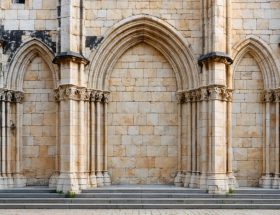
Granite wall cladding transforms ordinary surfaces into striking architectural statements, merging durability with timeless elegance in modern architecture. This sophisticated exterior finishing technique not only enhances building aesthetics but also provides superior weather protection and thermal insulation. Professional installation requires precise engineering, specialized tools, and meticulous attention to detail to ensure long-term structural integrity.
Proper installation begins with thorough wall preparation, including moisture barrier application and structural assessment to support the considerable weight of granite panels. The anchoring system selection—whether mechanical fasteners, adhesive mounting, or a combination—must account for local building codes, climate conditions, and seismic requirements. Each panel requires careful calibration during placement to maintain consistent joint spacing and ensure proper water drainage channels.
Industry experts recommend implementing a comprehensive quality control system throughout the installation process, focusing on panel alignment, joint uniformity, and secure anchoring verification. This systematic approach, combined with regular maintenance inspections, guarantees the cladding system’s longevity and optimal performance in protecting the building envelope while maintaining its architectural appeal.
Why Choose Granite for Wall Cladding?
Durability and Longevity
Granite stands as one of nature’s most enduring building materials, offering exceptional durability that can span centuries. When properly installed as wall cladding, granite demonstrates remarkable resistance to weathering, UV exposure, and environmental pollutants. Its crystalline structure provides inherent strength, with compressive strength ratings typically exceeding 19,000 psi, making it highly resistant to cracking and chipping.
The material’s low porosity naturally resists moisture infiltration, helping prevent issues like freeze-thaw damage in cold climates. This characteristic also makes granite highly resistant to staining and chemical exposure, maintaining its appearance even in urban environments where acid rain and air pollution can deteriorate other materials.
Color stability is another significant advantage of granite cladding. Unlike manufactured materials that may fade or discolor over time, granite’s natural pigmentation remains stable for decades, requiring minimal maintenance to preserve its original appearance. When properly sealed and maintained, granite cladding can easily last 100 years or more, making it a cost-effective choice despite its higher initial investment.
Additionally, granite’s thermal stability helps it withstand extreme temperature fluctuations without significant expansion or contraction, reducing the risk of structural stress over time.
Aesthetic Versatility
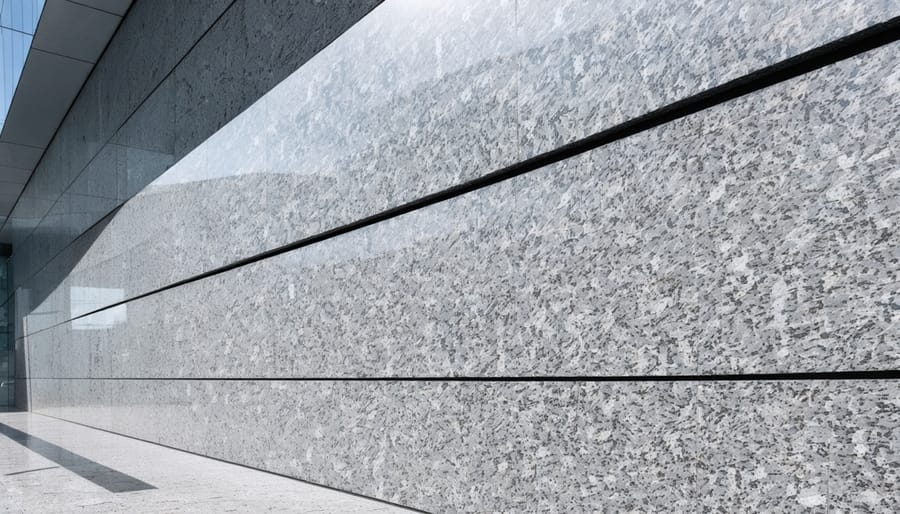
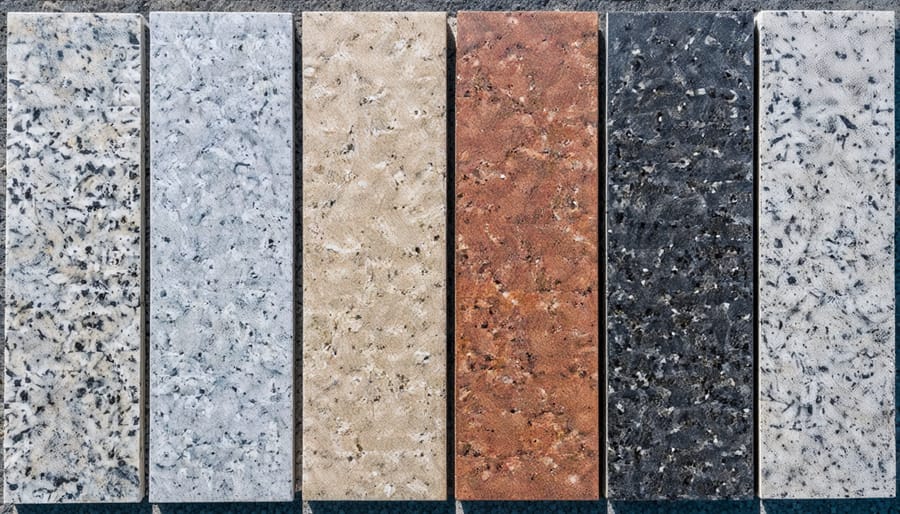
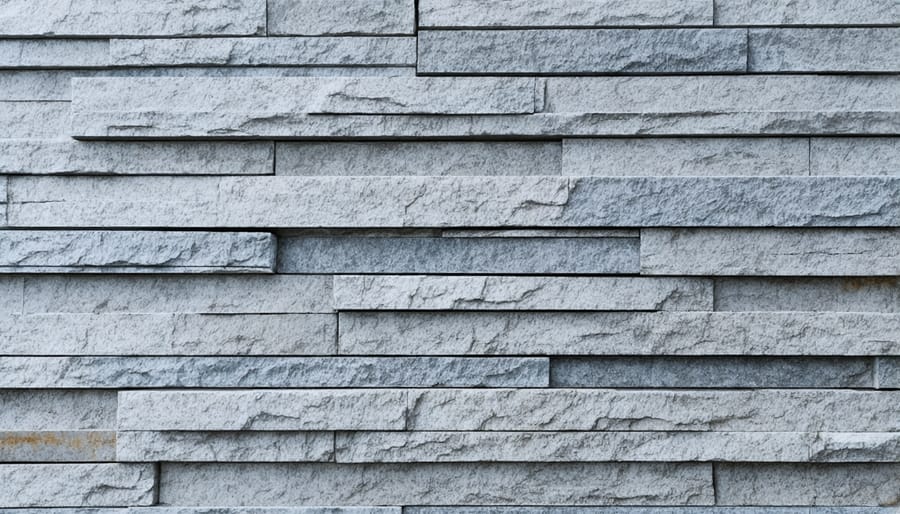
Granite wall cladding offers an extensive palette of aesthetic possibilities, making it a versatile choice for both interior and exterior applications. From classic whites and blacks to warm browns and striking blues, granite’s natural color variations provide designers with endless creative opportunities. The stone’s crystalline structure creates distinctive patterns, from subtle speckles to dramatic veining, ensuring each installation is unique.
The visual impact of granite can be further enhanced through various stone finish options, including polished, honed, flamed, or bush-hammered surfaces. Polished finishes deliver a glossy, reflective surface ideal for formal spaces, while honed finishes offer a sophisticated matte look. Flamed and bush-hammered textures provide excellent slip resistance and a more rustic appearance, perfect for exterior applications.
The material’s adaptability allows for various installation patterns, from traditional running bond to more contemporary geometric designs. Panels can be cut to different sizes and shapes, enabling architects to create striking visual effects through creative arrangement and orientation. This flexibility makes granite cladding suitable for modern minimalist designs, classical facades, and everything in between.

Pre-Installation Planning
Site Assessment and Measurements
Proper site assessment and accurate measurements are crucial first steps in ensuring a successful granite wall cladding installation. Begin by thoroughly inspecting the wall surface for any structural issues, moisture problems, or existing damage that could compromise the installation. Following commercial installation best practices, evaluate the wall’s plumbness using a level and check for any deviations that might affect the final appearance.
Take detailed measurements of the entire wall area, including height, width, and any architectural features such as windows, doors, or corners. Add an extra 10% to your calculations to account for waste, cuts, and potential replacements. Pay special attention to load-bearing requirements and verify that the existing wall structure can support the weight of granite cladding.
Document the location of utilities, electrical outlets, and any other wall penetrations that will need accommodation during installation. Check local building codes and regulations regarding stone cladding installation, as these may affect your measurement calculations and installation method selection.
Use a moisture meter to assess the wall’s moisture content and identify any areas requiring waterproofing treatment before installation. Note any expansion joints in the building structure, as these must be carried through the cladding system to prevent stress-related damage.
Material Selection and Quantity Calculation
Selecting the right granite variety for wall cladding requires careful consideration of both aesthetics and practical factors. Choose granite with consistent coloring and minimal veining for a uniform appearance, or opt for more dramatic patterns to create visual interest. Consider the stone’s porosity, density, and resistance to weathering, particularly for exterior applications.
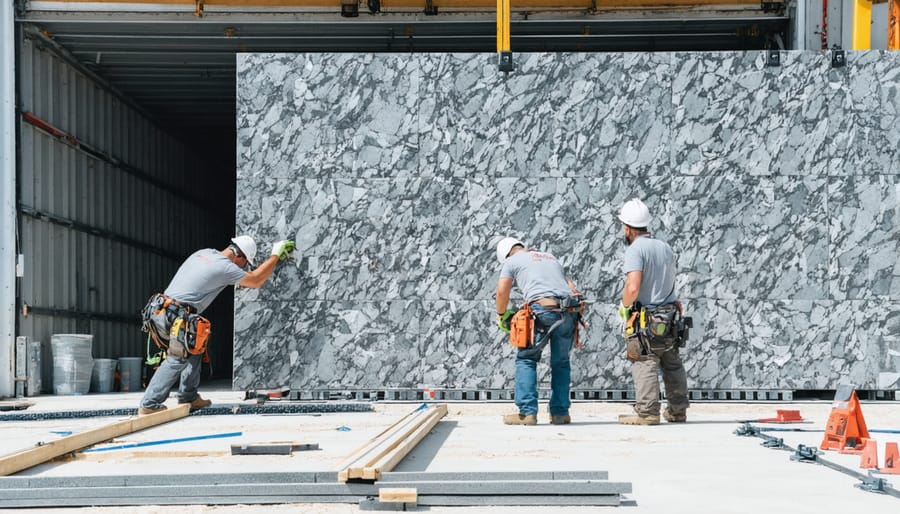
To calculate quantities, measure the total wall area in square feet, adding 10-15% extra for cuts, waste, and potential future repairs. Standard granite panel sizes typically range from 2’x2′ to 4’x8′, though custom sizes are available. Factor in the panel thickness, which usually varies between 20mm to 30mm for exterior cladding and 15mm to 20mm for interior applications.
When selecting your granite, request samples from multiple quarries and view them both wet and dry, as moisture can significantly affect appearance. Examine the stone’s finish options – polished finishes highlight the stone’s natural beauty but may be slippery when wet, while flamed or bush-hammered textures provide better grip for exterior applications.
Consider the weight-bearing capacity of your supporting structure, as granite typically weighs 165-185 pounds per cubic foot. Ensure your chosen variety meets local building codes and climate requirements, particularly regarding freeze-thaw resistance for exterior installations in cold climates.
Installation Methods and Techniques
Mechanical Fixing Systems
Mechanical fixing systems represent the most reliable and secure method for installing granite wall cladding, utilizing a combination of anchors, brackets, and support systems to ensure long-term stability. These systems typically consist of adjustable anchors made from high-grade stainless steel, designed to transfer the stone panel’s weight to the building’s structural framework while allowing for thermal movement and structural flexibility.
The primary components include kerf anchors, dowel anchors, and clip angles, each serving specific functions in the installation process. Kerf anchors fit into grooves cut into the edges of the granite panels, while dowel anchors require precisely drilled holes to secure the stone. When implementing these professional installation techniques, installers must carefully calculate the appropriate anchor spacing based on factors such as panel size, thickness, and wind load requirements.
Installation begins with the attachment of primary support brackets to the building structure, typically spaced 24 to 48 inches apart horizontally and vertically. Secondary anchors are then fixed to these brackets, creating an adjustable framework that allows for precise alignment of the granite panels. Each panel requires a minimum of four anchor points, with additional supports for larger pieces or specific design requirements.
Critical considerations include maintaining proper air gaps between the granite and building substrate (typically 1-2 inches), incorporating expansion joints at regular intervals, and ensuring adequate drainage channels. Installers must also account for panel weight, selecting appropriate anchor sizes and materials rated for the specific load requirements.
The system should be engineered to accommodate building movement and thermal expansion while maintaining weathertightness. Regular inspection points should be incorporated into the design to allow for future maintenance and assessment of anchor integrity, ensuring the longevity of the installation.
Adhesive Installation
The adhesive installation method is widely preferred for interior granite wall cladding due to its reliability and cost-effectiveness. Begin by ensuring the substrate wall is clean, dry, and properly prepared with a suitable primer if required. The wall surface should be free from dust, oils, and loose particles that could compromise adhesion.
Select a high-quality polymer-modified thinset mortar specifically designed for stone installations. Mix the adhesive according to manufacturer specifications, maintaining consistency throughout the batch. Apply the adhesive using a notched trowel held at a 45-degree angle, creating uniform ridges that run in one direction. The trowel size typically ranges from 1/2 inch to 3/4 inch, depending on the granite panel thickness.
Using the back-buttering technique, apply a thin layer of adhesive to the back of each granite panel with the flat side of the trowel. This ensures complete coverage and stronger adhesion. Position the granite panel against the prepared wall surface, pressing firmly while maintaining proper alignment with adjacent panels. Use plastic spacers to maintain consistent joint widths and prevent slippage.
Periodically check the adhesive coverage by removing a newly placed panel to verify at least 95% contact between the stone and substrate. Any voids could lead to future failures. Work in manageable sections to prevent the adhesive from skinning over before panel placement.
Allow the adhesive to cure for at least 24 hours before grouting. During this time, ensure panels remain undisturbed and protected from vibration or impact. For exterior applications or panels exceeding certain weight limits, mechanical anchors may be required in conjunction with adhesive installation for additional security.
Keep the work area temperature between 50°F and 95°F during installation and curing to ensure proper adhesive performance. Maintain detailed records of adhesive batch numbers and mixing ratios for quality control purposes. Always follow local building codes and manufacturer recommendations for specific installation requirements.
Joint Treatment and Sealing
Joint treatment and sealing are crucial steps in ensuring the longevity and performance of granite wall cladding installations. The joints between granite panels must be properly treated to prevent water infiltration and maintain the aesthetic appeal of the cladding system.
Begin by thoroughly cleaning the joints to remove any debris, dust, or construction residue. The joints should be completely dry before applying any sealant materials. For optimal results, use a high-quality silicone sealant specifically designed for natural stone applications, ensuring it matches or complements the granite’s color.
Install properly sized backer rods in the joints to control sealant depth and prevent three-sided adhesion. The recommended joint width-to-depth ratio is typically 2:1, though this may vary based on manufacturer specifications and local building codes.
Apply the sealant using professional stone sealing techniques to ensure complete coverage and proper adhesion. Tool the sealant immediately after application to create a slight concave profile that helps channel water away from the joint. This also ensures proper contact with joint surfaces and creates a neat, professional appearance.
Allow the sealant to cure completely according to manufacturer specifications before exposing the cladding to water or environmental stress. Regular inspection of joints should be included in maintenance routines to identify and address any potential issues before they become significant problems.
Maintenance and Care
Regular Cleaning Procedures
Regular maintenance of granite wall cladding ensures its longevity and preserves its aesthetic appeal. For routine cleaning, use a soft cloth or sponge with warm water and a pH-neutral stone cleaner. Avoid acidic or abrasive cleaners, as these can damage the stone’s surface and compromise its seal.
Weekly dusting with a microfiber cloth prevents dirt accumulation, while monthly deep cleaning helps maintain the stone’s natural luster. When deep cleaning, work in small sections and rinse thoroughly with clean water to prevent streaking. Pay special attention to areas exposed to high traffic or environmental elements.
For outdoor cladding, perform seasonal inspections and cleanings to address environmental buildup and potential staining. Use a low-pressure water spray to remove loose debris before cleaning. If you notice any stubborn stains, consult a stone care professional rather than attempting aggressive cleaning methods that might damage the surface.
Always test cleaning products on a small, inconspicuous area first, and avoid letting cleaning solutions dry on the surface. After cleaning, ensure the surface is completely dry to prevent water spots.
Preventive Maintenance
Regular preventive maintenance is crucial for preserving the beauty and integrity of granite wall cladding. Conduct visual inspections at least twice a year to check for loose panels, damaged joints, or signs of weathering. Pay special attention to areas around windows, doors, and corners where moisture infiltration is most likely to occur.
Clean the granite surfaces annually using pH-neutral stone cleaners to prevent buildup of dirt and environmental pollutants. Avoid acidic or abrasive cleaning products, which can damage the stone’s finish. After cleaning, apply a high-quality stone sealer every 2-3 years to protect against moisture penetration and staining.
Monitor joint sealants and replace them when signs of deterioration appear, typically every 10-15 years depending on exposure conditions. Keep drainage systems clear of debris to prevent water accumulation behind panels. Trim nearby vegetation to prevent root damage and minimize organic debris accumulation.
Address any damage promptly to prevent more extensive problems. Small cracks or chips should be repaired by professionals to maintain the cladding’s structural integrity and appearance. Following these preventive measures will significantly extend the lifespan of your granite wall cladding installation.
Granite wall cladding installation represents a significant investment that can dramatically enhance both the aesthetic appeal and durability of any structure. When properly executed, following the detailed preparation, installation, and maintenance guidelines outlined above, your granite cladding will provide decades of beauty and protection. Remember to always work with qualified professionals, use high-quality materials, and maintain proper safety protocols throughout the installation process. Regular inspections and maintenance will help preserve the integrity of your cladding system and protect your investment. Whether for commercial or residential applications, granite wall cladding remains one of the most prestigious and enduring architectural choices available, offering unmatched elegance, durability, and value for your property.