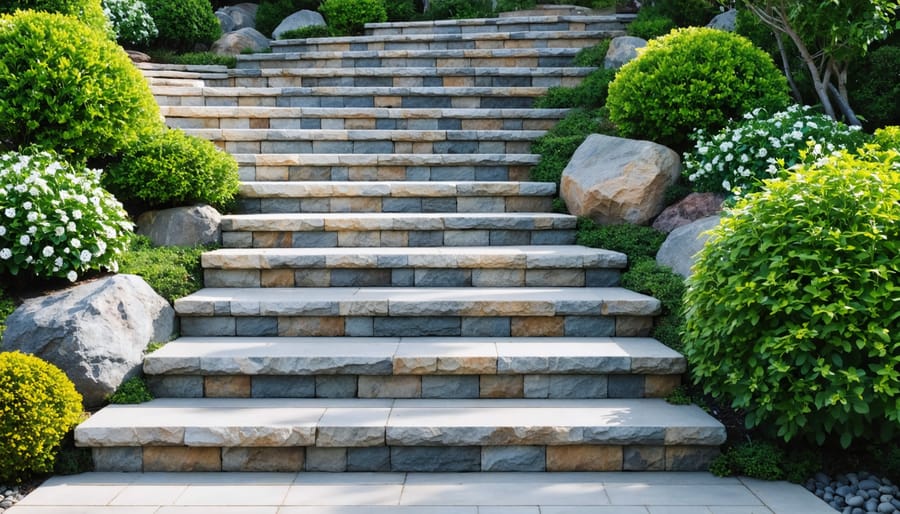
Transform your outdoor space with the timeless elegance of natural stone steps, a project that combines classic craftsmanship with modern natural stone construction techniques. Select flat stones with consistent thickness and natural cleft surfaces to ensure stable treads and reliable footing. Calculate a comfortable 6-7 inch rise between steps and maintain a minimum 12-inch depth for each tread to create a safe, ergonomic climb. Engineer a solid foundation using crushed stone base material compacted to 95% density, preventing future settling and movement. Build these steps into your hillside, and you’ll create more than just functional access – you’ll craft an enduring landscape feature that enhances your property’s value while harmonizing with the natural environment.
Essential Tools and Materials
Stone Selection Guide
When selecting natural stone materials for your steps, focus on durability, aesthetics, and functionality. Bluestone, granite, and limestone are popular choices due to their strength and weather resistance. Choose stones at least 2 inches thick for treads and 4 inches thick for risers to ensure stability and longevity.
Look for stones with relatively flat surfaces for treads, as these will provide safer footing. The ideal tread depth should be between 11 and 14 inches, while heights should maintain consistency at 6-7 inches per step. Select stones with at least one straight edge for the front of each tread, which helps create clean, professional-looking lines.
Consider the stone’s texture and color variation. Rough-hewn surfaces offer better traction in wet conditions, while thermal-finished stones provide a more refined appearance while maintaining slip resistance. Color variations should complement your home’s exterior and existing landscape features.
For structural integrity, choose stones that are rectangular or squarish in shape. Avoid rounded or irregularly shaped stones, as these can create unstable stepping surfaces and complicate installation. The width of each stone should be at least 24 inches to ensure proper support and visual appeal.
Source your stones from reputable suppliers who can provide consistent quality and quantity. Request samples to verify color, texture, and durability before making a final purchase decision.

Required Tools Checklist
Before starting your stone step project, gather these essential tools to ensure efficient and precise construction:
Safety Equipment:
– Safety glasses and work gloves
– Steel-toed boots
– Dust mask
– Knee pads
Layout and Measuring Tools:
– String line and stakes
– Level (4-foot and torpedo)
– Tape measure
– Marking paint or chalk
– Square
Excavation and Site Prep:
– Shovel (both flat and pointed)
– Wheelbarrow
– Pick mattock
– Garden rake
– Tamper (hand or power)
Stone Working Tools:
– Stone chisel
– Mason’s hammer
– Sledgehammer
– Brick set
– Stone splitter (optional for larger projects)
Construction Tools:
– Garden hose
– Rubber mallet
– Pry bar
– Hand trowel
– Mason’s line
Additional Materials:
– Gravel (3/4-inch crushed stone)
– Sand
– Landscape fabric
– Work gloves (multiple pairs)
Keep these tools clean and organized throughout the project, and ensure all safety equipment is in good condition before beginning work. For extensive projects, consider renting larger equipment like a power tamper or stone saw.
Site Preparation
Ground Assessment
Before beginning construction, a thorough ground assessment is essential to ensure your stone steps will be stable and long-lasting. Start by measuring the total rise and run of your slope using a level and tape measure. The ideal slope grade for stone steps should be between 35-45 degrees; anything steeper may require additional engineering considerations.
Examine the soil composition by digging a test hole at least 12 inches deep. Clay-heavy soils may need additional drainage provisions, while sandy soils might require extra compaction. Look for signs of erosion or water runoff patterns that could affect your steps’ stability.
Mark your step locations and test the ground’s load-bearing capacity by walking on it when both dry and after rainfall. Areas that feel spongy or unstable will need additional base preparation. Remove any organic material, including roots and topsoil, from the construction area. Create a solid foundation by adding a 4-6 inch layer of compacted gravel base.
Use wooden stakes and string lines to outline your steps’ planned path, ensuring each step will be level from side to side. This preparation phase is crucial for achieving professional results and ensuring your steps’ longevity.
Layout Planning
Begin by measuring the total height and horizontal distance your steps will cover. Calculate the number of steps needed by dividing the total rise (height) by 6-7 inches – the ideal height for each step. This ensures comfortable, safe climbing. For the run (depth) of each step, aim for 12-14 inches to provide adequate foot space.
Mark your layout using stakes and string lines to create a straight path. Place stakes at the top and bottom of your planned stairway, then run a string line between them to establish the slope. Use spray paint or marking chalk to outline where each step will sit, ensuring they’re perfectly level from side to side.
Calculate the width of your steps, typically 48-60 inches for residential applications. Consider the natural flow of traffic and the surrounding landscape when determining width. Mark the outer boundaries of your stairway using additional stakes and string lines.
For curved or irregular layouts, use flexible garden hoses or rope to visualize and adjust the design before marking. This helps ensure your steps will integrate naturally with the surrounding landscape while maintaining proper proportions and safety standards.

Step-by-Step Installation Process
Base Construction
A solid foundation is crucial for long-lasting stone steps that can withstand weather and regular use. Begin by excavating the area to a depth of at least 8 inches, ensuring the ground slopes slightly away from any adjacent structures. This gradient, combined with proper drainage techniques, prevents water accumulation that could compromise the steps’ stability.
Create a base layer using 4 inches of crushed stone or gravel, compacting it thoroughly with a plate compactor. This aggregate base provides essential drainage and helps prevent frost heave in colder climates. Over the crushed stone, add a 2-inch layer of coarse sand or stone dust, leveling it carefully with a straight edge.
For areas with poor soil conditions, consider installing a geotextile fabric beneath the crushed stone to prevent material migration and enhance stability. Take time to check your levels frequently during this phase, as any irregularities in the base will affect the final appearance and safety of your steps. The base should be firm enough that walking on it leaves minimal indentation, yet level enough to support the stone treads evenly.
Stone Placement
Begin by laying out the largest stones at the base of each step, ensuring they’re level and make solid contact with the prepared foundation. Position stones so their flattest surface faces upward, creating a stable stepping area. Use a level and rubber mallet to adjust each stone’s position until it sits firmly without rocking.
Work from the bottom step upward, staggering the joints between stones for enhanced stability. Each stone should overlap the one below it by at least 2-3 inches to prevent shifting. Fill any gaps between larger stones with smaller pieces, known as spawls, to provide additional support and prevent movement.
When placing stones, aim for gaps no wider than ½ inch between adjacent pieces. Use stone shims to level uneven surfaces and ensure each step maintains a consistent height of 6-7 inches. Apply construction adhesive to the bottom of each stone for extra security, especially on steeper slopes.
For wider steps, place larger stones along the front edge and fill in behind them with smaller pieces. This creates a solid face while maintaining structural integrity. Check each stone’s stability by applying pressure from different angles before moving to the next piece. Remember that proper stone placement is crucial for long-term durability and safety.
Level and Stability
Achieving proper leveling and stability is crucial for safe, long-lasting stone steps. Begin by using a 4-foot level to check both the front-to-back and side-to-side orientation of each step’s base. The front-to-back slope should have a slight pitch of approximately 1/8 inch per foot to allow water runoff, while the side-to-side orientation must be perfectly level to prevent wobbling.
When setting each stone, use smaller stones or stone chips as shims to eliminate any rocking motion. Place these shims strategically under the corners and middle sections where needed. Once positioned, test the stability by applying pressure to different points of the stone. There should be no movement whatsoever.
For additional stability, create a solid foundation beneath each step using a 4-6 inch layer of compacted gravel. As you work, regularly check your measurements against the initial layout marks to ensure consistent rise and run throughout the entire staircase. If using multiple stones for a single step, ensure they’re tightly fitted together and equally supported to prevent future shifting or settling.
Remember to periodically recheck the level of previously set steps as you progress upward, as the weight of new stones can affect earlier work.
Finishing Touches
To complete your natural stone steps, carefully backfill any gaps between stones with soil or stone dust, ensuring proper drainage while maintaining stability. Use a rubber mallet to make final adjustments to any loose stones, tapping them gently into place. Clean each step thoroughly with a stiff brush to remove any debris or excess material.
Apply a high-quality stone sealer to protect your steps from weather damage and staining. Choose a penetrating sealer that won’t alter the stone’s natural appearance while providing maximum protection. Work from the bottom step upward, applying the sealer evenly with a roller or brush, making sure to cover all exposed surfaces.
Install lighting fixtures along the sides of your steps if desired, enhancing both safety and aesthetic appeal during evening hours. Consider adding decorative elements such as potted plants or built-in planters along the edges to soften the appearance and create a more natural transition to your landscape.
Finally, test the stability of each step by walking up and down several times. Listen for any movement or shifting. If you notice any wobbling or instability, address it immediately by adjusting the base material or repositioning the stones. Regular maintenance, including annual cleaning and sealer reapplication, will ensure your stone steps remain beautiful and functional for years to come.
Regular maintenance of your natural stone steps will ensure their longevity and continued beauty. Inspect the steps seasonally for loose stones, cracking mortar, or shifting foundation. Clean the steps annually using a mild stone cleaner and avoid harsh chemicals that could damage the stone’s surface. During winter, use sand or cat litter instead of salt-based ice melters to prevent erosion. When properly maintained, your stone steps will not only enhance your outdoor space but also provide safe, durable access for decades to come. For best results, consider sealing your steps every 2-3 years and promptly address any repairs to prevent more significant issues. Remember that while building stone steps requires significant effort, the result is a timeless addition to your landscape that combines both functionality and natural beauty.