Transform your home baking with a professional-grade baking stone – the secret weapon behind perfectly crispy pizza crusts, artisanal bread loaves, and evenly baked pastries. This versatile kitchen tool recreates the intense, consistent heat of commercial brick ovens, delivering superior texture and professional results in any standard home oven.
Dating back to ancient civilizations, baking stones have evolved from simple cooking surfaces to precision-engineered baking implements. Today’s stones are crafted from materials like cordierite, ceramic, or natural stone, each offering unique thermal properties that dramatically improve heat distribution and moisture management during baking.
Whether you’re an aspiring bread baker or pizza enthusiast, mastering baking stone techniques will elevate your creations from good to extraordinary. The stone’s porous surface draws moisture away from dough, creating that coveted crispy bottom crust while maintaining a perfectly chewy interior. With proper care and technique, a quality baking stone becomes an indispensable tool that will transform your baking for years to come.
How Baking Stones Transform Your Baking
Heat Distribution and Retention
Baking stones excel at heat distribution and retention due to their unique material properties. When properly preheated, these dense, porous surfaces maintain a consistent temperature throughout the baking process, which is crucial for artisan bread baking and achieving professional-quality results. The stone’s uniform heat distribution eliminates hot spots that commonly occur with metal baking sheets, ensuring even browning and proper crust development.
The thermal mass of baking stones allows them to absorb and store significant amounts of heat, which is then steadily transferred to your baked goods. This stable heat transfer is particularly beneficial when opening the oven door, as the stone helps maintain the oven’s temperature and quickly recovers from temperature fluctuations. When dough or pizza is placed on the hot surface, the direct contact creates immediate heat conduction, resulting in better oven spring for breads and perfectly crispy pizza crusts.
For optimal heat distribution, it’s essential to preheat your baking stone for at least 30-60 minutes before use, allowing the material to reach and maintain the desired temperature throughout its entire mass.
Moisture Management
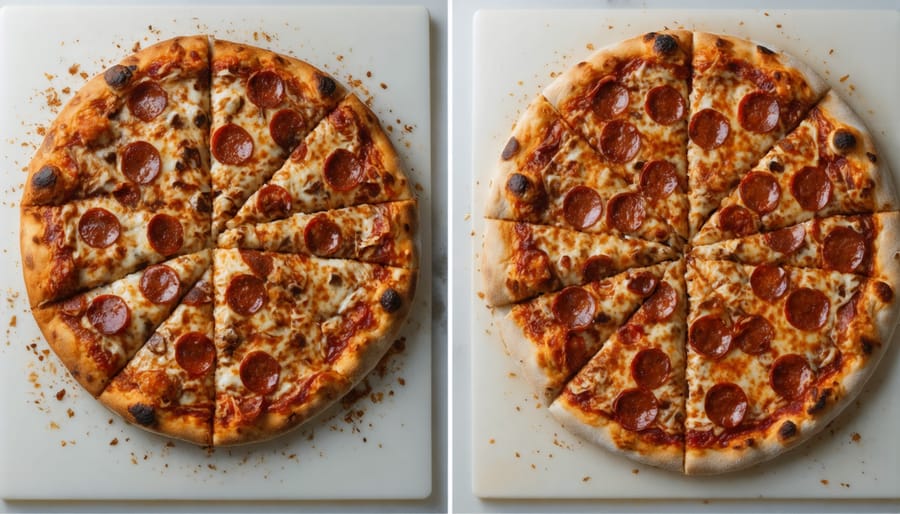
Baking stones play a crucial role in moisture management during the baking process, which is essential for achieving that coveted crispy crust and perfectly baked interior. These porous surfaces actively draw moisture away from the bottom of your dough, creating optimal conditions for even baking and crust development.
When you place bread or pizza dough on a preheated baking stone, the initial contact causes the moisture in the dough to immediately begin evaporating. The stone’s porous structure absorbs this excess moisture, preventing soggy bottoms and promoting proper crust formation. This moisture-wicking action is particularly important for items like pizza, where a crispy base is essential.
The stone’s ability to manage moisture also helps create the perfect environment for bread baking. As the dough bakes, the stone maintains consistent heat while simultaneously drawing away excess moisture, allowing the crust to develop its characteristic golden-brown color and crispy texture. This balance of heat and moisture management is what sets baking stones apart from regular baking sheets and contributes to their popularity among both home bakers and professionals.
Choosing the Right Baking Stone
Material Types
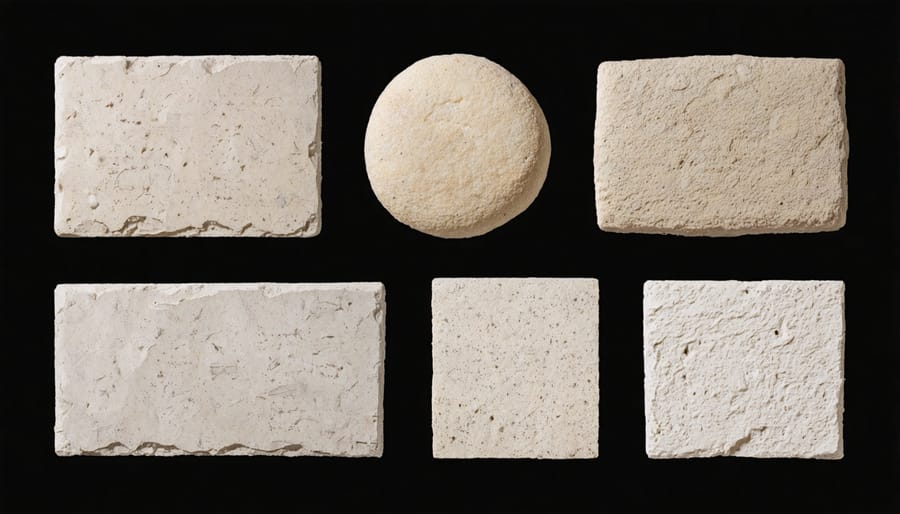
Baking stones come in several materials, each offering distinct advantages for home baking. Cordierite, a mineral compound known for its exceptional thermal shock resistance, stands as a popular choice among serious bakers. This material can withstand extreme temperature changes without cracking, making it ideal for moving between hot ovens and cooler countertops.
Ceramic baking stones provide excellent heat distribution and are generally more affordable than cordierite options. While they require more careful handling to prevent thermal shock damage, ceramic stones effectively create the crispy crusts desired in artisan bread baking and pizzas. Their porous surface helps absorb moisture from dough, contributing to better texture in finished baked goods.
Natural stone options, including granite and marble, offer unique aesthetic appeal and good heat retention. However, these materials typically require more maintenance and careful handling than manufactured alternatives. Unglazed quarry tiles, though less conventional, present a cost-effective alternative that performs similarly to purpose-made baking stones.
When selecting a material, consider factors beyond just heat resistance. Cordierite typically offers the best longevity and performance but comes at a higher price point. Ceramic provides an excellent balance of performance and value, while natural stone options may require additional care but can double as attractive serving pieces. The choice ultimately depends on your baking frequency, budget, and specific needs.
Size and Thickness Considerations
When selecting a baking stone, size and thickness are crucial factors that directly impact your baking results. For most home ovens, a rectangular stone measuring 14 x 16 inches provides an ideal balance between usable space and maneuverability. This size accommodates a large pizza or multiple loaves of bread while leaving enough room for proper air circulation.
Thickness is equally important, with optimal results typically achieved using stones between ½ to 1 inch thick. Thinner stones (under ½ inch) heat up quickly but may crack under high temperatures, while stones thicker than 1 inch retain heat better but require significantly longer preheating times.
For pizza-focused bakers, a round stone with a 15-inch diameter offers sufficient space for a 12-inch pizza with room for sliding and repositioning. Those primarily baking bread should consider rectangular stones at least 15 x 20 inches to accommodate multiple loaves or longer bread shapes.
Consider your oven’s interior dimensions before purchasing. Leave at least 1 inch of space on all sides of the stone for proper air circulation. If you frequently bake larger items or multiple pieces simultaneously, you might want to invest in two smaller stones rather than one large one, offering greater flexibility in placement and use.
Proper Care and Maintenance
Seasoning Your Stone
Before using your new baking stone for the first time, proper seasoning is essential to ensure optimal performance and longevity. Start by thoroughly washing the stone with plain water (no soap) and allowing it to air dry completely for 24 hours. Once dry, lightly coat both sides of the stone with a thin layer of vegetable oil or flaxseed oil using a clean cloth.
Place the oiled stone in a cold oven and heat it to 425°F (220°C). Let it bake for about an hour, then turn off the oven and allow the stone to cool completely inside. This process helps create a natural non-stick surface and strengthens the stone against thermal shock.
Repeat this seasoning process 2-3 times before first use. You may notice some darkening of the stone – this is normal and indicates proper seasoning. After the initial seasoning, your stone will continue to develop a natural patina through regular use, which actually improves its baking performance over time.
Remember that seasoning is a one-time process. Once completed, your stone only needs regular maintenance to maintain its performance.
Cleaning and Storage
Proper cleaning and storage are crucial for maintaining your baking stone’s longevity and performance. After each use, allow the stone to cool completely before cleaning. Never immerse a hot stone in water, as thermal shock can cause cracking. Instead, use a stiff brush or plastic scraper to remove any stuck-on food particles.
For stubborn residue, scrape gently with a metal spatula while the stone is slightly warm. Avoid using soap or detergents, as the porous surface will absorb these chemicals and potentially affect the taste of future baked goods. If necessary, use a damp cloth with plain water for cleaning, but keep water contact minimal.
Store your baking stone in a dry, room-temperature location. Avoid storing in areas with high humidity or temperature fluctuations. Keep the stone on a flat surface or store vertically to prevent accidental breakage. Some bakers prefer leaving their stone in the oven permanently, which is perfectly fine and can help regulate oven temperature.
Consider placing a piece of parchment paper between stored stones if stacking multiple pieces to prevent scratching.
Using Your Baking Stone Effectively
Preheating Methods
Proper preheating is crucial for achieving optimal baking results with your baking stone. Start by placing the stone on the middle rack of your oven and setting the proper oven temperature at least 45 minutes before baking. For bread and pizza, preheat to 450-500°F (230-260°C) to ensure the stone reaches the ideal temperature throughout.
For delicate pastries and cookies, use a lower preheating temperature of 350-375°F (175-190°C). Always verify the stone’s temperature using an infrared thermometer if available, as oven temperature readings can be inconsistent. Avoid preheating an empty oven with the stone for more than 2 hours, as this can cause unnecessary wear.
Different baking applications require specific preheating approaches:
– For pizza: Preheat for 1 hour at maximum temperature
– For artisan bread: 45 minutes at 450°F
– For pastries: 30 minutes at moderate temperature
– For flatbreads: 40 minutes at high temperature
Never place a cold stone in a hot oven or vice versa, as thermal shock can cause cracking. If baking multiple items, allow the stone to reheat for 10-15 minutes between batches to maintain consistent temperature and optimal baking results.
Transfer Techniques
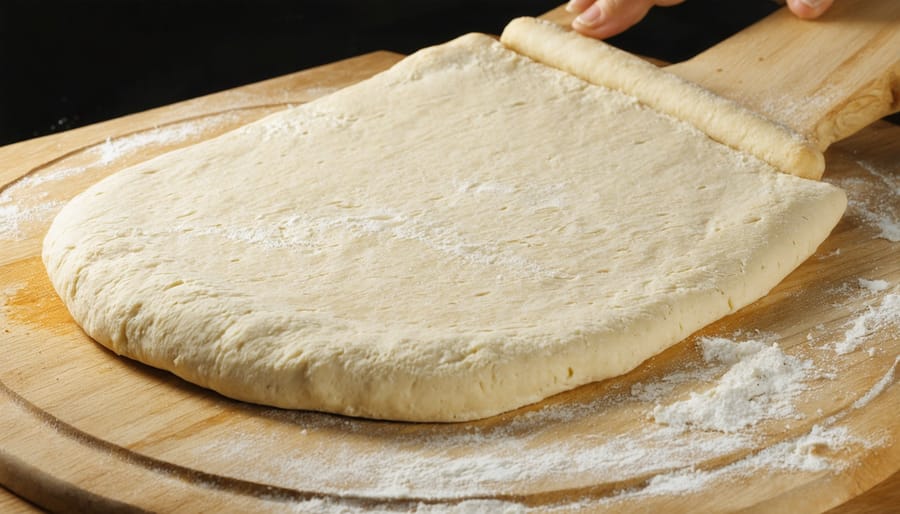
Transferring food onto a hot baking stone requires careful technique to ensure safety and optimal baking results. The most reliable method involves using a pizza peel, a flat paddle-like tool that allows you to slide items onto the stone smoothly. Before placing your homemade pizza dough or bread on the peel, generously dust it with cornmeal or semolina flour to prevent sticking.
For pizzas and flatbreads, assemble them directly on the dusted peel. Give the peel a gentle shake to ensure the dough moves freely before adding toppings. If you notice any spots where the dough sticks, carefully lift the edge and add more cornmeal underneath.
When ready to transfer, position the peel at a 20-30 degree angle to the stone’s surface. Using a quick, confident motion, pull the peel back while keeping it angled downward. This technique allows the food to slide smoothly onto the hot stone.
For bread loaves, you can also use parchment paper as a transfer aid. Place the dough on parchment, then slide both onto the stone using the peel. The parchment can remain under the bread during baking, though it may darken slightly.
Remember to work swiftly during transfer, as leaving the oven door open for extended periods will cause significant heat loss.
A baking stone is an invaluable tool that can transform your home baking from good to exceptional. By providing consistent heat distribution and moisture absorption, these versatile implements help create the perfect crust on breads, pizzas, and pastries that rivals professional bakery results. Whether you’re an occasional baker or a dedicated enthusiast, incorporating a baking stone into your kitchen arsenal will elevate your baking game significantly. Remember to properly preheat your stone, maintain it with care, and experiment with different recipes to discover its full potential. With proper use and maintenance, your baking stone will become an essential part of your baking routine, helping you achieve that coveted professional-quality finish for years to come. Start your journey toward better baking today by adding this time-tested tool to your kitchen.