
Removing granite countertops demands careful planning and precise execution to prevent damage to cabinets and surrounding structures. Unlike granite countertop installation, the removal process requires working backward through layers of secured stone, dealing with industrial-strength adhesives, and managing extremely heavy materials that can weigh upwards of 20 pounds per square foot.
Professional removal remains the safest option, but determined DIYers with proper tools and assistance can tackle this project by following specific safety protocols. The process involves disconnecting plumbing, removing the sink, breaking the seal between granite and cabinets, and carefully lifting sections with specialized suction cups and support bars. Critical safety gear includes safety glasses, heavy-duty gloves, steel-toed boots, and respiratory protection against silica dust.
Before starting, assess whether your granite is installed in sections or as a single slab – this determination fundamentally impacts your removal strategy and required manpower. Multiple workers, proper lifting techniques, and a clear path to safely transport the material out of your home are non-negotiable prerequisites for successful removal.
Essential Tools and Safety Equipment
Safety Equipment
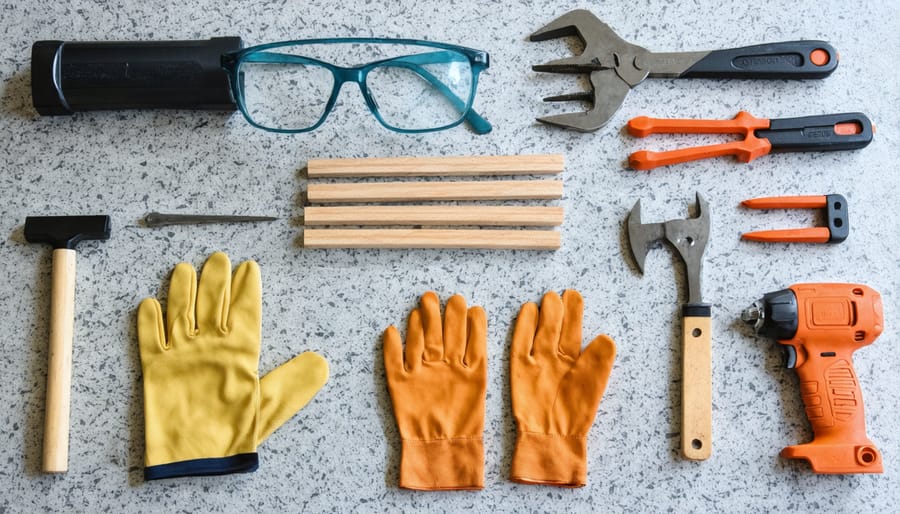
Before attempting to remove granite countertops, it’s essential to prioritize safety by wearing appropriate protective equipment. Start with a pair of heavy-duty work gloves to protect your hands from sharp edges and heavy lifting. Safety goggles or protective eyewear are crucial to shield your eyes from dust, debris, and potential stone fragments during the removal process.
A properly fitted N95 dust mask or respirator is necessary to prevent inhalation of silica dust, which can be harmful to your lungs. Steel-toed work boots provide protection for your feet from falling pieces of granite and other heavy materials. Consider wearing long sleeves and work pants to protect your skin from scratches and dust.
Additional safety equipment includes knee pads for comfort during low-level work and a back brace if you plan to lift heavy sections. Keep a first aid kit nearby for any minor injuries. When working with power tools, use ear protection to guard against noise damage. If using electrical tools near plumbing, ensure you have a ground fault circuit interrupter (GFCI) outlet or adapter to prevent electrical hazards.
Required Tools
Before attempting to remove granite countertops, gather these essential tools to ensure a safe and efficient removal process:
Safety Equipment:
– Safety goggles
– Heavy-duty work gloves
– Dust mask or respirator
– Steel-toed work boots
– Ear protection
Demolition Tools:
– Pry bar (24-inch minimum)
– Hammer
– Putty knife or utility knife
– Chisel set
– Heavy-duty demolition bar
– Reciprocating saw with masonry blade
Support Materials:
– Wood shims
– 2×4 lumber pieces for support
– Heavy-duty tarps or drop cloths
– Plastic sheeting for dust control
Additional Tools:
– Electric drill with screwdriver bits
– Adjustable wrench
– Pliers
– Caulk removal tool
– Paint scraper
– Heat gun (for loosening adhesive)
– Large garbage bins or debris container
– Moving dolly or hand truck
– Buckets for smaller debris
Note that specialized tools may be required depending on your specific installation. Having a partner to assist with the heavy lifting is strongly recommended, as granite sections can weigh 150-200 pounds per piece.
Preparation Steps
Clearing and Protection
Before beginning the removal process, thoroughly clear the countertop area and establish protective measures for surrounding surfaces. Remove all items from the countertops, including appliances, decorative pieces, and stored items. Disconnect and carefully remove the sink, faucet, and any other fixtures. Cover adjacent cabinets, floors, and walls with heavy-duty drop cloths or thick plastic sheeting to prevent damage from falling debris.
Just as you would protect your granite surfaces during regular maintenance, safeguarding nearby features during removal is crucial. Pay special attention to protecting cabinet faces and backsplashes, as these are particularly vulnerable during the removal process. Secure the protective coverings with painter’s tape, ensuring all edges are properly sealed.
Create a clear pathway from the kitchen to your disposal area, covering floors along this route. Remove cabinet doors near the work area to prevent accidental damage, and store them safely away from the construction zone. If you have overhead lighting or pendant lamps near the countertops, either remove them or protect them with appropriate covering. This preparation phase is essential for preventing costly damage and ensuring a smooth removal process.
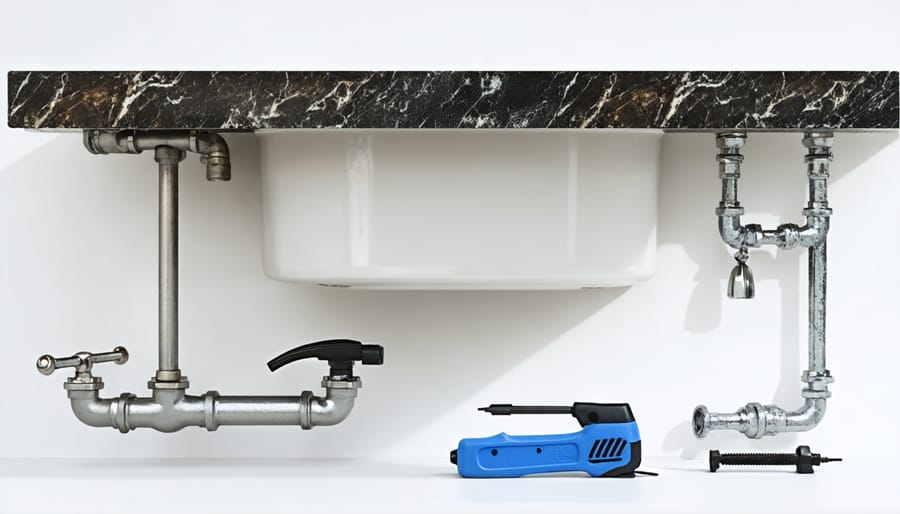
Disconnecting Utilities
Before beginning the granite countertop removal process, you must properly disconnect all utilities to ensure safety and prevent damage. Start by shutting off the water supply valves under the sink. These are typically located in the cabinet beneath your sink and should be turned clockwise until fully closed.
Next, disconnect the water supply lines from the faucet. Place a bucket underneath to catch any residual water, and use an adjustable wrench to loosen the supply line nuts. Remove the P-trap from under the sink by loosening the slip nuts on both ends.
For electrical disconnections, turn off the power at the circuit breaker before proceeding. If you have under-cabinet lighting or electrical outlets in the backsplash, these must be properly disconnected. Remove any electrical covers and carefully disconnect the wires, making sure to label them for future reinstallation.
If your countertop includes a cooktop or other electrical appliances, these need professional attention. Contact a licensed electrician to safely disconnect gas lines or complex electrical connections. Document the location and configuration of all plumbing and electrical components with photos before disconnection to facilitate easier reinstallation later.
Removal Process
Breaking the Seal
Breaking the seal between granite and the adhesive requires careful attention to prevent damaging the stone or surrounding surfaces. Start by removing any visible caulk along the edges using a utility knife, making sure to cut through the entire depth of the sealant. For stubborn areas, a putty knife can help scrape away residual caulk.
Next, locate the seams where separate granite pieces meet. These areas typically have silicone caulk or epoxy joining them. Use a heat gun on low setting to warm these spots, which helps soften the adhesive. Be cautious not to overheat the stone, as this could cause damage. Work in small sections, applying heat for 30-45 seconds at a time.
Insert plastic shims or wooden wedges between the granite and the cabinet top, spacing them every 12 inches along the countertop’s length. This creates leverage points for separation. Gradually tap the wedges deeper using a rubber mallet, allowing the adhesive to release slowly. If you encounter significant resistance, apply more heat to that specific area.
For particularly stubborn adhesive, you may need to use a specialized adhesive solvent designed for stone applications. Apply the solvent according to manufacturer instructions, allowing it adequate time to penetrate and break down the bonding agents. Always test solvents on a small, hidden area first to ensure they won’t damage the stone or surrounding materials.
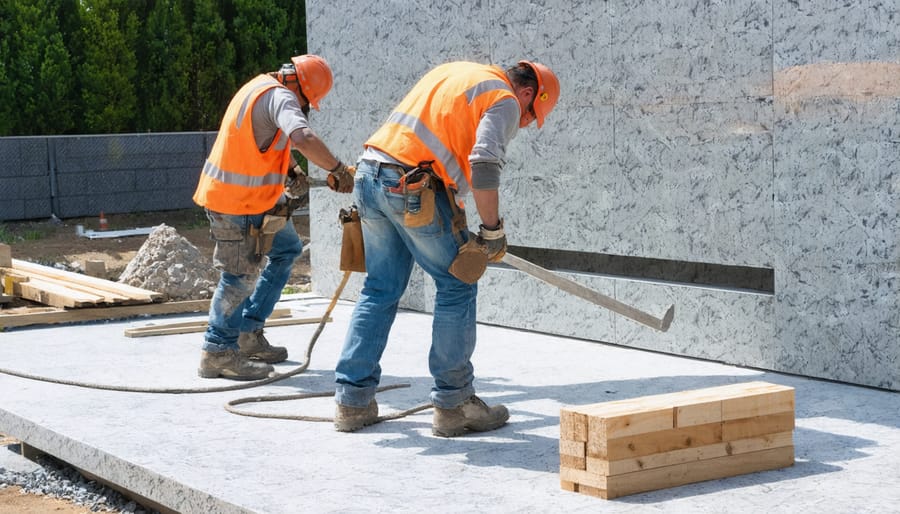
Lifting and Removal
The most critical phase of granite countertop removal is the lifting process, which requires careful coordination and proper technique. Start by having at least 2-4 strong individuals positioned strategically around the granite piece. Before lifting, insert wooden shims or pry bars under the granite at regular intervals to break the adhesive seal and create lifting points.
When ready to lift, ensure everyone maintains proper form: bend at the knees, keep backs straight, and grip the granite firmly at its edges. Lift slowly and in unison, communicating clearly with your team. The granite should be raised gradually, allowing you to check for any remaining attachment points or unexpected resistance.
As you lift, watch for hidden support brackets or stubborn adhesive spots that might need additional attention. Once the section is completely free, carefully walk it to a designated safe area. For larger pieces, consider using A-frame dollies or specialized stone-carrying clamps to assist with transportation.
Never attempt to twist or flex the granite during removal, as this can cause it to crack or shatter. If a section feels too heavy or unwieldy, stop immediately and reassess your approach. Remember that most granite countertops weigh 12-15 pounds per square foot, making even modest-sized pieces extremely heavy. When in doubt about your ability to safely manage the weight, it’s best to contact professional stone installers.
Managing Seams and Joints
Seams and joints require special attention during granite countertop removal, as these areas are typically held together with strong epoxy adhesives and may have metal reinforcement strips underneath. Begin by locating all seam points across your countertop surface. These are usually visible as thin lines where two pieces meet, often near corners or in long stretches of countertop.
Using a heat gun set to medium temperature, warm the seam area gradually to soften the epoxy. Be careful not to overheat the stone, as this can cause damage. Once the adhesive begins to soften, insert a putty knife or thin pry bar into the seam. Work slowly along the joint, applying gentle pressure to separate the pieces.
If you encounter metal reinforcement strips, use an oscillating tool with a metal-cutting blade to carefully cut through them. Keep the blade parallel to the countertop surface to avoid damaging the cabinets below. Some joints may also have mechanical fasteners underneath, which will need to be removed with a screwdriver or drill.
For particularly stubborn seams, you can use a commercial adhesive remover specifically designed for stone applications. Apply it according to the manufacturer’s instructions and allow adequate time for it to penetrate before attempting separation. Remember that rushed separation can lead to stone breakage, making removal more difficult and potentially dangerous.
Post-Removal Cleanup
After removing your granite countertops, proper cleanup is essential to prepare the space for new installation and maintain a safe working environment. Start by carefully removing all debris and loose materials from the cabinets and surrounding areas. Use a shop vacuum to collect dust and small particles, paying special attention to corners and crevices where debris might accumulate.
Inspect the cabinet tops for any remaining adhesive or caulk. These can be removed using a putty knife or scraper, working carefully to avoid damaging the cabinet surfaces. For stubborn adhesive residue, apply a commercial adhesive remover following the manufacturer’s instructions, then scrape clean.
Check the walls behind where the countertop was installed for any damage or residual sealant. Clean these areas thoroughly and repair any minor wall damage if necessary. If your cabinets have sustained any damage during the removal process, now is the time to address these issues before new installation begins.
Examine the plumbing connections and ensure all pipes and fixtures are properly protected and free from debris. Cover any exposed pipes or electrical outlets with appropriate protective materials to prevent debris from entering these openings during the cleanup process.
Finally, wipe down all surfaces with a damp cloth to remove any remaining dust. Ensure the area is completely dry before proceeding with any new installation work. If you notice any structural issues with your cabinets during cleanup, it’s important to address these before installing new countertops to ensure a proper foundation for your new surfaces.
When to Call a Professional
While DIY granite countertop removal is possible, certain situations demand professional intervention. If your countertop is particularly large, spans multiple sections, or features complex angles, a professional team will have the expertise and equipment to handle the job safely. Additionally, if your granite is integrated with a backsplash or has undermount sinks, the removal process becomes more intricate and risky for DIY attempts.
Watch for signs that indicate professional help is necessary: visible cracks or fissures in the granite, countertops that are epoxied or permanently bonded to the cabinets, or situations where the cost of granite countertops replacement is a significant concern, as damaged cabinets during removal could substantially increase your renovation expenses.
Professional removal is also recommended if you plan to preserve the granite for reuse or resale. Experts have specialized tools and techniques to minimize damage and maintain the stone’s integrity. They can also properly dispose of the material or help you explore alternative countertop materials for your renovation.
Consider professional help if you lack proper safety equipment, heavy-duty tools, or sufficient manpower. Granite slabs typically weigh 15-20 pounds per square foot, making them dangerous to handle without proper experience and equipment. The risk of personal injury or property damage often outweighs any potential cost savings from DIY removal.
Removing granite countertops requires careful planning, proper tools, and strict adherence to safety protocols. Whether you choose to tackle this project yourself or hire professionals, remember to prioritize personal protection with appropriate safety gear and maintain proper ventilation throughout the process. The key steps include disconnecting utilities, removing the sink and appliances, breaking the plumber’s putty seal, and carefully lifting the granite sections. For large or complex installations, professional removal services offer expertise and specialized equipment that can prevent costly mistakes and potential injuries. Always dispose of materials properly and consider recycling options for the granite. If you’re uncertain about any aspect of the removal process, don’t hesitate to consult with experienced contractors who can ensure a safe and efficient removal of your granite countertops.