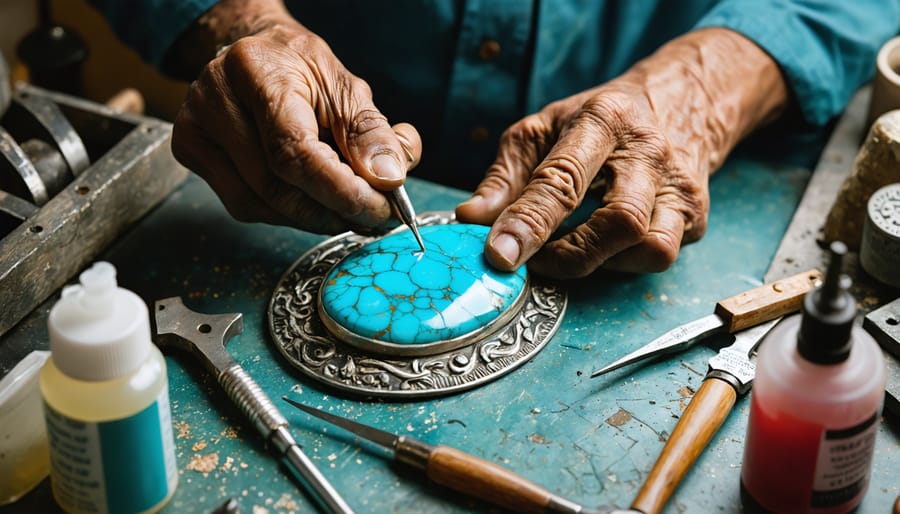
Transform raw stones into stunning jewelry pieces through the intricate art of stone inlay, a technique rooted in ancient stone carving traditions. Master precision cutting using a jeweler’s saw to create perfectly fitted stone channels, ensuring each piece sits flush within its metal housing. Execute professional-grade inlay work by preparing stones with graduated grits, starting at 120 and working up to 3000 for mirror-like polish. Control depth and consistency by carefully measuring channel depths with digital calipers, maintaining the ideal 2mm depth for most gemstone varieties.
Select complementary stone combinations based on both aesthetic appeal and material hardness, pairing similar-density stones to prevent uneven wear. Mix crushed stone with clear epoxy using a 70/30 ratio to achieve seamless transitions between inlay sections while maintaining structural integrity. Apply modern stabilization techniques to softer stones like turquoise and opal before cutting, preventing future cracking and ensuring longevity in finished pieces.
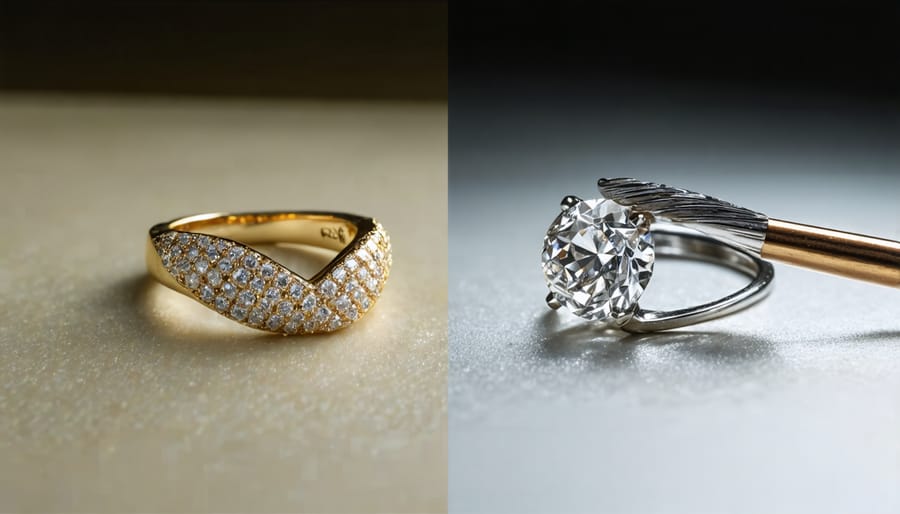
This comprehensive guide bridges traditional craftsmanship with contemporary methods, offering both novice and experienced jewelers the essential techniques for creating museum-quality stone inlay jewelry.
Essential Tools and Materials
Stone Selection and Preparation
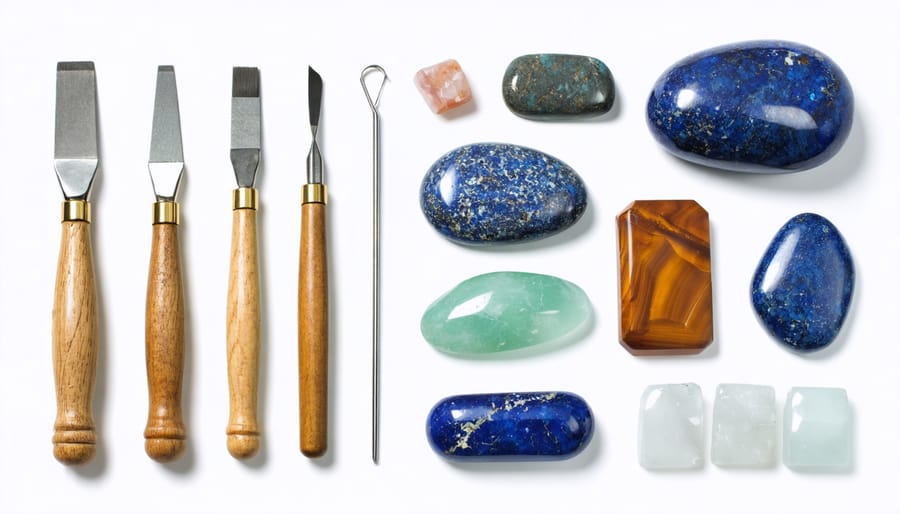
Selecting the right stones is crucial for successful stone inlay applications. Begin by choosing stones that complement your design and work well together. Popular options include turquoise, lapis lazuli, malachite, and mother-of-pearl, each offering unique colors and patterns.
When preparing stones, start by cutting them into thin slices approximately 1/8 inch thick using a lapidary saw. Shape these pieces according to your design template, leaving slight excess for final adjustments. Always wear appropriate safety gear and work in a well-ventilated area.
Before inlaying, stones must be properly cleaned and dried. Remove any dust or debris using compressed air and a soft brush. For porous stones, apply a stabilizing agent to prevent future cracking. Sort your prepared pieces by color and pattern variation, arranging them to ensure a harmonious flow in your final design.
Test-fit all pieces before permanent placement, and consider photographing your layout for reference. This preparation phase is critical for achieving professional results in your finished jewelry piece.
Tools and Equipment
To create stone inlay jewelry, you’ll need several essential tools and safety equipment. Begin with basic cutting tools including a jeweler’s saw, files of various sizes, and a flex shaft or rotary tool with assorted bits. For precise stone work, acquire a set of diamond-tipped burrs and stone-cutting wheels.
Essential measuring and marking tools include digital calipers, metal rulers, and scribing tools for accurate layout work. You’ll also need pliers, including flat-nose and chain-nose varieties, along with specialized stone-setting tools such as burnishers and bezel pushers.
For safety, always wear protective eyewear, a dust mask rated for fine particles, and disposable nitrile gloves. A well-ventilated workspace or dust collection system is crucial when working with stone materials.
Additional supplies include various grits of sandpaper, polishing compounds, and a selection of adhesives suitable for stone and metal bonding. Keep a bench pin, ring clamp, and sturdy work surface readily available. Store your tools in organized containers to maintain their condition and ensure easy access during your projects.
Modern Inlay Techniques
Channel Inlay Method
The channel inlay method requires precise preparation to create clean, professional results. Begin by marking your channel dimensions carefully on the metal surface using a fine-point marker. Using a flex shaft or drill press with a burr attachment, cut the initial channel slightly smaller than your intended final size. This allows for adjustments during fitting.
Work slowly when cutting, maintaining consistent depth and width. The channel depth should be approximately 75% of the stone’s thickness to ensure proper setting. Clean the channels thoroughly with compressed air and isopropyl alcohol to remove any metal debris.
Test-fit your stones frequently during the channel-cutting process. Each stone should fit snugly but not require force to seat properly. Use needle files to refine the channel walls and floor, ensuring they’re perfectly straight and smooth. For curved channels, use round burrs and carefully follow your marked lines.
Apply a thin layer of epoxy specifically designed for stone inlay to the channel floor. Place each stone carefully, using tweezers to avoid contaminating the surfaces with oils from your hands. Press gently to ensure full contact with the adhesive. For multiple stones, maintain consistent spacing between pieces.
Allow the epoxy to cure completely according to manufacturer specifications – typically 24 hours for full strength. Once cured, use progressive grits of sandpaper starting at 400 and working up to 1200 to level the stones with the metal surface. Finally, polish the entire piece to achieve a seamless transition between stone and metal.

Micro-Mosaic Technique
The micro-mosaic technique elevates stone inlay jewelry by creating intricate patterns using tiny stone pieces, typically ranging from 1-3mm in size. Begin by sketching your desired pattern onto the metal base, ensuring clear guidelines for placement. Prepare your work surface with a clean, flat layout and organize your stone pieces by color and size.
Select stones with similar thickness to ensure a level final surface. Using fine-point tweezers, place each stone piece precisely within your outlined pattern. Start from the center and work outward, maintaining consistent spacing between pieces. Apply a small amount of jeweler’s epoxy to secure each stone, being careful not to use excess adhesive that might seep between pieces.
For complex designs, work in small sections at a time to prevent the epoxy from setting before stone placement is complete. Consider color gradients and natural stone variations to create depth and visual interest. When placing adjacent pieces, maintain minimal gaps while ensuring each stone sits firmly in the epoxy.
After completing the pattern, allow the epoxy to cure completely according to manufacturer specifications, typically 24 hours. Once cured, carefully sand the surface using progressively finer grits, starting at 400 and working up to 3000. This process levels the stones and creates a smooth, unified surface. Finally, polish the piece using stone-specific compounds to achieve a brilliant finish that highlights the natural beauty of each stone piece.
Remember to wear appropriate safety gear, including a dust mask and eye protection, during the sanding and polishing processes. Store unused stone pieces in labeled containers for future projects.
Contemporary Flush Inlay
Contemporary flush inlay represents a significant advancement in stone inlay jewelry making, offering a seamless integration that appears as if the stone naturally belongs within the metal. This modern technique requires precision tools and careful attention to detail, but the results are worth the extra effort.
The process begins with precise measurement and cutting of the stone using diamond-tipped tools or a high-quality lapidary saw. Unlike traditional methods, contemporary flush inlay demands creating a perfectly fitted cavity that matches the stone’s dimensions exactly, typically leaving only 0.1-0.2mm of clearance for adhesive.
Modern jewelers often employ digital calipers and microscopes to achieve the necessary precision. The metal cavity is carefully carved using specialized burs, creating straight walls and a flat bottom. This differs from traditional inlay techniques that relied on undercuts or mechanical settings to secure stones.
A key innovation in contemporary flush inlay is the use of modern epoxy adhesives specifically formulated for jewelry. These adhesives provide superior bonding strength while remaining virtually invisible, contributing to the seamless appearance. Before setting, both the stone and metal surfaces are thoroughly cleaned with alcohol and prepared with a primer if recommended by the adhesive manufacturer.
The setting process involves carefully positioning the stone flush with the metal surface. Many contemporary artists use specialized clamping systems or precision tools to maintain perfect alignment while the adhesive cures. After curing, the surface is carefully leveled using progressive grits of diamond abrasives, ensuring the stone and metal create a perfectly smooth transition.
Final finishing typically involves minimal metal manipulation around the stone, maintaining clean lines and modern aesthetic appeal. This approach results in durable, water-resistant pieces that showcase the natural beauty of both stone and metal while meeting contemporary jewelry design standards.
Finishing and Polishing
Surface Leveling
Achieving a perfectly smooth surface is crucial for creating professional-looking stone inlay jewelry. Once your inlay materials are set, begin the leveling process using progressively finer grits of sandpaper, starting with 220-grit and working up to 600-grit. Work in a consistent circular motion, keeping the surface wet to prevent dust and ensure even wear.
For optimal results, use a flat sanding block or lapidary disc to maintain evenness across the entire surface. Pay special attention to the boundaries between different materials, as these areas often require additional attention to achieve seamless transitions. Check your progress frequently by wiping the surface clean and examining it under good lighting.
Modern professional finishing techniques often incorporate diamond-embedded sanding pads, which provide superior consistency and longevity compared to traditional sandpaper. These tools are particularly effective when working with harder stone varieties and create exceptionally smooth transitions between materials.
Once you’ve achieved a uniform surface, proceed to fine-grit wet sanding (800-1200 grit) to prepare for the final polishing stage. Remember to clean the piece thoroughly between grits to prevent cross-contamination that could create unwanted scratches. This methodical approach ensures your inlay work will have the professional, glass-like finish that distinguishes high-quality pieces.
Final Polish and Protective Coating
The final stage of creating stone inlay jewelry requires careful attention to achieve a professional finish. Begin by using progressively finer grits of sandpaper, starting with 400-grit and working your way up to 3000-grit. This gradual progression ensures all surface irregularities are smoothed out while maintaining the stone’s natural beauty. Apply stone polishing techniques using a soft polishing cloth and specialized stone compound to bring out the maximum luster in both the stones and metal components.
Once you’ve achieved the desired shine, it’s crucial to protect your piece with a high-quality sealant. Apply a thin, even coat of jewelry-grade stone sealer using a small brush, ensuring complete coverage of the inlay work. This protective layer prevents moisture absorption and helps maintain the stone’s color vibrancy. Allow the sealant to cure for at least 24 hours in a dust-free environment.
For added durability, consider applying a second coat of sealant after the first has fully cured. This double-layer protection is especially important for pieces that will see frequent wear. Finally, buff the entire piece with a microfiber cloth to remove any residual sealant and achieve that perfect, professional gleam. Store the finished jewelry in a soft pouch or lined box to protect it from scratches and environmental damage.
Troubleshooting Common Issues
Even experienced artisans encounter challenges when creating stone inlay jewelry. Here are solutions to the most common issues you might face during the process:
If stones keep popping out during setting, the channel depth may be insufficient. Ensure your channels are at least 1.5 times the stone thickness. Also check that your epoxy mixture has the correct ratio and hasn’t expired, as this can affect adhesion strength.
Gaps between stones are often caused by improper stone sizing or rushed placement. Take time to dry-fit pieces before applying epoxy, and use calibrated stones when possible. For irregular gaps, crushed stone mixed with epoxy can serve as effective filler.
Cloudy or dull finish after polishing typically indicates residual epoxy on the stone surface. Prevention is key – clean excess epoxy immediately after setting. If cloudiness occurs, carefully repolish affected areas with progressively finer grits, starting at 400 and working up to 3000.
Uneven surface levels usually result from stones sitting at different heights. Use a depth gauge while cutting channels and ensure consistent epoxy thickness. For corrections, carefully sand high spots with diamond pads, though prevention is preferable to fixing.
Cracking during channel cutting often happens due to excessive tool pressure or wrong speed settings. Use sharp bits, maintain steady pressure, and keep tools cool with proper lubrication. Start with wider channels and work inward to maintain structural integrity.
Color bleeding between stones can occur with porous materials. Apply a stone sealer before setting, and ensure complete curing between different colored sections. When working with particularly soft stones, consider using separating barriers of metal wire.
Creating beautiful stone inlay jewelry requires patience, practice, and attention to detail. As you’ve learned throughout this tutorial, the key to success lies in proper preparation, precise cutting techniques, and careful assembly. Remember that your first attempts may not be perfect, but each piece you create will help you refine your skills and develop your unique style.
Keep your workspace clean and organized, maintain your tools properly, and always prioritize safety when working with stones and adhesives. Start with simple designs and gradually progress to more complex patterns as your confidence grows. Don’t be afraid to experiment with different stone combinations and metal backgrounds to discover exciting new possibilities.
Consider documenting your progress by photographing your work and keeping notes about techniques that work best for you. Join online communities or local jewelry-making groups to share experiences and learn from fellow craftspeople. With dedication and consistent practice, you’ll soon be creating professional-quality stone inlay jewelry that showcases your artistic vision and technical expertise.
Remember, every master jeweler started as a beginner. Stay patient, keep learning, and enjoy the rewarding process of creating unique pieces that will be treasured for years to come.