Natural stone restoration demands precision, expertise, and an understanding of geological composition to preserve these timeless architectural elements. From elegant marble countertops to historic limestone facades, addressing common types of stone damage requires a methodical approach that balances preservation with enhancement.
Professional restoration techniques breathe new life into weathered stone surfaces, reversing decades of wear while maintaining the material’s inherent character. Whether dealing with acid etching on marble, efflorescence on travertine, or deep staining on granite, each stone type presents unique challenges that demand specialized treatment protocols.
Modern restoration methods combine traditional craftsmanship with cutting-edge technology, offering solutions that not only repair damage but also strengthen the stone against future deterioration. This science-based approach ensures that restored surfaces maintain their structural integrity while preserving the distinctive patterns, colors, and textures that make natural stone an enduring choice in architecture and design.
The key to successful stone restoration lies in proper assessment, technique selection, and preventive maintenance – elements that work together to extend the life and beauty of these irreplaceable materials.
Assessment and Documentation of Stone Damage
Identifying Stone Types and Damage Patterns
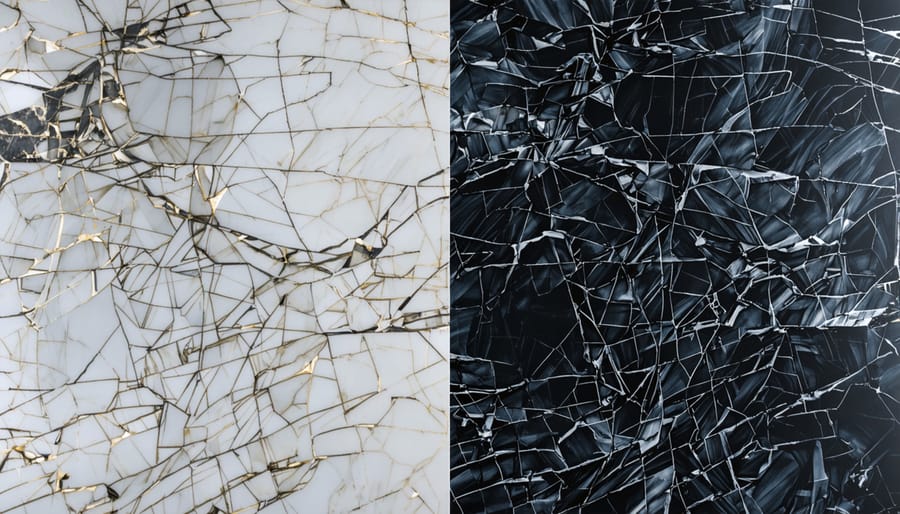
Natural stone comes in various types, each with distinct characteristics and vulnerabilities. Marble, known for its elegant veining, often shows etching from acidic substances and wear patterns in high-traffic areas. Granite, while more durable, can develop dull spots and light scratching over time. Limestone and travertine are particularly susceptible to pitting and chemical erosion due to their calcium carbonate composition.
Common damage patterns include surface scratches, which appear as fine lines across the stone’s surface; spalling, where pieces of stone flake off; and efflorescence, visible as white powdery deposits. Water damage typically manifests as dark spots or rings, while improper cleaning agents can create etching that looks like dull, light-colored marks on polished surfaces.
To identify stone types, observe characteristics like veining patterns, color consistency, and surface texture. Marble typically has flowing veins, while granite shows distinct mineral specks. A simple acid test can help differentiate between calcium-based stones (marble, limestone) and silica-based stones (granite, quartzite), though this should be performed by professionals to avoid damage.
Early detection of these patterns is crucial for effective restoration and preventing further deterioration.
Pre-Restoration Documentation
Before initiating any stone restoration project, thorough documentation of the existing conditions is crucial. High-quality photographs should capture all damaged areas, discoloration, cracks, chips, and other imperfections from multiple angles and under different lighting conditions. This visual record serves multiple purposes: it helps establish the scope of work, provides a reference point for tracking progress, and offers protection for both contractors and clients by clearly showing the stone’s condition before intervention.
Create detailed written notes describing the type and extent of damage, including measurements where applicable. Document any previous restoration attempts, regular maintenance procedures, and known incidents that may have caused damage. This information helps develop an appropriate restoration strategy and can prevent potential disputes about the work’s extent and results.
Additionally, maintaining records of the stone type, installation date (if known), and previous treatments provides valuable context for selecting suitable restoration methods and materials. Professional restorers often use standardized assessment forms to ensure consistent documentation across projects, making it easier to track progress and validate results upon completion.
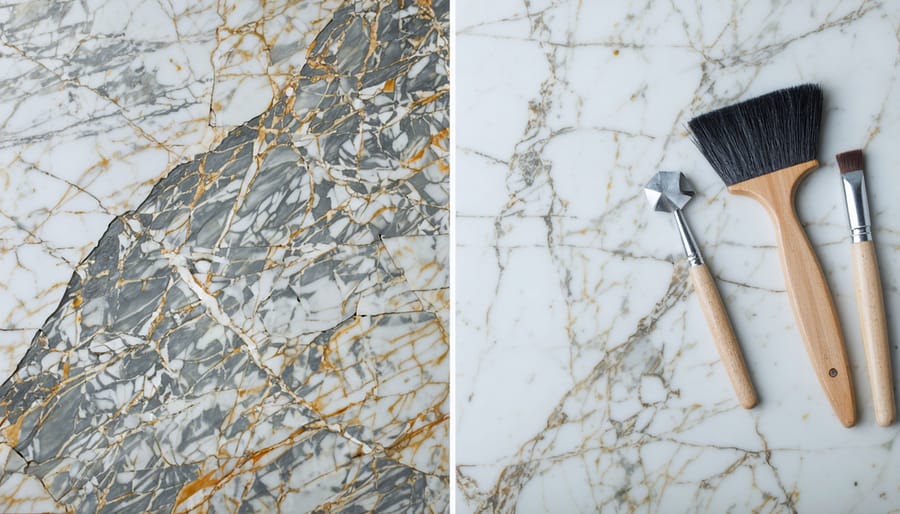
Professional Restoration Techniques
Surface Cleaning and Preparation
Before beginning any restoration work, proper surface cleaning and preparation are essential for achieving optimal results. Start by conducting a thorough inspection to identify contaminants, stains, and surface conditions that require attention. Using safe cleaning methods appropriate for your specific stone type is crucial to avoid causing additional damage.
Begin with a gentle dust removal process using soft microfiber cloths or non-abrasive brushes to eliminate loose debris. For embedded dirt and grime, apply a pH-neutral stone cleaner specifically formulated for natural stone surfaces. Work in small sections, allowing the cleaner to dwell briefly before wiping with clean, damp cloths.
For stubborn stains or deposits, poultice treatments may be necessary. These drawing agents help extract deep-set stains without damaging the stone’s surface. After cleaning, ensure the surface is completely dry before proceeding with any restoration work.
Remove any loose or deteriorating material around damaged areas, and clean these sections thoroughly. For surfaces with existing sealers or coatings, these may need to be stripped using appropriate stone-safe solutions. Always test cleaning products and methods in an inconspicuous area first to ensure compatibility with your stone type.
The final preparation step involves ensuring proper environmental conditions, including adequate ventilation and appropriate temperature ranges for the restoration products being used.
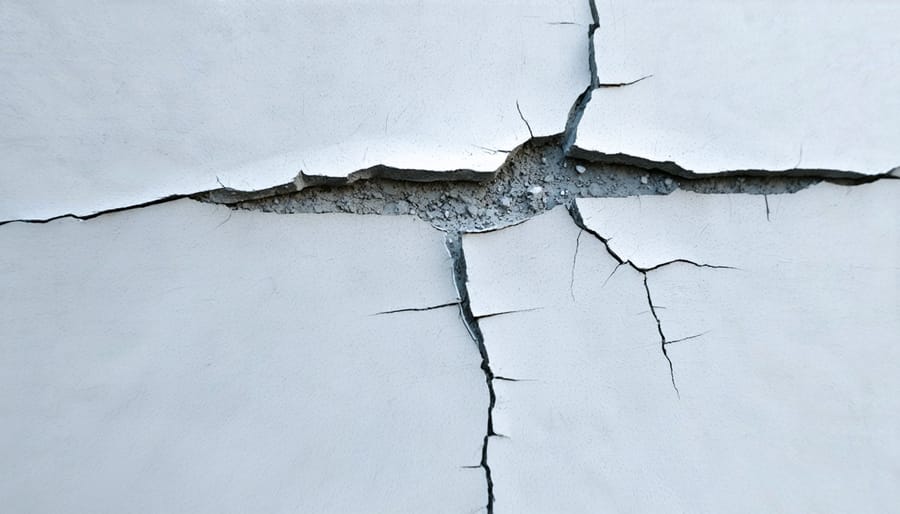
Crack and Chip Repair
Cracks and chips in natural stone can compromise both the aesthetic appeal and structural integrity of the material. Professional restoration techniques can effectively repair these issues, often restoring the stone to its original condition. The repair process typically begins with a thorough cleaning of the damaged area to remove any debris or loose particles.
For hairline cracks, specialized stone-specific epoxy resins are carefully injected into the fissure. These resins are matched to the stone’s color and texture, ensuring a seamless repair once cured. Larger cracks may require a more comprehensive approach, including stabilization of the surrounding area and potentially reinforcement with steel pins or carbon fiber rods before filling.
Chip repair involves carefully building up the damaged area using a combination of stone dust (typically sourced from the same material) and color-matched epoxy. This mixture is applied in layers, allowing proper curing time between applications. Once the final layer is set, the repaired area is ground and polished to match the surrounding stone’s finish.
For historically significant pieces or high-value stone installations, conservators may employ more specialized techniques, such as dutchman repairs, where damaged sections are precisely cut out and replaced with matching stone material. This method, while more intensive, provides the most authentic and durable repair for severe damage.
Regular monitoring of repaired areas is essential to ensure the longevity of the restoration work, particularly in high-traffic areas or outdoor installations exposed to weathering.
Color Matching and Stone Fillers
Color matching in natural stone restoration is a meticulous process that requires both technical expertise and artistic skill. When stones are damaged, finding the exact color match for repairs is crucial to maintain the material’s aesthetic integrity. Professional restorers typically begin by analyzing the stone’s unique color composition, including its primary and secondary hues, veining patterns, and natural variations.
The process involves creating custom-mixed epoxy fillers or using specialized stone-matching compounds that closely replicate the original stone’s appearance. These fillers are carefully formulated to match not only the color but also the texture and reflective properties of the surrounding stone. Experienced technicians often create test patches in inconspicuous areas to ensure a seamless blend before applying the filler to visible surfaces.
For deeper repairs, multiple layers of colored fillers may be necessary to achieve the desired depth and dimension. The technique often involves building up layers from darker to lighter shades, mimicking the natural stone’s depth. Once cured, these fillers are ground and polished to match the surrounding stone’s finish.
Modern technology has enhanced this process through the use of color-matching systems and specialized pigments that can be precisely measured and mixed. However, the human eye and artistic judgment remain essential in achieving natural-looking results. Successful color matching requires understanding how different lighting conditions affect the stone’s appearance and how the filler will age over time alongside the original material.
Polishing and Surface Finishing
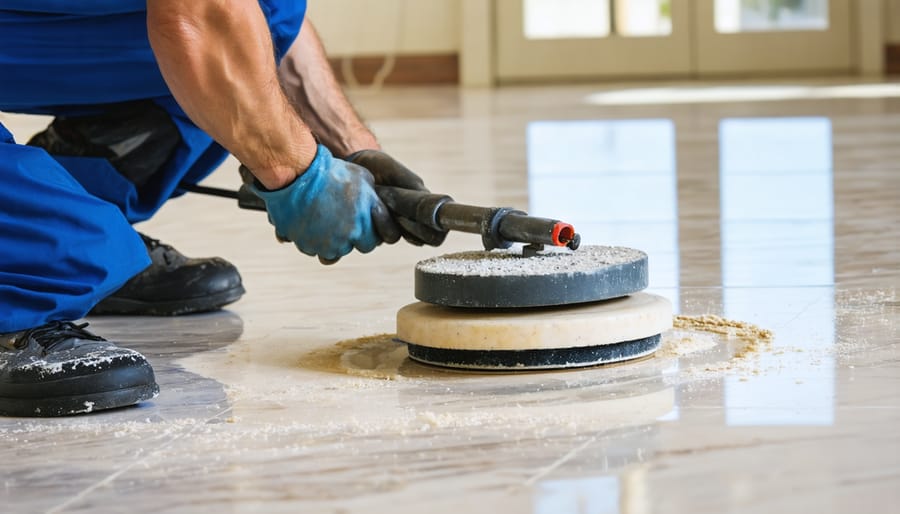
Diamond Polishing Techniques
Diamond polishing is a sophisticated technique that uses specialized diamond-embedded pads to achieve various finishes on natural stone surfaces. The process typically begins with coarser grit pads and progressively moves to finer grits, creating increasingly smoother and more reflective surfaces.
Professional restorers typically start with diamond pads ranging from 50 to 100 grit to remove deep scratches and surface damage. They then progress through medium grits (200-400) to refine the surface and eliminate visible scratching patterns. The final stages utilize ultra-fine grits (800-3000) to achieve the desired level of shine and clarity.
Different finishes can be achieved depending on where you stop in the polishing sequence:
– Honed finish (200-400 grit): Creates a smooth, matte appearance
– Semi-polished (800 grit): Offers a subtle sheen without full reflection
– High-polish (1500-3000 grit): Produces a mirror-like, glossy finish
Water is typically used during the polishing process to cool the stone surface and prevent dust. Modern equipment features variable speed controls and weighted heads to ensure even pressure distribution. For optimal results, professionals maintain consistent overlapping patterns and carefully monitor the stone’s temperature throughout the process.
The technique requires significant expertise, as different stone types respond differently to diamond polishing. Marble and limestone generally achieve the best results, while granite may require additional steps due to its harder composition.
Sealing and Protection
The final step in natural stone restoration involves applying protective sealants to prevent future damage and maintain the stone’s restored appearance. Understanding proper sealing techniques is crucial for long-term preservation of your natural stone surfaces.
Most natural stones are porous and require impregnating sealers that penetrate deep into the material, creating an invisible barrier against stains, moisture, and everyday wear. These sealers maintain the stone’s natural appearance while providing essential protection. For highly polished stones like marble or granite, a topical sealer may also be applied to enhance shine and provide additional protection.
The type of sealer chosen should match your stone’s specific characteristics and intended use. For example, kitchen countertops require more robust protection against food stains and acidic substances, while bathroom floors need sealers with excellent moisture resistance.
After sealing, it’s important to allow adequate curing time, typically 24-48 hours, before resuming normal use. Regular maintenance should include periodic resealing, with frequency depending on the stone type and amount of use. High-traffic areas may need resealing annually, while less-used surfaces might go several years between applications.
To maximize the sealer’s effectiveness, always follow manufacturer guidelines and maintain proper cleaning routines using pH-neutral stone cleaners.
Maintenance After Restoration
After investing in professional stone restoration, proper maintenance is crucial to preserve the renewed beauty and extend the life of your natural stone surfaces. A well-planned ongoing stone maintenance routine will protect your investment and prevent the need for frequent restorations.
Start by implementing a regular cleaning schedule using pH-neutral cleaners specifically formulated for natural stone. Avoid acidic or abrasive cleaning products, which can damage the stone’s surface and compromise the restoration work. Clean spills immediately to prevent staining, and use coasters, trivets, and protective pads under items that could scratch or mark the stone.
For flooring applications, place mats at entrances to catch dirt and debris that could scratch the surface. Regularly dust mop interior floors and sweep exterior stone surfaces to remove abrasive particles. Consider implementing a periodic professional cleaning schedule, typically every 12-18 months, depending on traffic and exposure.
Maintain proper sealing schedules as recommended by your restoration professional. Most natural stones require resealing every 1-3 years, though this varies based on stone type, location, and usage. Test the seal’s effectiveness by placing a few drops of water on the surface – if the water doesn’t bead up, it’s time to reseal.
Monitor your stone surfaces for signs of wear or damage. Address minor issues promptly to prevent them from developing into major problems requiring extensive restoration. Keep detailed records of maintenance procedures, including cleaning products used and sealing dates, to ensure consistent care.
For exterior stone, conduct seasonal inspections to check for weather-related damage, especially after harsh winters or extreme weather events. Clear drainage systems to prevent water accumulation, which can lead to erosion and staining. Consider applying additional protective treatments for outdoor stone surfaces exposed to harsh environmental conditions.
Natural stone restoration is a complex yet rewarding process that plays a vital role in preserving the beauty and integrity of stone surfaces. Throughout this guide, we’ve explored the essential aspects of stone restoration, from initial assessment and cleaning to advanced repair techniques and preventive maintenance strategies.
The restoration process requires a careful balance of technical expertise, appropriate tools, and proven methodologies. While some minor maintenance tasks can be handled by property owners, professional restoration services offer the expertise, equipment, and experience necessary to achieve optimal results while preventing potential damage.
Investing in professional stone restoration not only enhances the aesthetic appeal of your stone surfaces but also protects your investment by extending the material’s lifespan. Properly restored stone can maintain its natural beauty for generations, contributing to increased property value and reduced long-term maintenance costs.
Remember that each type of stone has unique characteristics and requires specific care approaches. Regular maintenance, combined with professional restoration when needed, ensures your natural stone surfaces remain in pristine condition. By understanding the restoration process and working with qualified professionals, you can preserve the timeless elegance of your stone installations while protecting their structural integrity for years to come.
Don’t wait until visible damage occurs – proactive maintenance and timely restoration are key to preserving the natural beauty and value of your stone surfaces.