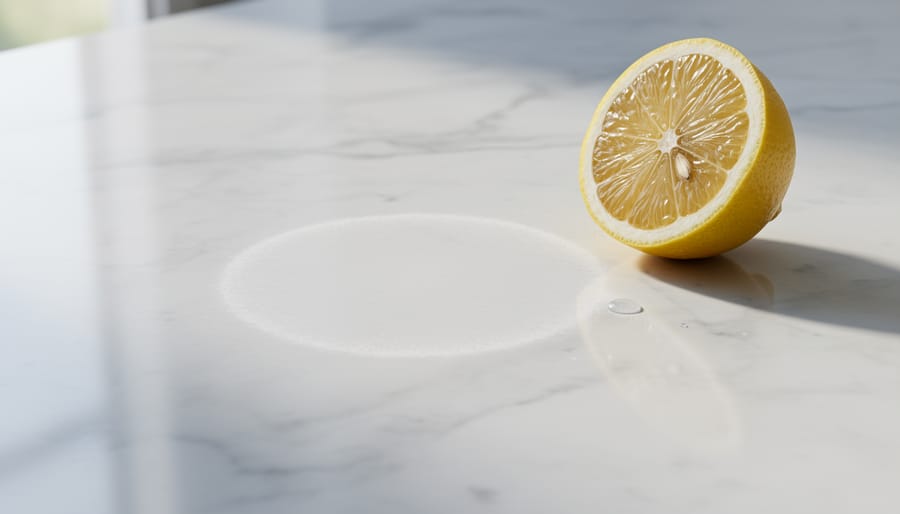
Marble etching occurs when acidic substances chemically react with the calcium carbonate in the stone, leaving dull, light-colored spots or rings on the surface. Unlike stains that penetrate the stone, etches are surface damage that remove the polish, and the good news is they can often be repaired at home using fine polishing powder, patience, and the right technique. Light etches typically take 10 to 15 minutes to fix, while deeper damage may require professional restoration.
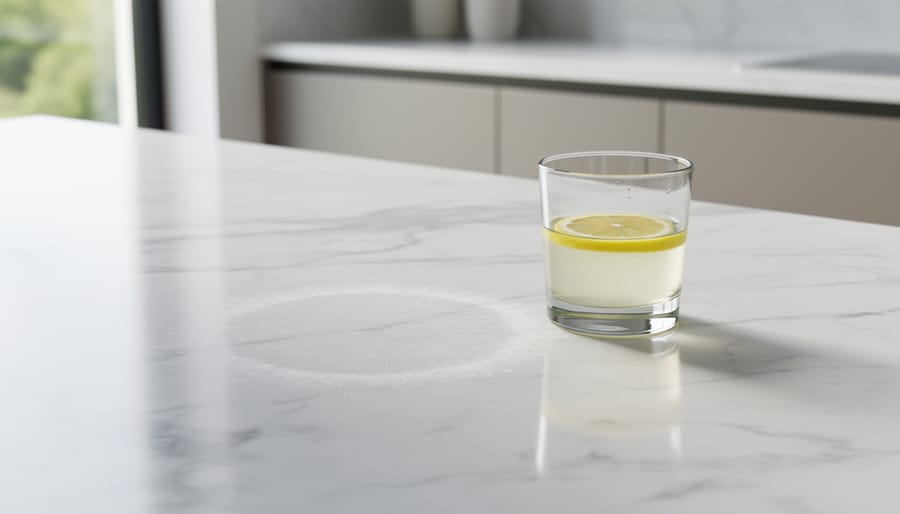
The distinction matters because it determines your repair approach. A glass of lemon juice left on a marble countertop overnight creates an etch, a cloudy mark where acid has literally dissolved microscopic amounts of the stone’s surface. That same spot would feel slightly rougher to the touch than the surrounding polished marble. A coffee spill, by contrast, might leave a brown stain that seeps into the pores but doesn’t alter the surface texture or sheen.
Most homeowners discover etching the hard way: a wine glass leaves a ring, cleaning with vinegar dulls an entire section, or acidic foods during meal prep create a constellation of white spots. These marks appear instantly on contact with acids because the reaction is chemical, not gradual absorption. Understanding this difference shapes everything from daily maintenance to emergency response when spills happen.
This guide walks through assessment, material selection, and step-by-step repair methods calibrated to etch severity, followed by verification techniques and prevention strategies that protect your investment long-term.
What Causes Marble to Etch
Why Some Stones Are More Vulnerable
Not all marble and limestone surfaces face equal etching risk. The vulnerability comes down to two main factors: calcium carbonate content and surface finish.
Pure white marbles like Carrara, Calacatta, and Thassos contain nearly 100% calcium carbonate, making them extremely reactive to acids. Even brief contact with lemon juice can leave visible marks. Conversely, stones marketed as marble but containing dolomite (calcium magnesium carbonate) or other minerals show slightly better resistance, though they’ll still etch under sustained acid exposure.
Limestone poses similar challenges since it’s essentially compressed calcium carbonate. Travertine, a limestone variant popular for floors and countertops, etches just as readily as marble despite its different appearance.
Surface finish dramatically affects how you notice etching. Polished marble shows every dull spot immediately because the acid destroys the glossy surface layer. Honed marble has a matte finish to start with, so light etching often goes unnoticed until it becomes severe enough to create texture changes. This doesn’t mean honed surfaces are more resistant, the damage happens just as quickly, but you simply can’t see it as easily in everyday lighting.
What You’ll Need to Repair Marble Etching
The supplies you need depend entirely on how severe the etching is. Light dulling requires minimal materials, while deep marks demand a more complete restoration kit.
For Light to Moderate Etching on Polished Marble:
Start with marble polishing powder or a dedicated marble polishing compound. These products contain fine abrasives specifically formulated for calcium-based stone. Look for compounds labeled “marble polish” rather than general stone polish, as granite products are too aggressive. You’ll also need soft, lint-free cloths or felt buffing pads. White cotton rags work well, though microfiber can leave faint scratches on some marble. A spray bottle filled with clean water helps control the polishing compound consistency.
For Severe Etching Requiring Wet Sanding:
Deep marks need wet/dry sandpaper in progressive grits: 400, 600, 800, 1200, and 1500 for initial smoothing, then 3000 and 5000 for pre-polish. Buy sandpaper specifically marked as wet/dry, since standard sandpaper disintegrates when damp. You’ll use these with constant water as a lubricant, so keep a bucket and sponge nearby. After sanding, you still need marble polishing powder to restore the final shine.
Universal Supplies:
Regardless of etching severity, gather pH-neutral stone cleaner to prep the area, painter’s tape to protect adjacent surfaces, and multiple clean towels for drying between steps. A small handheld buffer or drill with a soft polishing pad attachment speeds the process considerably, though hand polishing works if you have patience.
Optional But Helpful:
A bright LED work light reveals your progress better than overhead lighting. Rubber gloves protect your hands during extended polishing sessions. For countertops, knee pads make the work less grueling.
Don’t buy every item upfront. Assess the damage first, start with polishing powder for light marks, then invest in sandpaper only if the simpler approach fails.
Safety Precautions Before You Begin
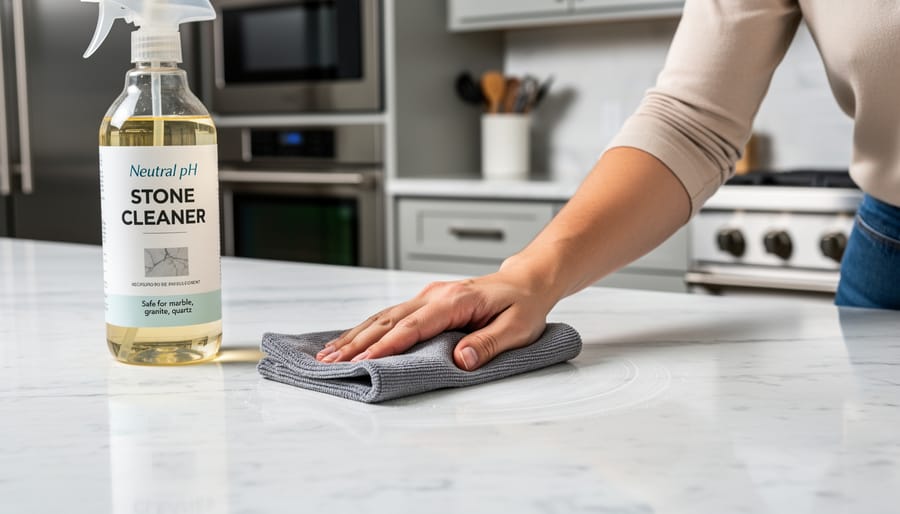
Before you start repairing etched marble, take these safety measures seriously. Marble polishing compounds and wet sanding generate fine dust that can irritate your lungs and eyes, so work in a well-ventilated area, open windows and consider running a fan to direct airflow away from your workspace. Wear safety glasses to protect your eyes from splatter and dust, and nitrile gloves to keep polishing compounds and cleaning solutions off your skin. If you’re wet sanding, a dust mask or N95 respirator prevents you from inhaling the slurry particles.
Always test your chosen repair method on an inconspicuous spot first, behind an appliance, in a corner, or underneath a decorative item. This test reveals how your specific marble responds to the compound or abrasive, and whether you’re using the correct technique for your stone’s finish. Give yourself a small practice area to develop feel for the right pressure and motion before tackling the visible etch.
Know your limits. If the etched area covers more than a few square feet, if you’re dealing with antique or rare marble, if you’re uncertain whether your surface is polished or honed, or if a first repair attempt didn’t work, stop and call a professional stone restorer. Some situations, like etching on intricate inlays or historical installations, carry risks that outweigh the cost of expert help.
How to Remove Light Etching from Polished Marble
Technique Tips for Even Results
The difference between professional-looking marble repair and an obvious patch job comes down to technique. Apply consistent, moderate pressure throughout the polishing process, pressing too hard generates excess heat and can create new surface irregularities, while too little pressure won’t effectively restore the shine.
Use overlapping circular motions rather than back-and-forth scrubbing. Work in small sections, roughly 12 to 18 inches square, to maintain control and prevent the compound from drying too quickly. The circles should overlap by about half their diameter to ensure even coverage.
Blending the repair into the surrounding surface requires feathering at the edges. Gradually reduce pressure as you work outward from the center of the etched area, extending your circular motions several inches beyond the visible damage. This creates a gradual transition rather than a distinct boundary where restored shine meets untouched marble.
Check your progress frequently by wiping the area clean and inspecting under strong light from multiple angles. If you notice any halos or uneven gloss, continue polishing with lighter pressure until the transition becomes imperceptible. Patience during this blending phase prevents the telltale ring that marks amateur repairs.
Repairing Severe Etching and Deep Marks
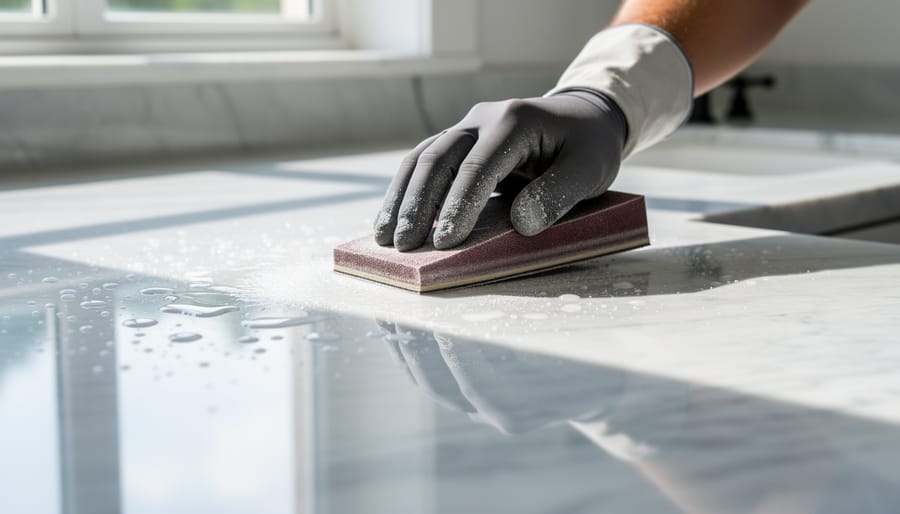
Severe etching removes more than the surface luster, it creates visible texture changes, depressions, or rough patches that feel different under your fingertips. This damage requires aggressive intervention with wet sanding to level the surface before you can restore the polish. If the etch mark catches your fingernail when you run it across, or if polishing powder alone leaves the spot dull, you’re dealing with severe etching that needs this approach.
This process demands time and physical effort. Plan on spending 45 minutes to several hours depending on the affected area, and understand you’re essentially refinishing a portion of your marble. The technique involves working through multiple grit levels to gradually smooth the surface, removing material until you’re below the deepest damage, then rebuilding the polish one stage at a time.
Here’s the progression through grits:
- Start with 220-grit wet/dry sandpaper if the etch feels rough or has visible depth. Keep the surface and sandpaper constantly wet, using circular motions with light to moderate pressure for 3-5 minutes until the texture feels uniform. This stage removes the most material and levels the damage.
- Move to 400-grit for 3-4 minutes, maintaining wet conditions and overlapping your previous work area by an inch on all sides. The surface should begin to feel smoother but will still appear very dull.
- Progress to 800-grit for 4-5 minutes. At this stage, you’re refining scratches from the coarser grits. The marble starts developing a satin appearance rather than raw stone.
- Use 1500-grit for 5-6 minutes with the same wet technique. The surface should now feel quite smooth and show a soft sheen when dry.
- Finish wet sanding with 3000-grit for 5-7 minutes. This creates the foundation for polishing by removing the finest scratches. The surface will have a noticeable glow but won’t yet match the surrounding polish.
After completing the wet sanding sequence, let the area dry completely and apply marble polishing powder with a soft cloth or buffing pad, working it in firm circles for 5-10 minutes. You may need multiple applications to build the gloss level to match the surrounding stone. The key is patience, rushing through grits or skipping steps leaves scratches that prevent proper polishing.
This method works for damage up to about 1-2mm deep. Deeper etching or areas larger than a dinner plate typically require professional equipment with weighted polishers to achieve truly invisible repairs.
Special Considerations for Honed and Textured Finishes
Honed marble presents a fundamentally different challenge when addressing etching. While polished surfaces show etching as dull spots against a glossy background, honed marble displays the opposite problem: etched areas often appear shinier than the surrounding matte finish because the acid exposure creates a localized polish.
Your repair goal shifts from restoring shine to recreating uniform matteness. Standard marble polishing compounds will make the problem worse by adding gloss where you want none. Instead, you’ll need fine abrasive pads (typically 400-800 grit) or honing powder specifically formulated for matte finishes. Work the product gently across the etched area and slightly beyond its borders to blend the texture seamlessly with the surrounding surface.
The challenge lies in matching the exact level of hone. Factories create honed finishes with precise equipment calibrated to specific grit levels, and replicating that uniformity by hand proves difficult. Light etching on honed marble often responds reasonably well to careful DIY treatment, but moderate to severe etching typically requires professional re-honing of the entire surface or large sections.
Textured finishes like leathered or brushed marble add another layer of complexity. These surfaces feature deliberate valleys and peaks that etching can partially smooth out, fundamentally altering the texture pattern. Attempting spot repairs on textured marble almost always creates visible patches. If your textured marble shows noticeable etching, professional refinishing is the realistic path forward rather than a DIY project.
How to Verify Your Repair Was Successful
After completing your repair work, you need to confirm that the etching has been fully removed and the surface properly restored. Proper verification prevents you from sealing in incomplete repairs or missing areas that need additional attention.
Start by examining the repaired area under multiple lighting conditions. Natural daylight from a window shows the most accurate results, but also check under your kitchen or bathroom lighting since that’s how you’ll see the marble daily. Look at the surface from different angles, what appears uniform straight-on may show unevenness when viewed at a shallow angle. The repaired spot should blend seamlessly with the surrounding marble, matching both color and sheen level.
Run your hand gently across the repair area and the adjacent undamaged marble. A successful repair on polished marble should feel equally smooth in both areas, with no perceptible difference in texture. If you detect a rough patch, the surface needs additional polishing. On honed finishes, the repaired area should match the surrounding matte texture without any glossy spots.
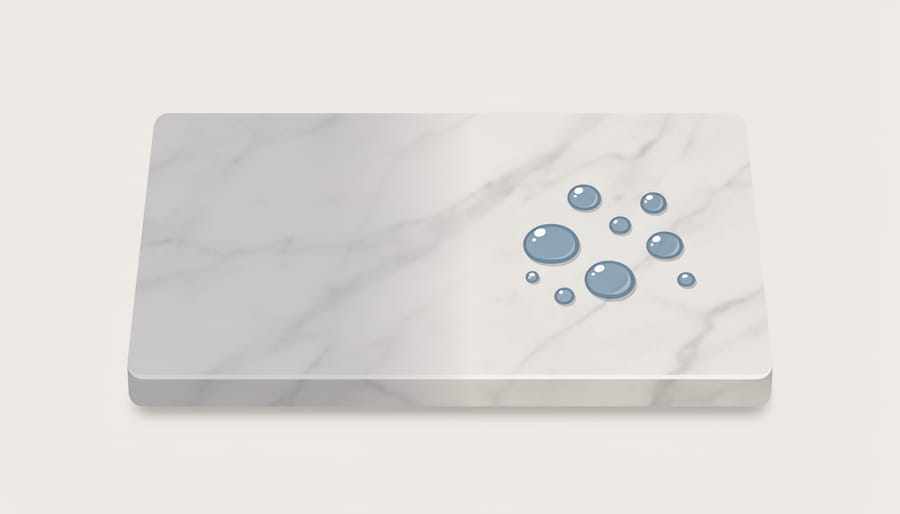
The water droplet test provides definitive proof that polish has been restored to marble. Place a small drop of water on the repaired area and on an undamaged section nearby. On properly polished marble, both drops should bead up similarly and exhibit the same level of shine when light hits them. If the water on the repaired spot looks duller or absorbs differently, continue polishing until the behavior matches.
Use these verification methods to assess your repair quality:
- Visual inspection under natural and artificial light reveals color matching and sheen uniformity
- Touch test detects texture differences between repaired and original surface
- Water droplet comparison shows whether polish level has been fully restored
- Angle viewing at 45 degrees exposes subtle halos or unevenness invisible from above
- Flashlight test with raking light highlights any remaining dull spots or scratches
If spots remain visible after your initial repair attempt, don’t panic. Light etching often requires two or three polishing sessions to fully remove, especially if you’re being appropriately gentle to avoid creating new problems. Return to the polishing step with fresh compound and continue working the area in overlapping circles. For stubborn marks that won’t respond to additional polishing, you may need to step back to a finer wet-sanding grit before polishing again.
Preventing Future Etching with Etch-Resistant Treatments
Types of Protective Treatments
The three main categories of protective treatments differ significantly in how they interact with marble and where they perform best.
Impregnating sealers absorb into the stone’s pores without altering surface appearance. They resist water and oil-based stains effectively but provide minimal protection against acid etching since the chemical reaction occurs at the surface before the sealer can act. Best for: kitchen countertops and bathroom vanities where stain prevention is the priority, particularly on honed finishes where maintaining the original texture matters. Reapplication needed every 1-3 years depending on use.
Topical coatings create a sacrificial barrier layer on the marble surface that can buffer some acidic contact. These include specialized epoxy-based products and urethane coatings designed for natural stone. They offer better etch resistance than impregnators but can alter appearance, adding slight sheen to honed surfaces or deepening color. The coating itself can scratch or wear, requiring periodic reapplication. Best for: high-traffic commercial installations, bar tops, or residential surfaces where maximum protection justifies a slight aesthetic change.
Nano-technology treatments use microscopic particles to create an ultra-thin protective layer that bonds at the molecular level. Premium options in 2026 offer improved etch resistance while preserving stone appearance better than traditional topicals. They’re more expensive and still require reapplication every 2-5 years. Best for: luxury installations, showpiece surfaces, or situations where you want maximum protection with minimal visual change. Results vary significantly by product quality and proper application.
Application Best Practices
Applying protective treatments correctly ensures maximum effectiveness and longevity. Start with a thoroughly cleaned surface, residual cleaners or oils will prevent proper penetration. Use a pH-neutral stone cleaner and allow the marble to dry completely for 24 hours before treatment application.
Apply impregnating sealers with a clean, lint-free cloth or foam applicator, working in small sections. Spread the product evenly and allow it to penetrate for the manufacturer’s recommended dwell time, typically 5-15 minutes. Remove excess sealer before it dries on the surface, as residue creates hazy streaks that require additional cleaning to remove.
For polished marble, most treatments require reapplication every 6-12 months depending on traffic and exposure to acidic substances. Honed finishes may need more frequent applications, as their open pore structure absorbs liquids more readily. High-traffic kitchen countertops benefit from quarterly assessment and touch-up application.
Topical coatings require complete curing between coats, often 2-4 hours. Avoid water contact during the initial 24-48 hour cure period. Not all treatments work with every finish, verify compatibility before purchasing. Some nano-technology products specifically designed for polished surfaces may appear cloudy on honed marble.
Daily Habits to Minimize Etching Risk
Even the best etch-resistant treatments need support from smart daily habits. Think of protective coatings as your first line of defense and these practices as your backup, together, they dramatically reduce etching incidents.
In the Kitchen and Dining Areas
Coasters aren’t just decorative. Place them under any glass containing citrus juice, wine, cocktails, or soda. A single sweating glass of lemonade left on marble for an hour can leave a ring you’ll spend thirty minutes polishing out. The same goes for cutting boards, acidic foods like tomatoes, citrus, and vinegar-based dressings will etch marble on contact. Keep a dedicated cutting board for prep work involving these ingredients.
The Ten-Second Rule
Treat spills like emergencies, because on marble, they are. Blot (don’t wipe) spills immediately with a soft cloth, then clean the area with plain water. Wiping spreads the acidic liquid across a larger surface area, multiplying the damage. This ten-second response window makes the difference between no damage and a visible etch mark.
Daily Maintenance Essentials
Your cleaning products matter as much as your cleaning habits:
- Use only pH-neutral cleaners specifically formulated for natural stone, never vinegar, lemon juice, or all-purpose cleaners
- Keep coasters at every seating area and bathroom counter where personal care products sit
- Place trivets or heat-resistant mats under coffee makers, which often drip acidic condensation
- Store acidic foods in sealed containers away from marble surfaces
- Wipe bathroom counters daily to remove toothpaste, which is surprisingly acidic
- Train household members and guests about marble’s vulnerability, a quick mention prevents accidents
These habits become automatic within a week or two, and they extend the life of any protective treatment you’ve applied. Reapply etch-resistant coatings according to the manufacturer’s schedule (typically every one to two years), but don’t use that protection as permission to skip these basic precautions. The goal is marble that looks pristine without constant worry, and that requires both chemical and behavioral protection working in tandem.
When to Call a Professional Stone Restorer
Most etching can be handled with DIY methods, but certain situations require professional expertise. If you’re facing any of these scenarios, save yourself frustration and potential damage by calling a certified stone restoration specialist.
Large or prominent areas demand professional attention. Etching that covers more than a few square feet becomes difficult to repair evenly without specialized equipment. Countertop edges, entire vanity tops, or high-traffic floor sections need the consistent results only professional polishing machines can deliver.
Valuable or antique marble shouldn’t be experimental ground. Historic pieces, imported stone, or expensive installations justify the cost of professional restoration. One wrong move with the wrong grit or technique can permanently alter the finish or damage irreplaceable material.
If you’re unsure about your marble’s finish type or previous treatments, professionals have the knowledge to identify what they’re working with. They’ll know whether your stone has been waxed, coated, or treated in ways that affect repair approaches.
Failed DIY attempts often make problems worse. If you’ve tried polishing and created uneven spots, halos, or dull patches, professionals can restore uniform appearance across the entire surface.
Stone restoration specialists use commercial-grade polishing equipment, diamond abrasive pads in precise grit sequences, and crystallization techniques that bring back factory-level shine. They also have access to professional-grade etch-resistant treatments and can recommend maintenance protocols specific to your stone type and household use patterns.
Frequently Asked Questions About Marble Etching
Can you completely prevent marble from etching?
No protective treatment can guarantee 100% prevention of marble etching. Etch-resistant treatments and sealers significantly reduce the risk and buy you time to wipe up spills, but direct contact with strong acids will eventually dull the surface if left long enough.
Does sealing prevent etching?
Standard impregnating sealers primarily protect against staining, not etching. They work below the surface and don’t create a barrier against acid. Specialized etch-resistant topical treatments offer better protection, but even these can’t eliminate etching entirely, they just slow the chemical reaction.
How long will a DIY etching repair last?
A properly executed repair is permanent for that specific spot. However, the repaired area remains just as vulnerable to future etching as the rest of your marble, so you’ll need to maintain the same preventive habits going forward.
Can granite get etched like marble?
True granite contains little to no calcium carbonate, so it won’t etch from acids the way marble and limestone do. If a stone sold as “granite” shows etching, it’s likely a softer stone that was mislabeled, some quartzites and marble lookalikes get marketed as granite.
Another common source of confusion is distinguishing etching from water spots. Water spots appear as rings or cloudy marks from mineral deposits left when hard water evaporates, particularly on darker marbles. These sit on the surface and can often be removed with a specialized stone cleaner or a paste of baking soda and water. Etching, by contrast, is actual surface damage where the polish has been chemically stripped away. If you run your finger over the spot and feel a texture difference or see a definite dull area that doesn’t wipe away, you’re dealing with etching rather than mineral deposits. Water spots are purely cosmetic and easier to address, while etching requires physical restoration of the surface finish.
Understanding these distinctions helps you choose the right solution. If you’re uncertain whether you’re looking at etching, staining, or water spots, test a small area with water, etching will remain dull even when wet, while water spots may temporarily disappear when moistened.
Understanding how marble etching works and how to address it transforms what seems like a permanent flaw into a manageable maintenance issue. Whether you’re dealing with a fresh ring from a wine glass or dulled spots that have accumulated over time, you now have the knowledge to restore your marble’s appearance and protect it going forward.
The key takeaway is that etching doesn’t have to be inevitable. A layered approach works best: apply etch-resistant treatments to create a buffer against acidic contact, establish simple daily habits like using coasters and cleaning spills promptly, and keep the right repair supplies on hand for when prevention falls short. No single solution eliminates etching risk entirely, but combining protective treatments with mindful use dramatically reduces how often you’ll need to intervene.
Most importantly, don’t let fear of etching prevent you from enjoying marble’s beauty. These calcium carbonate stones have graced homes and monuments for centuries precisely because they can be maintained and restored. With the techniques covered here, you’re equipped to handle etching confidently rather than viewing every dinner party as a potential disaster. Your marble countertops, vanities, and floors can serve their intended purpose while maintaining their elegance for years to come.