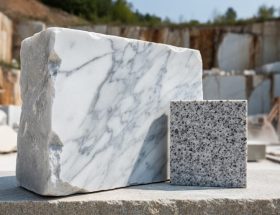
Large-format porcelain panels and natural stone slabs have transformed modern architecture, but their impressive size creates a critical installation challenge: warping, lippage, and uneven surfaces that compromise both aesthetics and structural integrity. The Z-technique solves this problem through a methodical back-buttering approach that ensures complete mortar coverage and eliminates voids beneath heavy stone tiles.
This installation method gets its name from the distinctive Z-shaped pattern installers create when applying thin-set mortar to the back of each stone piece. Unlike traditional methods that rely solely on mortar combed onto the substrate, the Z-technique combines substrate application with back-buttering to achieve 95% or greater mortar coverage—the industry standard for tiles larger than 15 inches in any direction.
Professional installers recognize this technique as essential for preventing catastrophic failures in high-end residential and commercial projects. When stone panels exceeding two feet aren’t properly supported, the resulting hollow spots create stress points that lead to cracking, delamination, and costly repairs. Understanding the Z-technique represents a crucial step in mastering proper stone installation techniques for contemporary large-format materials.
Whether you’re a contractor bidding on luxury installations or a homeowner evaluating installer qualifications, knowing how and when to apply this method ensures your natural stone investment delivers lasting beauty and performance.
What Is the Z-Technique?
The Z-technique is a specialized installation method used in natural stone applications that involves applying mortar or positioning stones in a diagonal, zigzag pattern rather than following traditional straight-line or grid approaches. Named for the distinctive “Z” shape created during the application process, this technique has become a trusted solution among professional stone installers for preventing installation failures and ensuring long-term durability.
Originating from the commercial stone installation industry, the Z-technique was developed as installers recognized that conventional application methods often created weak points and stress concentrations in stone installations. When mortar is applied in straight lines or when stones are placed in perfectly aligned rows, these patterns can create natural fault lines where cracks, displacement, or delamination are more likely to occur over time.
The fundamental principle behind the Z-technique involves distributing mechanical stress and environmental forces more evenly across the installation surface. By working in an angled or zigzag pattern, installers create interlocking stress points that work together to absorb movement, temperature fluctuations, and settling that naturally occur in building structures. This dispersed stress distribution significantly reduces the likelihood of failure at any single point.
In practice, the Z-technique can refer to both mortar application patterns and stone placement sequences. When applying mortar, installers use a notched trowel in diagonal strokes that change direction, creating the characteristic Z-pattern. For stone placement, the technique involves installing pieces in a staggered, diagonal sequence rather than working row by row or section by section. This approach ensures that adjacent stones cure and bond at different times, preventing the formation of continuous seams that could become weak points in the finished installation.
The Problem This Technique Solves
Common Stone Installation Failures
Natural stone installations can fail in several predictable ways when proper techniques aren’t followed. Understanding these common failure modes helps explain why advanced methods like the Z-technique have become essential in professional installations.
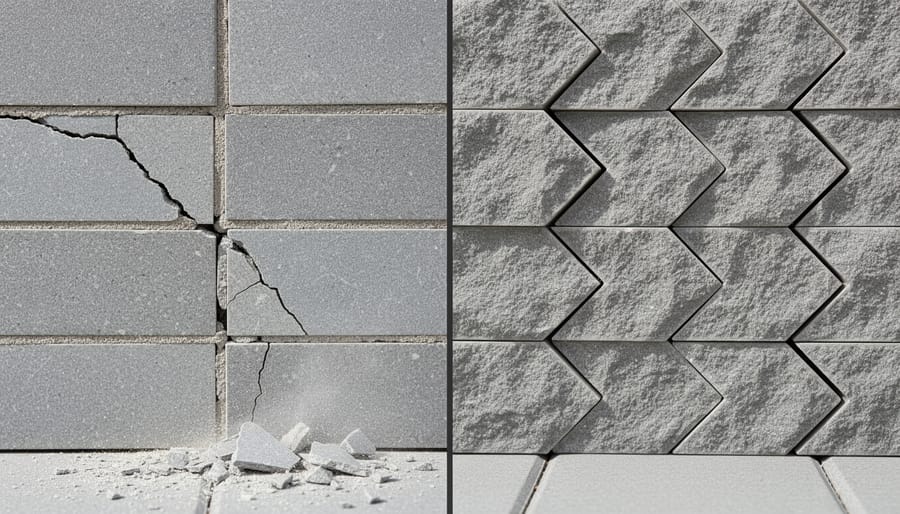
Cracking along grout lines represents one of the most frequent problems, occurring when thin-set mortar doesn’t provide adequate support beneath the stone. As the stone flexes under foot traffic or temperature changes, stress concentrates at the grout joints, leading to hairline fractures that progressively worsen.
Corner breakage typically affects large format tiles, particularly at entry points and high-traffic areas. Without full mortar coverage underneath, corners become vulnerable to impact damage and can chip or break completely away from the installation.
Hollow spots develop when trowel ridges don’t collapse fully during installation, leaving air pockets beneath the stone. These voids compromise the tile’s structural integrity and often announce themselves with a distinctive hollow sound when tapped. Over time, hollow areas can lead to cracking or complete tile failure.
Delamination occurs when the bond between stone and substrate fails entirely, causing tiles to lift or detach. This failure mode often results from inadequate mortar coverage, improper substrate preparation, or using installation methods unsuited to the stone type and size being installed.
Why Traditional Methods Fall Short
Conventional installation methods like straight-line or standard grid patterns work well for smaller tiles and lighter materials, but they reveal significant limitations when dealing with large-format slabs and heavy natural stone. The primary issue is lippage, where adjacent tiles sit at uneven heights, creating a visibly uneven surface that detracts from the stone’s beauty and can present tripping hazards.
Traditional approaches typically involve setting one tile completely before moving to the next, allowing adhesive to cure in sequence. With large-format tiles measuring 24 inches or greater, this method creates problems. The weight of heavy stone materials like granite, marble, or quartzite can cause tiles to settle unevenly as the adhesive cures. Without proper support during the critical curing period, corners and edges may sink or rise, especially when the substrate has minor imperfections.
Standard grid patterns also struggle with the cumulative effect of slight variations across multiple large tiles. What appears acceptable with smaller tiles becomes glaringly obvious when each piece covers several square feet. The result is a professional installation that looks amateur, requiring costly repairs or complete reinstallation to achieve the smooth, seamless finish that natural stone deserves.
How the Z-Technique Works
The Application Process
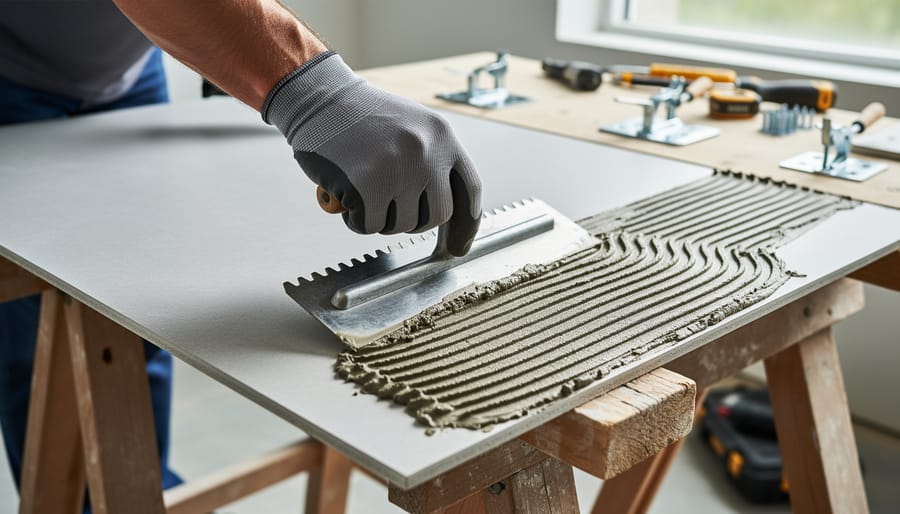
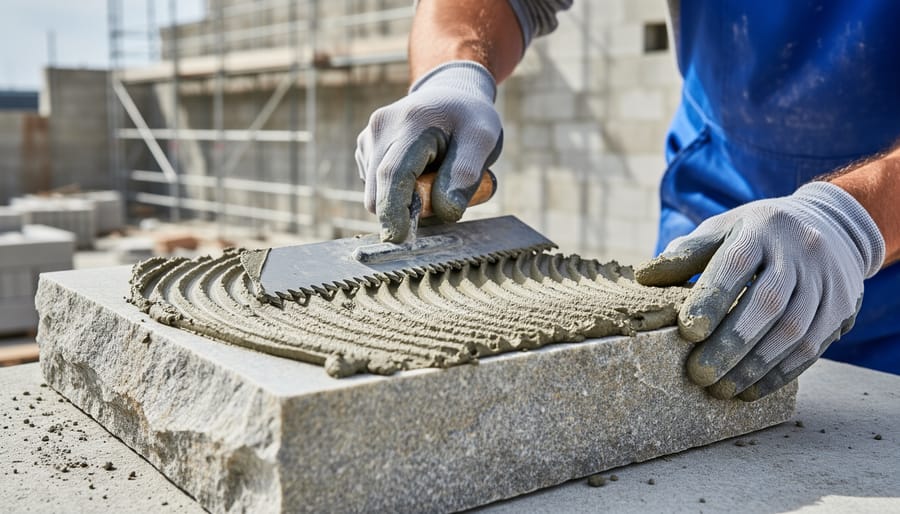
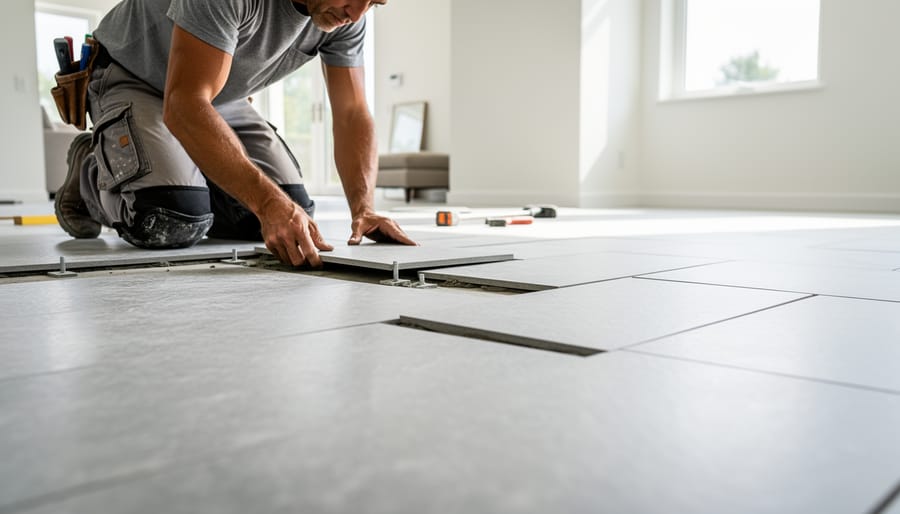
The Z-technique requires careful execution to achieve optimal results. Professional installers begin by applying mortar to the substrate using a notched trowel, creating uniform ridges in a consistent pattern. The key difference from standard applications lies in the directional approach: rather than straight lines, the installer creates a Z-shaped pattern with the trowel, ensuring complete coverage while allowing proper air release.
When placing the stone, installers start at one corner and work systematically across the surface. Each tile or slab is positioned at a slight angle, then pressed firmly into the mortar bed using the Z-motion technique. This involves applying pressure at three critical points that form a Z-pattern across the stone’s surface: first the top corner, then the center middle area, and finally the opposite bottom corner. This sequence forces air and excess mortar outward in a controlled manner, preventing voids beneath the installation.
The installer uses a slight twisting motion at each pressure point, which helps the mortar ridges collapse uniformly and creates maximum contact between the stone and substrate. A rubber mallet may be used for additional pressure, though care must be taken not to damage the stone surface. Throughout the process, installers check for proper adhesion by gently lifting corners to verify complete mortar transfer.
The final step involves back-buttering larger format tiles or problematic stones with a thin layer of mortar before placement, ensuring no gaps remain in the coverage pattern.
Key Principles That Make It Effective
The Z-technique’s effectiveness stems from three fundamental principles that work together to protect natural stone installations from common failure points.
First, the method excels at load distribution by creating multiple contact points between the stone and substrate. Rather than relying on full-coverage adhesion, strategically placed adhesive beads form a flexible framework that spreads weight evenly across the stone’s back surface. This prevents stress concentration in any single area, which is especially critical for large-format slabs or stones with natural variations in thickness.
Second, the technique incorporates flexibility zones between the adhesive beads. These intentional gaps allow the stone to expand and contract naturally in response to temperature changes and humidity fluctuations. Natural stone is a living material that moves subtly over time, and rigid, full-coverage installations often crack or delaminate when this movement is restricted. The Z-pattern’s flexibility zones accommodate this natural behavior while maintaining secure adhesion.
Finally, the design provides integrated stress relief mechanisms. When external forces like building settlement or substrate movement occur, the flexible adhesive pattern absorbs and disperses these stresses rather than transferring them directly to the stone. This dynamic response system significantly reduces the risk of cracking, lippage, and bond failure compared to traditional installation methods.
When to Use the Z-Technique
Best Applications for Natural Stone
The Z-technique delivers optimal results when working with large-format tiles measuring 12×24 inches or larger, where the risk of lippage increases significantly. This method proves especially valuable for rectified porcelain and natural stone tiles with minimal edge tolerances. Exterior installations benefit tremendously from the Z-technique, as it ensures proper drainage slopes while maintaining level transitions between tiles exposed to weathering and temperature fluctuations.
High-traffic commercial spaces like hotel lobbies, retail environments, and office buildings represent ideal applications where long-term flatness is crucial for both aesthetics and safety. The technique excels with dense stone varieties such as granite, quartzite, and marble slabs that require precise leveling due to their weight and rigidity. Residential bathrooms and kitchen backsplashes also benefit, particularly when using book-matched or vein-matched stone where alignment is critical. Areas subject to moisture, such as shower floors and pool decks, see improved performance because the Z-technique creates more uniform surfaces that resist water pooling and facilitate proper drainage.
Substrate and Environmental Considerations
The decision to employ the Z-technique depends primarily on three interconnected factors: the natural stone’s composition, environmental conditions, and the stone’s coefficient of thermal expansion.
Substrate type plays a crucial role in determining whether the Z-technique is necessary. Concrete slabs, wood framing, and existing tile installations all respond differently to temperature fluctuations and moisture exposure. When installing stone over substrates prone to movement or in areas with poor waterproofing, the Z-technique provides additional flexibility that prevents stress transfer to the stone surface.
Climate conditions significantly influence installation methodology. Regions experiencing extreme temperature variations between seasons create expansion and contraction cycles that can stress traditionally installed stone. Areas with high humidity, frequent freeze-thaw cycles, or direct sun exposure on exterior applications are prime candidates for the Z-technique. Coastal environments with salt air exposure also benefit from this method’s stress-relieving properties.
The stone’s expansion coefficient determines its vulnerability to thermal movement. Darker stones absorb more heat and expand more dramatically than lighter varieties. Large-format tiles, which have greater surface area exposed to temperature changes, are particularly susceptible to thermal stress. When combining multiple substrate and environmental risk factors with high-expansion stone materials, the Z-technique transitions from optional best practice to essential installation requirement for long-term performance and aesthetic preservation.
Professional Installation Tips
Successful implementation of the Z-technique requires careful preparation and attention to detail throughout the installation process. Before beginning, ensure you have the necessary tools on hand: a notched trowel appropriate for your tile size, a flat trowel for back-buttering, thin-set mortar mixed to proper consistency, and a level for continuous monitoring.
Start by applying mortar to the substrate using the notched trowel in one direction, creating uniform ridges. The key is maintaining consistent trowel angle and pressure to achieve even coverage. Next, back-butter each stone piece by applying a thin layer of mortar to its back surface using the flat trowel, then comb through with the notched trowel in a perpendicular direction to the substrate ridges. This perpendicular application creates the characteristic “Z” pattern when the stone is pressed into place, eliminating air pockets and maximizing bond strength.
Common mistakes include using too much or too little mortar, failing to maintain the perpendicular pattern, and not checking for proper coverage. Before the mortar sets, periodically remove a stone to verify that at least 95 percent coverage has been achieved on both surfaces. Inadequate coverage is the leading cause of installation failure, particularly with large format tiles or exterior applications.
Quality control checkpoints should occur at multiple stages. Check substrate flatness before starting, verify mortar consistency throughout the day, and conduct periodic pull tests on sample pieces. For critical installations, consider documenting coverage percentages with photographs as work progresses.
Professional installers recommend practicing the technique on sample boards before tackling the actual project. This hands-on approach helps develop the muscle memory and timing necessary for consistent results, particularly when working with premium natural stone materials where mistakes prove costly.
Z-Technique vs. Other Advanced Installation Methods
The Z-technique stands among several advanced installation methods used for securing natural stone, each with distinct advantages for specific applications.
Back-buttering involves applying mortar to the reverse side of each stone tile before setting it onto a substrate. While effective for smaller tiles and ensuring good adhesion, it’s more labor-intensive than the Z-technique and doesn’t provide the same mechanical anchoring strength for larger format stones. Back-buttering works best for horizontal installations or moderate-sized tiles where weight isn’t the primary concern.
Full-mortar bed methods create a thick layer of mortar between the stone and substrate, offering excellent coverage and stability. This traditional approach excels for uneven substrates and heavy stone installations, but requires more material, longer curing times, and greater wall depth than the Z-technique. It’s ideal for floors and areas requiring maximum load distribution.
Mechanical anchoring systems use metal clips, pins, or rails to secure stone panels independently of adhesives. These systems provide superior strength for large-format cladding and curtain walls, especially in high-rise applications. However, they’re significantly more expensive and complex than the Z-technique, requiring specialized hardware and installation expertise.
The Z-technique offers a practical middle ground: stronger than simple back-buttering, faster and more economical than mechanical systems, and suitable for vertical installations where full-mortar beds would be excessive. It’s particularly effective for residential and commercial wall applications using medium to large-format natural stone, combining adequate mechanical support with efficient installation procedures.
Proper installation techniques like the Z-technique represent the difference between a stone surface that lasts decades and one that requires premature repair or replacement. While the materials themselves possess inherent durability, their long-term performance depends entirely on the expertise applied during installation. Understanding these advanced methods empowers you to make informed decisions when selecting an installer for your natural stone project.
Before committing to any stone installation project, take time to discuss methodology with potential installers. Ask specific questions about their approach to stress management, particularly for large-format panels and exterior applications. An installer familiar with the Z-technique and similar advanced methods demonstrates a commitment to quality that extends beyond basic competency.
For consumers and design professionals alike, verifying your installer’s knowledge of these specialized techniques protects your investment and ensures optimal results. Don’t hesitate to request references or examples of previous work involving challenging installations. When in doubt, consult with certified stone professionals who can provide guidance tailored to your specific project requirements. The time invested in finding the right expertise pays dividends in performance, aesthetics, and longevity.