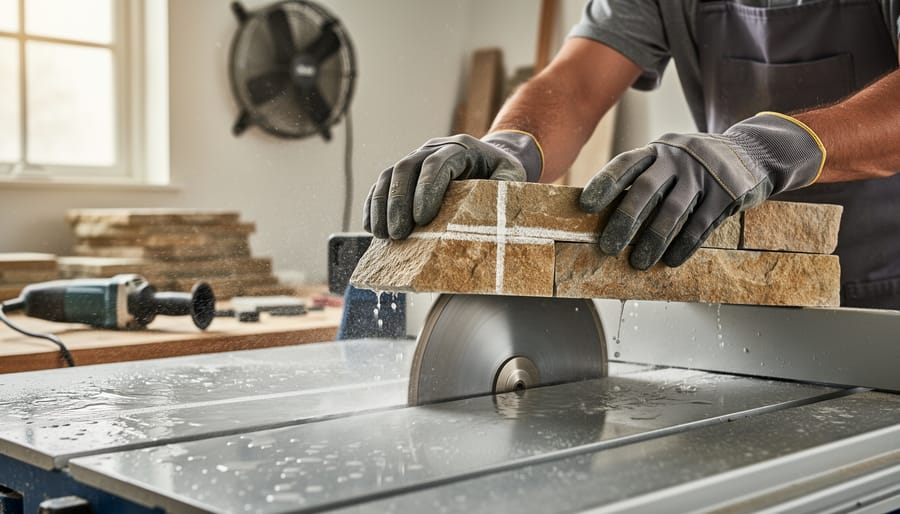
Measure twice and mark your cutting line with a pencil or chalk directly on the stone veneer face, ensuring precision before making any cuts. Select a diamond blade specifically rated for natural stone—wet-cutting blades reduce dust by up to 90% and extend blade life significantly. Set up your work area with proper ventilation, position the stone on a stable surface, and always cut from the finished face to prevent chipping on visible edges.
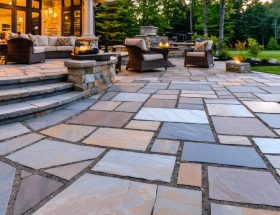
Stone veneer transforms spaces with authentic texture and timeless appeal, but achieving professional results during DIY stone veneer installation requires understanding the right cutting techniques. Whether you’re working with natural limestone, slate, or quartzite, the cutting process demands specific tools, safety equipment, and methodical approaches that differ substantially from cutting ceramic tile or wood.
The challenge lies not just in making the cut, but in doing so without damaging the stone’s natural beauty or compromising your safety. Stone dust contains crystalline silica, a serious respiratory hazard, while improper cutting techniques can shatter expensive material or create jagged edges that won’t fit properly. Professional installers understand that successful stone cutting combines the right equipment with proper technique—using angle grinders for detailed cuts, wet saws for straight lines, and scoring tools for thinner veneers.
This comprehensive guide walks you through tool selection, essential safety protocols, proven cutting methods for different stone types, and solutions to common problems like chipping and uneven edges, ensuring your project delivers the elegant, seamless finish that natural stone veneer promises.
Understanding Stone Veneer: What You’re Actually Cutting

Natural Stone Veneer Characteristics
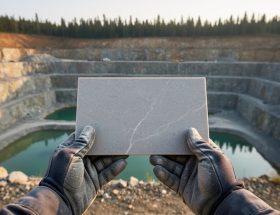
Understanding the unique characteristics of different natural stone types is essential for selecting the right cutting tools and techniques. Each stone variety presents distinct challenges based on its hardness, porosity, and composition.
Granite ranks among the hardest natural stones, requiring diamond-tipped blades and specialized equipment. Its dense crystalline structure resists wear but can chip if cut improperly. For detailed information on granite properties, consult comprehensive material guides before beginning your project.
Marble offers moderate hardness with a softer, more uniform composition than granite. Its calcium carbonate base cuts more smoothly but remains susceptible to heat damage, demanding slower cutting speeds and adequate water cooling.
Limestone and travertine share similar sedimentary origins, making them the softest options for veneer applications. Their porous nature allows easier cutting with standard masonry blades, though their delicate structure requires gentler handling to prevent crumbling.
Slate’s layered metamorphic composition creates natural cleavage planes that simplify cutting along grain lines but complicate cross-grain cuts. Its tendency to flake demands sharp blades and controlled pressure throughout the cutting process.
Thickness and Density Considerations
Stone veneer typically ranges from 3/4 inch to 1-1/4 inches thick, and this measurement directly impacts your cutting approach. Thicker veneers require more aggressive blades with deeper cutting capacity and may need multiple passes to complete cuts. They also generate more dust and heat, necessitating frequent cooling breaks and adequate water flow when using wet saws.
Density plays an equally important role in blade selection. Harder, denser stones like granite demand diamond blades with softer bonds that wear away to expose fresh cutting edges. Conversely, softer stones such as limestone work better with harder-bonded blades that resist premature wear. Choosing the wrong blade-to-density combination results in slow cutting, excessive blade wear, or rough, chipped edges. Always verify your stone’s density rating and match it to manufacturer blade specifications for optimal performance and longevity.
Essential Tools for Cutting Stone Veneer
Wet Saws: The Professional’s Choice
When working with stone veneer, wet saws deliver the precision and clean edges that professional installers demand. The continuous water stream serves two essential purposes: it cools the diamond blade to prevent overheating and virtually eliminates the hazardous silica dust that dry cutting produces.
For most stone veneer projects, a standard 7-inch or 10-inch tile saw with a diamond blade works perfectly for cutting individual pieces to size. These compact saws offer adequate power for veneer thickness (typically 3/4 to 1-1/4 inches) and provide excellent control for detailed cuts around outlets, corners, and edges. The sliding table feature on quality tile saws ensures straight, consistent cuts every time.
Larger masonry saws become necessary when cutting substantial quantities of stone or working with thicker material. These heavy-duty machines accommodate 14-inch blades and handle continuous production work without bogging down. Consider a masonry saw if you’re tackling an extensive facade project or frequently work with stone.
Blade selection directly impacts your results. Use a continuous rim diamond blade specifically designed for natural stone rather than segmented blades meant for concrete or brick. Continuous rim blades produce smoother edges with minimal chipping, which is critical for visible cut edges on corners and around openings.
The water reservoir must remain filled throughout cutting. Running a diamond blade dry, even briefly, will damage the blade and potentially crack your stone. Change the water regularly as it becomes saturated with stone slurry, which reduces cooling efficiency. Most professionals also adjust water flow to create a steady stream directly at the cutting point without flooding the work surface.

Angle Grinders for Detail Work
Angle grinders equipped with diamond blades are indispensable for detailed stone veneer work where precision matters most. The 4-1/2 inch models offer superior maneuverability for tight curves and intricate notches around electrical outlets, corners, and irregular edges. These compact grinders typically operate on 6 to 10 amps, providing sufficient power for controlled cuts without the bulk of larger tools. For slightly longer straight cuts or deeper penetration, 7-inch angle grinders deliver more cutting depth while remaining manageable for detail work.
Diamond blade selection directly impacts your results. Dry-cutting segmented blades work well for quick adjustments and rough shaping, though they generate considerable dust. Continuous rim diamond blades produce smoother edges ideal for visible cuts but require water cooling to prevent overheating. Variable speed grinders provide better control when working near finished edges or delicate stone corners.
The key advantage of angle grinders lies in their versatility for on-the-spot modifications. When a piece needs minor trimming to fit perfectly or you discover an unexpected obstacle during installation, an angle grinder allows immediate corrections without returning to a larger saw station. Always maintain a firm two-handed grip and let the tool do the work rather than forcing it through the material, which can cause chipping or blade damage.
Manual Tools and When to Use Them
Manual tools remain essential for stone veneer cutting, particularly when precision matters more than speed. Stone chisels paired with a hammer excel at scoring and splitting slate, flagstone, and other naturally layered materials along their grain. This approach produces cleaner breaks with less dust and noise than power tools, making it ideal for indoor projects or noise-sensitive environments.
Carbide-tipped scoring tools create controlled fracture lines on thinner veneer pieces. Score deeply along your cut line, then apply pressure with a snap cutter designed for tile and stone. This method works exceptionally well for straight cuts on slate and soft sedimentary stones under half an inch thick.
Manual tools prove superior when working with irregular shapes or making small adjustments during installation. They offer better tactile feedback, allowing you to feel the stone’s natural break points and grain structure. For projects requiring only a few cuts, hand tools eliminate setup time and equipment costs while delivering professional results.
However, recognize their limitations. Manual methods require more physical effort and work poorly on harder stones like granite or thick pieces exceeding three-quarters of an inch. Reserve hand tools for finishing touches, delicate work around edges, or situations where power equipment access is impractical.
Choosing the Right Diamond Blade
Blade Types Matched to Stone Hardness
Matching the right blade to your stone’s hardness is essential for clean cuts and preserving your material. Hard stones like granite and quartzite demand diamond blades with continuous or turbo rims specifically rated for dense materials. These blades feature concentrated diamond segments that can withstand the extreme abrasion these stones produce. Using a blade designed for softer materials on granite will dull immediately, create excessive heat, and potentially crack your expensive veneer.
Soft stones including limestone, sandstone, and travertine require diamond blades with softer bonds and segmented rims. These blades allow the diamonds to wear away gradually, exposing fresh cutting edges as you work through the more porous material. The segmented design also provides crucial cooling channels that prevent overheating in slower cuts.
Using the wrong blade creates multiple problems. A hard-stone blade on soft materials won’t cut efficiently because the diamonds never properly expose themselves, resulting in glazing and burnishing rather than cutting. Conversely, a soft-stone blade on granite wears down within minutes, wastes money, and produces rough, chipped edges that ruin the veneer’s appearance.
Always verify your stone type before purchasing blades, and check the manufacturer’s specifications to ensure compatibility. This simple matching process saves both your material investment and project timeline.
Wet vs. Dry Cutting Blades
Stone veneer can be cut with either wet or dry blades, each designed for specific applications. Wet blades use water to cool the blade and suppress dust during cutting, while dry blades operate without water. For veneer work, wet cutting is almost always the preferred method for several compelling reasons.
Wet cutting produces significantly less airborne silica dust, which poses serious respiratory health risks. The water also keeps both the blade and stone cool, preventing heat damage that can cause veneer to crack or discolor. Additionally, wet cutting delivers cleaner, more precise cuts with less chipping along edges—essential when working with thin veneer pieces where every millimeter matters.
Dry cutting blades are appropriate only for quick outdoor cuts where water isn’t available or for specific field adjustments. However, they generate excessive dust, wear faster, and increase the risk of thermal damage to delicate veneer. Most professional installers exclusively use wet cutting methods with proper equipment like wet saws or angle grinders with water feed attachments to ensure quality results and maintain safe working conditions.
Safety Essentials: Protecting Yourself During Cuts

Personal Protective Equipment (PPE)
Cutting stone veneer generates significant hazards that demand proper protective equipment—not optional safety suggestions, but essential barriers between you and serious injury.
Start with ANSI Z87.1-rated safety glasses, not basic eyewear from the hardware store. Stone cutting propels razor-sharp fragments at high velocity, and standard glasses lack the impact resistance and side shields needed for adequate protection. These fragments can cause permanent eye damage or blindness.
Respiratory protection is equally critical. Stone dust contains crystalline silica, which causes silicosis—a progressive, incurable lung disease. You need a NIOSH-approved respirator rated N95 or higher, preferably a half-face respirator with P100 filters for extended cutting sessions. Cloth dust masks provide virtually no protection against these microscopic particles that penetrate deep into lung tissue.
Hearing protection matters because wet saws and angle grinders produce noise levels exceeding 90 decibels, enough to cause permanent hearing loss with repeated exposure. Use foam earplugs or earmuffs rated for at least 25 NRR (Noise Reduction Rating).
Heavy-duty work gloves protect against cuts and abrasions when handling sharp stone edges, though remove them when operating power tools to prevent catch hazards. Long sleeves and pants made from durable fabric shield your skin from flying debris and the cooling water spray that carries stone particles.
Consider steel-toed boots as well, since stone veneer pieces are surprisingly heavy and dropping one on an unprotected foot can crush bones. This complete PPE ensemble transforms stone cutting from a dangerous activity into a controlled, manageable process.
Workspace Safety and Ventilation
Proper workspace preparation is essential when cutting stone veneer to protect both yourself and your work environment. Always set up cutting operations outdoors or in a well-ventilated garage with wide-open doors. Stone cutting generates substantial amounts of silica-containing dust, a serious respiratory hazard that can cause silicosis with prolonged exposure. Even when using wet-cutting methods that suppress most dust, adequate ventilation remains critical.
When establishing your outdoor workspace, position the cutting area on level ground away from windows, air conditioning units, and high-traffic zones. Create a containment system for water runoff by setting up within a designated area where slurry—the mixture of water and stone particles—can be controlled and properly disposed of according to local regulations. Never allow this runoff to enter storm drains, as it contains fine sediment that can harm waterways.
Electrical safety demands special attention during wet cutting. Use only Ground Fault Circuit Interrupter (GFCI) protected outlets to prevent electrocution hazards. Keep all electrical connections, extension cords, and power tools as far from standing water as possible, and inspect cords regularly for damage. Consider using battery-powered tools when feasible to eliminate shock risks entirely.
Secure your workpieces firmly before cutting using stable sawhorses, workbenches, or purpose-built cutting stands. Unstable stone can shift during cutting, causing blade binding, kickback, or ruined cuts. Use clamps or non-slip pads to prevent movement, ensuring your hands remain clear of the cutting path. Always wear NIOSH-approved respirators (N95 minimum for dust, P100 for silica exposure), safety glasses, hearing protection, and water-resistant gloves throughout all cutting operations.
Step-by-Step: Making Clean, Accurate Cuts
Measuring, Marking, and Planning Your Cuts
Accurate measuring and marking prevent costly mistakes when cutting stone veneer. Before making any cut, measure your installation area carefully and transfer those dimensions to the stone surface using appropriate marking tools.
Soapstone pencils and wax-based markers work best for marking stone veneer because they create visible lines that won’t easily rub off during handling. Standard pencils and chalk often fail on textured or darker stone surfaces. Mark your cut lines clearly on the finished face of the stone, ensuring they’re straight and precise.
Always account for the kerf—the material removed by the blade’s thickness during cutting. Most diamond blades remove approximately 1/8 inch of material, so factor this into your measurements. If you need a piece that’s exactly 12 inches wide, mark your cut line at 12-1/8 inches to compensate for the kerf loss.
The old carpenter’s rule applies equally to stone work: measure twice, cut once. Stone veneer cannot be pieced back together after an incorrect cut, making verification essential before starting your saw.
For complex cuts around outlets, corners, or irregular shapes, create cardboard or paper templates first. Trace these templates onto your stone veneer to ensure accurate reproduction of intricate angles and curves. This approach significantly reduces errors on challenging cuts and saves valuable material.
Executing Straight Cuts with a Wet Saw
Position the marked stone veneer on the wet saw table with the cutting line aligned to the blade. Turn on the water pump first, then the blade motor, allowing both to reach full operating speed before beginning your cut. This ensures proper cooling and dust suppression throughout the process.
Guide the stone slowly and steadily toward the blade using consistent, gentle pressure. Let the blade do the cutting work rather than forcing the material through. Rushing the cut generates excessive heat and increases the risk of chipping or blade damage. For most stone veneer pieces, a feed rate of approximately one inch per three to five seconds produces clean results.
Support larger pieces on both sides of the blade to prevent binding or uneven cuts. If your wet saw lacks adequate table space, use roller stands or have an assistant support the outfeed side. This prevents the stone from tipping or breaking as it passes through the blade, which is particularly important when working with thin veneer materials.
Keep your hands at least six inches from the blade path at all times. Use a push stick for smaller pieces that bring your fingers too close to the cutting zone. Maintain a firm grip on the stone throughout the cut to prevent shifting, which can create angled or uneven edges. Once the cut is complete, turn off the blade motor before retrieving the finished piece.

Making Curves, Notches, and Detail Cuts
For non-linear cuts and detailed work, an angle grinder equipped with a diamond blade provides the precision needed for curves and intricate shapes. Mark your cutting line clearly, then work slowly along the curve, letting the blade follow your pattern rather than forcing it. For tight curves, make relief cuts perpendicular to your curve line, creating small segments that break away cleanly as you complete the primary cut.
When cutting openings for electrical outlets or fixtures, measure twice and mark the perimeter accurately. Drill corner holes first using a diamond-core bit, then connect these points with your angle grinder. This technique prevents overcuts and maintains clean corners. For switch plates and outlets, cutting slightly smaller than needed allows for adjustment during installation.
Exposed edges require finishing attention to achieve professional results. Use a hand polisher with progressive grits of diamond pads, starting at 50-grit and working up to 400-grit for a refined appearance. This process is especially important when building natural stone walls where cut edges will be visible. For a natural look matching the stone’s face, simply break sharp edges with 100-grit sandpaper, avoiding an overly polished contrast with the textured surface.
Handling Stone Veneer: Before, During, and After Cutting
Transporting and Storing Veneer
Proper handling of stone veneer before cutting prevents damage and ensures accurate results. When transporting pieces, always carry veneer with both hands, supporting from underneath rather than gripping edges. Stone veneer is brittle along thin edges, making it vulnerable to chipping from even minor impacts.
Store veneer vertically whenever possible, leaning pieces at a slight angle against a wall with protective padding between each sheet. This prevents warping and reduces pressure on edges. If horizontal storage is necessary, place veneer on a completely flat surface with foam or cardboard spacers between layers to distribute weight evenly. Never stack pieces more than waist-high to avoid excessive pressure on lower sheets.
Protect edges by wrapping corners with foam corner guards or bubble wrap, especially during transport. Inspect each piece before cutting, marking any existing chips or weak spots to avoid. Keep your storage area dry and climate-controlled, as moisture fluctuations can cause natural stone to expand or contract slightly, affecting cutting precision. Position veneer close to your cutting station to minimize handling and potential drops.
Supporting Material During Cuts
Proper support prevents costly mistakes during stone veneer cutting. Always position a support table or stable surface directly beneath the cutting area to catch pieces as they separate from the main slab. Without adequate support, the weight of overhanging material creates stress that can cause sudden breakage or unsightly chips at the cut’s completion.
As you near the end of each cut, reduce blade pressure and cutting speed to maintain control. Have a helper support larger pieces, or use roller stands positioned at the same height as your cutting surface. This prevents the separated piece from dropping and potentially cracking.
Binding occurs when cut edges pinch the blade during operation. To prevent this, use wedges or shims to keep the kerf open on longer cuts. If you notice the blade struggling or hear changes in motor sound, stop immediately and reassess your support setup. Forcing through a binding situation damages both blade and stone.
These stone surface techniques apply whether working with wet saws or angle grinders, ensuring clean cuts and minimizing waste throughout your project.
Common Cutting Problems and How to Fix Them
Preventing and Minimizing Chipping
Chipping occurs when the blade’s force fractures the stone along its natural weak points rather than cutting cleanly through it. This happens most frequently with brittle materials like slate, thin limestone, and highly textured travertine. Harder stones like granite generally chip less but can still fracture at edges if improperly supported.
To minimize chipping, apply painter’s tape or masking tape along your cut line on both the top and bottom surfaces. This simple technique helps hold surface fragments together during cutting and significantly reduces edge breakage. For particularly delicate edges or decorative profiles, consider using two layers of tape for added protection.
Cutting from the back side is another effective strategy. Since most blades chip upward as they exit the material, reversing your stone so the visible face is down means any chip-out occurs on the hidden side. Mark your cut line on the back using measurements transferred from the front.
When working with softer sedimentary stones like sandstone or certain limestones, take extra care with blade selection. Using a fine-grit diamond blade designed specifically for softer materials and reducing your cutting speed both help prevent excessive chipping. Always support the stone completely on both sides of your cut line to prevent stress fractures.
When Cuts Go Wrong: Salvage Strategies
Even with careful planning, stone veneer pieces occasionally crack during cutting. When this happens, assess the damage immediately. Minor edge chips on pieces destined for corners or edges can often be hidden by grout lines or trim work. If the crack runs through the center of a highly visible piece, attempting repairs rarely produces professional-looking results.
Consider adjusting your installation layout to accommodate damaged pieces. A cracked stone that was meant for eye-level placement might work perfectly along a floor line where furniture will partially conceal it. You can also flip pieces to position cracks toward the wall side, though this only works if the veneer face remains undamaged.
For projects requiring tight color matching from a specific lot, even damaged pieces have value. Break them into smaller sections for use as fill pieces around outlets, edges, or tight corners where you’d need to make cuts anyway.
Know when to walk away. If a premium piece with unique veining cracks beyond salvage, starting fresh with a new piece saves time compared to creative workarounds that compromise the final appearance. Factor a 10-15 percent overage into your material orders specifically for these situations. Stone cutting involves inherent unpredictability, and having backup pieces on hand prevents project delays and ensures you can maintain quality standards throughout your installation.
Cleanup and Blade Maintenance
Proper cleanup after cutting stone veneer protects your investment in tools and maintains a safe workspace. Begin by unplugging all power tools and allowing blades to cool completely before handling. While blades are cooling, use a shop vacuum with a HEPA filter to collect stone dust from the cutting area, working from top to bottom to prevent dust redistribution.
Once cooled, remove the diamond blade and inspect it for damage or excessive wear. Rinse the blade thoroughly with clean water to remove accumulated stone slurry, which can harden and reduce cutting efficiency. Use a stiff nylon brush to gently scrub between the diamond segments, clearing any embedded debris. Never use wire brushes, as they can damage the blade matrix. Allow the blade to air dry completely before storage to prevent rust on the core.
For wet saws, drain the water reservoir and flush the pump system with clean water to remove sediment that can clog the mechanism. Wipe down all tool surfaces with a damp cloth to remove stone dust, paying special attention to ventilation ports and moving parts.
Stone waste disposal varies by location, so check local regulations. Most municipalities accept small quantities of stone debris with regular construction waste, but slurry containing fine particles may require special handling. Never wash large amounts of slurry down drains, as it can solidify and cause plumbing blockages. Instead, allow slurry to settle in a bucket, pour off clear water, and dispose of the solidified material as solid waste. Clean cutting areas may also yield usable scrap pieces suitable for mosaic projects or decorative accents, reducing overall waste.
Cutting stone veneer is an entirely achievable skill for DIY enthusiasts and professionals alike when you equip yourself with the right tools, prioritize safety, and follow proven techniques. While working with natural stone may seem intimidating at first, understanding the material properties and selecting appropriate cutting methods demystifies the process considerably. The key to success lies in preparation—investing in quality diamond blades, wearing proper protective equipment, and setting up adequate ventilation and dust control systems before making your first cut.
Before tackling visible pieces for your natural stone facade projects, start with practice cuts on scrap materials or less conspicuous sections. This approach allows you to develop a feel for your tools, understand how different stone types respond to cutting pressure, and refine your technique without the stress of potentially ruining expensive materials. As your confidence grows, you’ll find that achieving clean, professional cuts becomes second nature. Remember that even experienced installers occasionally need multiple attempts to achieve perfect results, so patience and persistence are essential virtues in stone veneer installation. With practice and attention to detail, you’ll soon be producing cuts that rival professional work.