Assess damage severity before attempting repairs by examining whether chips are surface-level or penetrate through multiple layers, as this determines whether DIY methods will suffice or professional intervention is necessary. Surface chips smaller than a quarter inch typically respond well to epoxy-based repair kits, while deeper cracks or extensive damage require professional resin injection to prevent moisture infiltration and structural compromise.
Clean the damaged area thoroughly with isopropyl alcohol and allow complete drying before applying any repair materials, as residual oils, cleaning products, or moisture create bonding failures that leave visible repair lines. Match repair compounds precisely to your countertop’s color and pattern by testing on an inconspicuous edge first, since quartz coloration varies significantly between manufacturers and even within the same product line.
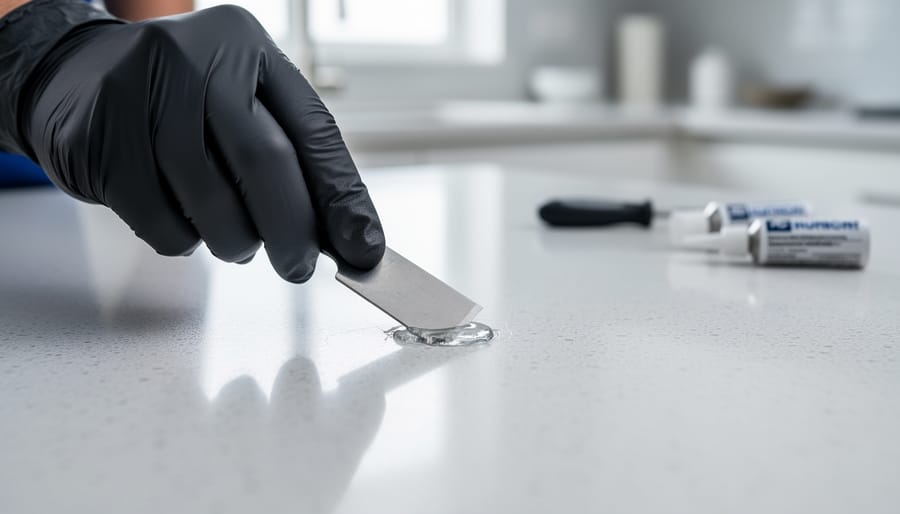
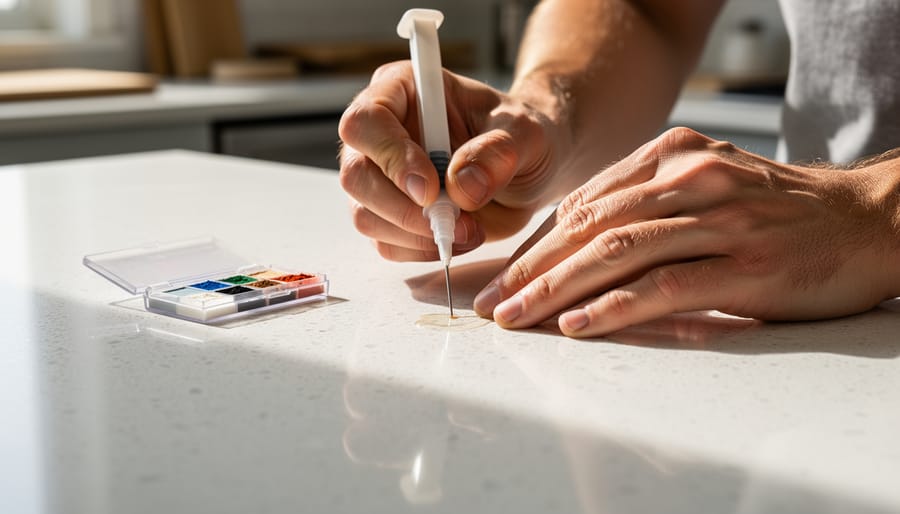
Address chips immediately using two-part epoxy specifically formulated for quartz surfaces, applying thin layers with a razor blade to achieve a flush finish that prevents the repair from catching debris or appearing raised. Most minor repairs cost between $150-$300 when handled by professionals, while DIY kits range from $25-$75, making immediate action financially prudent compared to full section replacement averaging $1,500-$3,000.
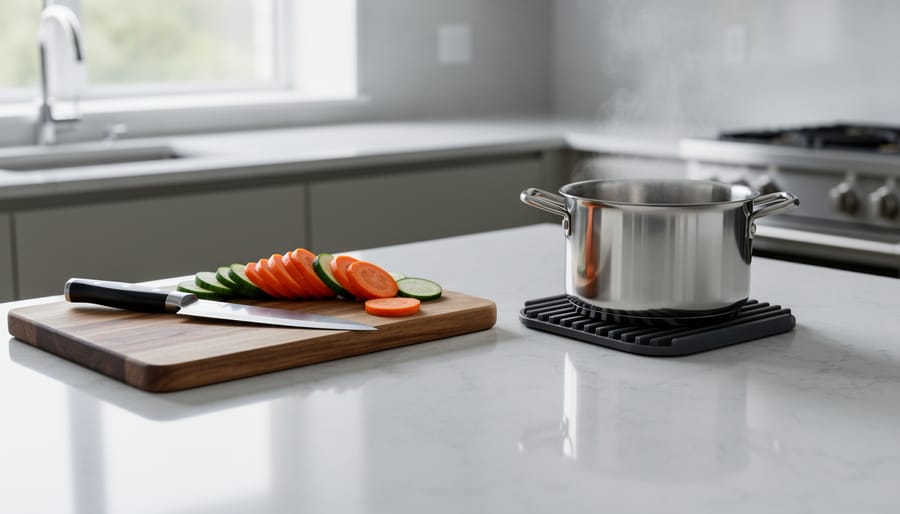
Prevent future damage by using cutting boards consistently, avoiding thermal shock from hot pans placed directly on surfaces, and addressing underlying structural issues like inadequate cabinet support that causes stress fractures. Understanding when damage exceeds DIY capabilities protects your investment, as improper repairs often worsen the problem and increase eventual professional repair costs by 40-60 percent.
Understanding Quartz Countertop Damage: What Can Actually Be Repaired
Surface-Level vs. Structural Damage
Understanding whether your quartz countertop has surface-level or structural damage is essential for determining the appropriate repair approach and cost. Surface-level damage includes scratches, minor chips, stains, and dull spots that affect only the top layer of the material. These cosmetic issues typically don’t compromise the countertop’s function and can often be addressed with DIY methods or simple professional repairs. Examples include light scratches from cutting directly on the surface or small chips along edges.
Structural damage, however, penetrates deeper into the quartz slab and threatens the countertop’s integrity. This includes large cracks extending across the surface, deep fissures near seams, significant breaks, or damage affecting the substrate underneath. Such problems can worsen over time, potentially leading to water infiltration, bacterial growth, or complete countertop failure. Structural issues often result from improper installation, excessive weight, or impact trauma.
To assess your damage, examine the affected area closely. If you can feel depth with your fingernail or see the damage extends beyond the surface layer, it likely requires professional evaluation. Structural damage demands immediate attention to prevent further deterioration and more expensive repairs.
When Replacement Is Your Only Option
While quartz is remarkably durable, certain types of damage exceed the limitations of repair techniques. Understanding when replacement becomes necessary helps you make informed decisions and avoid investing in ineffective fixes.
Severe cracking represents the most common unrepairable damage. Cracks extending through the full thickness of the slab or branching into multiple directions compromise structural integrity. These fractures will continue spreading regardless of repair attempts, creating safety hazards and aesthetic issues that worsen over time.
Extensive heat damage that causes large-scale discoloration, warping, or bubbling cannot be reversed. When heat penetrates deep into the resin matrix, it fundamentally alters the material’s composition. Surface repairs may temporarily mask the problem, but the underlying damage remains permanent.
Failed seams present another irreparable scenario. When seams separate due to settling, improper installation, or structural movement, the misalignment prevents effective re-bonding. The visible gap and height differences require complete removal and reinstallation.
Large impact damage exceeding six inches, particularly near edges or corners, typically demands replacement. The cost and labor involved in extensive repairs often approaches replacement expenses, making new countertops the more practical investment. Additionally, multiple repair sites across a single surface create an inconsistent appearance that diminishes your kitchen’s overall aesthetic value.
DIY Quartz Countertop Repair Solutions
Fixing Minor Chips and Nicks
Minor chips and nicks along the edges or surface of your quartz countertop are among the most common types of damage, and fortunately, they’re often repairable with readily available repair kits. These kits typically contain epoxy or acrylic-based adhesives specifically formulated for engineered stone surfaces.
Before beginning any repair, thoroughly clean the damaged area with isopropyl alcohol to remove oils, debris, and residue. This ensures proper adhesion and a lasting repair. Allow the surface to dry completely before proceeding.
Most quartz repair kits include multiple pigments that you’ll need to mix to match your countertop’s specific color. Test your color mixture on an inconspicuous area or scrap piece first. Quartz comes in countless color variations, from pure white to dramatic veining patterns, so achieving an exact match requires patience. Mix small amounts of the pigments with the clear epoxy or acrylic base until you replicate your countertop’s dominant color. For countertops with veining or speckling, you may need to create multiple color batches to layer the repair.
Apply the mixed adhesive to the chip using a small spatula or the applicator provided in your kit. Overfill the damaged area slightly, as the material may shrink during curing. Allow the repair to cure according to the manufacturer’s instructions, which typically ranges from 30 minutes to several hours depending on the product.
Once fully cured, carefully sand the repair using progressively finer grits of sandpaper, starting with 400-grit and finishing with 1500 to 2000-grit wet/dry sandpaper. Use water while sanding to prevent dust and achieve a smoother finish. For a professional-looking result, polish the repaired area with a stone polishing compound using circular motions until the sheen matches the surrounding surface.
Removing Scratches and Restoring Surface Shine
Superficial scratches on quartz countertops can often diminish the surface’s lustrous appearance, but many minor imperfections respond well to careful polishing. Before attempting any restoration, assess the scratch depth by running your fingernail across it. If your nail doesn’t catch, the scratch is likely superficial and suitable for DIY treatment.
For light scratches, start with a non-abrasive quartz polish or a paste made from baking soda and water. Apply the mixture to a soft, damp cloth and gently buff the affected area using circular motions. Avoid excessive pressure, which can create dull spots or uneven surfaces. Commercial quartz polishing compounds specifically formulated for engineered stone provide the safest option, as they’re designed to work with the resin binders in quartz without causing damage.
For slightly deeper scratches, you may use automotive rubbing compound or a specialized stone polishing powder, but proceed with extreme caution. Test any product in an inconspicuous area first, and never use products containing bleach or highly acidic ingredients that can break down the resin matrix.
Know when to stop. If scratches are deep enough to catch your fingernail, feel rough to the touch, or if initial polishing attempts show no improvement after 5-10 minutes of gentle buffing, discontinue your efforts. Deep scratches often require professional equipment and expertise to repair without creating larger problems. Similarly, avoid polishing matte or textured quartz finishes, as DIY attempts will create shiny spots that stand out against the intended finish. Professional fabricators have access to industrial-grade polishing pads and compounds that match your specific quartz finish.
Addressing Stains and Discoloration
Quartz countertops resist staining better than natural stone, but certain substances can cause discoloration. For removing stubborn stains, start with gentle methods: mix mild dish soap with warm water and apply with a soft cloth. For tougher marks, create a paste using baking soda and water, let it sit for 10-15 minutes, then wipe clean.
Avoid harsh chemicals like bleach, oven cleaners, or products containing acetone, as these can damage the resin binding the quartz particles together. Never use abrasive scrubbing pads or acidic cleaners like vinegar on quartz surfaces.
To determine if discoloration is permanent, assess its depth. Surface stains from coffee, wine, or food typically respond to proper cleaning within 24 hours. Deep discoloration from prolonged chemical exposure, excessive heat, or UV damage may indicate permanent damage to the resin. If a stain persists after multiple gentle cleaning attempts, it has likely penetrated the surface. Professional assessment can confirm whether refinishing or replacement is necessary for severely discolored areas.
Essential Tools and Materials for DIY Repairs
Successfully repairing quartz countertops requires having the right supplies on hand before you begin. For chip and crack repairs, invest in a quality two-part epoxy adhesive specifically formulated for stone surfaces. Look for products that cure to a hard, durable finish and offer color-matching options. Quartz repair kits typically include epoxy resin, hardener, color pigments, and mixing tools, making them ideal for DIYers tackling minor damage.
For scratch removal and surface restoration, you’ll need progressively finer grits of polishing compounds designed for engineered stone. Start with 400-grit sandpaper for deeper scratches, progressing through 800, 1500, and 3000-grit before finishing with a polishing compound. Essential tools include plastic putty knives for applying epoxy, clean microfiber cloths, acetone or denatured alcohol for surface preparation, and painter’s tape for masking repair areas.
When selecting materials, prioritize products from reputable manufacturers that specify compatibility with quartz surfaces. Read product reviews and verify cure times match your project timeline. Having proper lighting and magnification tools helps ensure precise color matching and thorough repairs.
Professional Quartz Countertop Restoration Services
What Professionals Can Fix That You Can’t
While minor quartz damage often yields to DIY solutions, certain repairs demand professional intervention to avoid making problems worse or creating safety hazards.
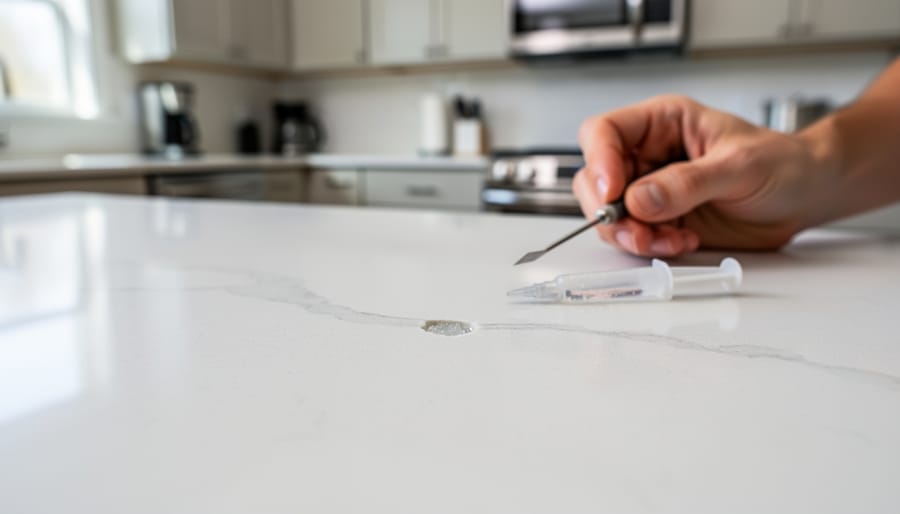
Crack stabilization represents one of the most critical professional repairs. Unlike surface scratches, cracks compromise the countertop’s structural integrity. Professionals use specialized resins and injection techniques to stabilize cracks from underneath, preventing propagation. They can also determine whether a crack has rendered the slab unsafe and requires replacement rather than repair.
Large chip reconstruction exceeds the capabilities of standard repair kits. Professional stone restoration specialists use color-matched epoxy systems with multiple pigments to recreate the depth and variation found in natural quartz patterns. They employ professional-grade tools to sculpt the repair material and achieve a seamless blend with the surrounding surface. The result is virtually invisible, whereas DIY attempts on chips larger than a quarter often remain noticeable.
Seam repair requires precision equipment and expertise. Poorly joined seams can trap moisture and bacteria while creating visual interruptions. Professionals use specialized adhesives, clamping systems, and finishing techniques to create tight, hygienic seams that match the original installation quality.
Complete surface refinishing addresses widespread damage like etching, dullness, or multiple scratches. This process involves diamond abrasive pads in progressive grits, polishing compounds, and industrial equipment that safely restores the factory finish without thinning the slab excessively. Attempting this without proper training risks irreversible damage to your investment.
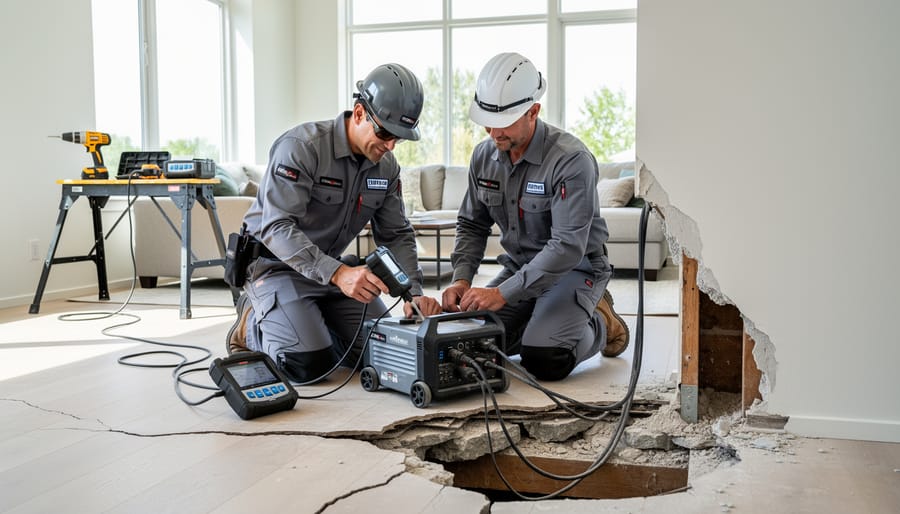
The Professional Repair Process
Professional quartz countertop repair follows a systematic approach that ensures seamless results. The process begins with a thorough damage assessment, where technicians examine the extent and type of damage—whether it’s a chip, crack, scratch, or stain. They evaluate the depth of the damage, the quartz pattern and color, and determine the most appropriate repair method.
Material selection comes next. Professionals use specialized epoxy resins and fillers specifically formulated for engineered stone. They carefully match the color and pattern of your existing countertop, often mixing custom tints to achieve a perfect blend. For more complex patterns, they may use multiple shades to replicate the natural variation in the quartz.
The repair execution involves cleaning the damaged area completely to remove debris, oils, and contaminants. Technicians then apply the matched epoxy or resin in layers, allowing each to cure properly. For chips, they overfill slightly to account for material shrinkage during curing. Cracks may require stabilization techniques to prevent further spreading.
The finishing stage is where expertise truly shows. Once the repair material has fully cured, professionals sand the area using progressively finer grits, starting with coarse abrasives and working down to very fine polishing compounds. They then restore the surface sheen to match the surrounding countertop, whether it’s a polished, honed, or textured finish. The final result should be virtually invisible, with the repaired area blending seamlessly into the original surface both visually and texturally.
Cost Expectations and Value Analysis
Professional quartz countertop repairs typically range from $200 to $500 depending on damage severity and location. Minor chip repairs cost $150-$250, while crack repairs run $250-$400. Seam repairs or extensive damage may reach $500-$800. Compare this to replacement costs of $50-$120 per square foot installed, meaning a standard 30-square-foot countertop replacement costs $1,500-$3,600. Most repairs cost 10-20% of replacement expenses, making professional fixes financially sensible for isolated damage. However, multiple damaged areas, widespread discoloration, or structural issues may justify replacement. Consider the countertop’s age and overall condition when deciding. Warranties often cover manufacturing defects but exclude installation errors or impact damage. Request itemized estimates from certified technicians, verify their experience with quartz specifically, and ask about warranty coverage on repair work before committing.
Preventing Future Damage to Your Quartz Countertops
Daily Care and Maintenance Best Practices
Prevention is always more cost-effective than repair. Following daily care best practices will significantly extend the life of your quartz countertops and minimize the need for repairs.
Use pH-neutral cleaners specifically formulated for quartz or simple soap and water for routine cleaning. Avoid harsh chemicals like bleach, oven cleaners, or products containing alkaline or acidic ingredients, as these can dull the surface or damage the resin binders over time. Acetone-based cleaners and abrasive scrubbing pads should also be avoided.
Always use cutting boards when preparing food. While quartz is scratch-resistant, direct knife contact can still leave marks, especially when cutting with force or using ceramic knives. Similarly, never place hot pots, pans, or baking dishes directly on the surface. Though quartz is heat-resistant, sudden temperature changes can cause thermal shock, leading to cracks or discoloration. Use trivets or hot pads for any cookware above 300 degrees Fahrenheit.
Wipe up spills immediately, particularly those from wine, coffee, or acidic substances like lemon juice. Although quartz is non-porous and stain-resistant, prolonged exposure to certain liquids can affect the surface appearance.
Avoid standing or placing excessive weight on unsupported areas, particularly near seams or overhangs. This prevents stress fractures and structural damage that require professional intervention.
Common Mistakes That Damage Quartz
While quartz countertops are engineered for durability, certain mistakes can cause unnecessary damage that leads to costly repairs. Understanding these common pitfalls helps you protect your investment and maintain your countertop’s pristine appearance.
Heat exposure ranks among the most frequent causes of quartz damage. Although quartz resists heat better than many materials, placing hot pots and pans directly on the surface can cause thermal shock, leading to discoloration, cracks, or permanent scorch marks. Always use trivets or hot pads, especially with cookware exceeding 300 degrees Fahrenheit.
Harsh chemicals pose another significant threat. Bleach, oven cleaners, paint strippers, and products containing high pH levels can break down the resin that binds quartz particles together, causing dullness and surface degradation. Stick to pH-neutral cleaners specifically formulated for quartz or simple soap and water for daily maintenance.
Impact damage from dropping heavy objects or cutting directly on the surface creates chips and cracks that require professional attention. While quartz is hard, it isn’t indestructible. Use cutting boards for food preparation and handle cast iron cookware with care.
Prolonged exposure to direct sunlight, particularly in outdoor kitchens or near large windows, can cause fading and discoloration over time. Consider window treatments for intense sun exposure, and avoid using quartz in outdoor applications unless specifically rated for exterior use. Taking these preventive measures significantly reduces the likelihood of needing repairs.
Quartz vs. Natural Stone: Repair Considerations
Understanding the differences between quartz versus natural stone repairs is essential for making informed decisions about restoration methods and long-term maintenance.
Quartz countertops, being engineered products composed of approximately 90-95% crushed natural quartz bound with polymer resins, present unique repair challenges compared to natural stone. When damaged, the resin component can be difficult to match precisely, particularly with specific colors or patterns. The manufactured nature means repairs often require specialized products designed specifically for engineered stone, and color matching can be more challenging due to the consistency of the original manufacturing process.
Natural stones like granite and marble offer certain repairability advantages stemming from their solid composition. Chips and scratches in granite can often be filled with epoxy resin tinted to match the stone’s natural variations, while the mineral structure allows for professional honing and polishing to remove surface damage. Marble’s softer nature actually makes it more amenable to resurfacing techniques that can restore the entire surface uniformly.
However, quartz does have repair benefits worth noting. Its non-porous surface means stains rarely penetrate deeply, making most discoloration easier to address than with natural stone. Surface scratches on quartz typically affect only the resin layer rather than penetrating the mineral structure, allowing for targeted polishing in many cases.
The key distinction lies in approach: natural stone repairs work with the material’s inherent properties and natural variations, while quartz repairs must account for its engineered consistency. Professional assessment becomes particularly important with quartz because improper repair attempts can create noticeable inconsistencies in the surface’s uniform appearance. Understanding these fundamental differences helps homeowners set realistic expectations and choose appropriate repair strategies for their specific countertop material.
The good news for homeowners with damaged quartz countertops is that most issues are repairable. Whether you’re dealing with minor scratches, chips, stains, or heat marks, solutions exist that can restore your countertop’s appearance and functionality. The key is accurately assessing the extent and type of damage you’re facing.
For superficial problems like light scratches, water spots, or minor stains, DIY repairs using appropriate cleaning products, polishing compounds, or repair kits can deliver excellent results. These approaches are cost-effective and can be completed in a single afternoon with readily available materials. However, knowing your limits is equally important. Deep chips, extensive cracking, severe heat damage, or issues affecting the structural integrity of your countertop require professional expertise and specialized tools.
When deciding between DIY and professional repair, consider the damage severity, your comfort level with the repair process, and the value of your time versus the cost of hiring experts. Professional fabricators bring experience, proper materials, and techniques that ensure seamless repairs, particularly for visible damage in high-traffic areas.
Remember that prevention remains your best strategy. Using cutting boards, trivets, and appropriate cleaning products will minimize future damage and extend your countertop’s lifespan. Regular maintenance and prompt attention to spills prevent minor issues from becoming major problems. With proper care and timely repairs, your quartz countertops can maintain their beauty and durability for decades, making them a worthwhile investment for any home.