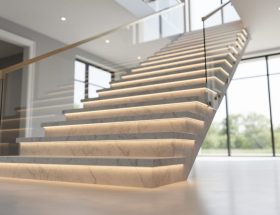
A quartz staircase transforms ordinary vertical circulation into a luminous architectural statement, combining the crystalline beauty of quartz stone with the structural demands of daily foot traffic. Installing quartz treads and risers typically requires 3-5 days for a standard residential staircase, depending on structural preparation and the complexity of your design. This material choice delivers exceptional durability ratings, with a Mohs hardness of 7 making it nearly twice as resistant to scratching as marble, while maintaining a visual depth and sparkle that no manufactured surface can replicate.
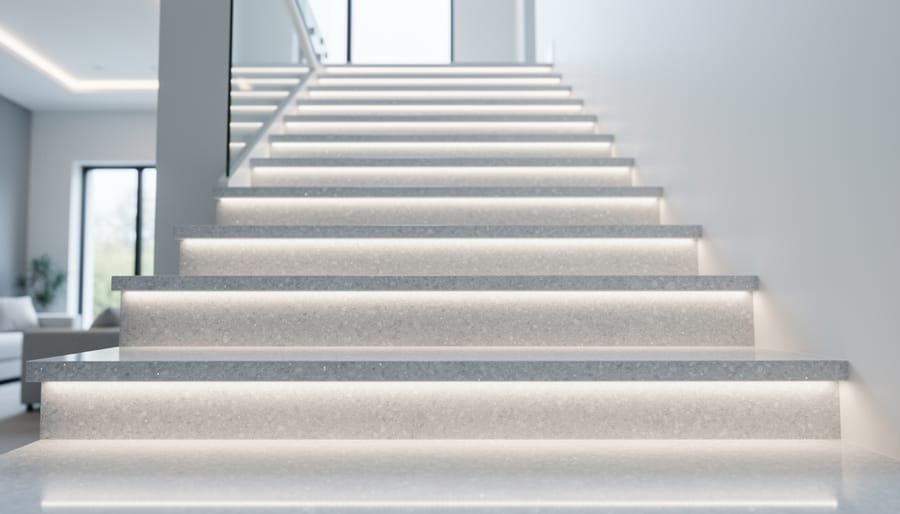
The growing preference for quartz staircases in 2026 stems from practical considerations as much as aesthetic ones. Natural quartz slabs resist moisture penetration far better than porous limestone or travertine, making them ideal for high-traffic areas where spills and tracked-in moisture are inevitable. The stone’s natural translucency also allows designers to integrate LED underlighting for dramatic evening effects, a technique increasingly popular in contemporary residential projects.
Success with quartz staircase installation hinges on three critical factors: precise measurement of each tread and riser to maintain uniform dimensions, structural substrate preparation capable of supporting 50-70 pounds per square foot, and proper sealing to prevent staining in the joints. Whether you’re working with a professional fabricator or tackling the project yourself, understanding the unique properties of quartz stone, its installation requirements, and long-term maintenance needs ensures your investment delivers both beauty and performance for decades. This guide walks you through each phase, from material selection and structural assessment through final installation and ongoing care protocols.
What You’ll Need: Materials and Tools for Quartz Staircase Installation
Selecting the Right Quartz for Your Staircase
Quartz thickness directly impacts your staircase’s durability and visual presence. For stair treads, 3cm (1.25 inches) thickness provides optimal strength for high-traffic areas and minimizes deflection under load. While 2cm material costs less and weighs approximately 40% less, it requires additional substrate support and works best for risers rather than weight-bearing treads. Commercial installations and homes with heavy foot traffic should always specify 3cm material.
Surface finish affects both aesthetics and safety. Polished quartz delivers maximum visual impact with its reflective sheen and color depth, but it can become slippery when wet, particularly problematic on stairs. Honed finishes offer a matte appearance with better slip resistance, making them safer for family homes and high-traffic areas. Leathered finishes add subtle texture that enhances grip while maintaining visual interest, though they require more frequent cleaning to prevent dirt accumulation in the surface texture.
Color selection should balance design vision with practical concerns. Lighter quartz shades minimize visible wear patterns and foot traffic marks, while darker colors show dust and scratches more readily. Veined patterns help disguise minor chips better than solid colors. For outdoor or high-moisture environments, avoid quartz with high resin content, which can yellow under UV exposure.
Quality grades matter significantly for stairs. Premium-grade quartz contains higher quartz content (90-95%) with minimal resin, offering superior hardness and scratch resistance. Lower grades may include more resin or recycled content, reducing durability. Request material specifications showing Mohs hardness ratings (should be 7 or higher) and flexural strength ratings. Reputable manufacturers provide detailed technical data sheets confirming their quartz meets ANSI standards for stair applications.
Structural Support Requirements
Quartz staircases demand robust structural support due to the material’s substantial weight, approximately 15 to 18 pounds per square foot for standard 3cm slabs. Unlike lighter materials, quartz cannot flex or distribute loads unevenly without risk of cracking.
Your substrate must be concrete, steel framing, or engineered wood rated for concentrated loads. Concrete substrates should be at least 4 inches thick and fully cured, with a compression strength of minimum 3,000 PSI. Steel stringers require 1/4-inch plate thickness or greater, with supports spaced no more than 12 inches apart. If using plywood substrates, specify 3/4-inch marine-grade material over structural framing with joists spaced 12 inches on center.
Reinforce the substrate with metal brackets or L-brackets anchored into wall studs or concrete at every third tread location. These prevent lateral movement and distribute the cumulative weight of multiple quartz pieces down the staircase run.
Calculate total load capacity by adding the quartz weight, expected live load (typically 100 pounds per square foot for residential stairs), and a safety factor of 1.5. For a standard 10-step staircase with 3cm quartz treads, expect total loads exceeding 1,200 pounds.
Cantilevered or floating quartz stairs require engineering certification in most jurisdictions. The anchoring points must penetrate deep into structural members, typically 6 to 8 inches into masonry or concrete walls, to handle the torque forces created by unsupported spans.
Critical Safety Warnings and Precautions
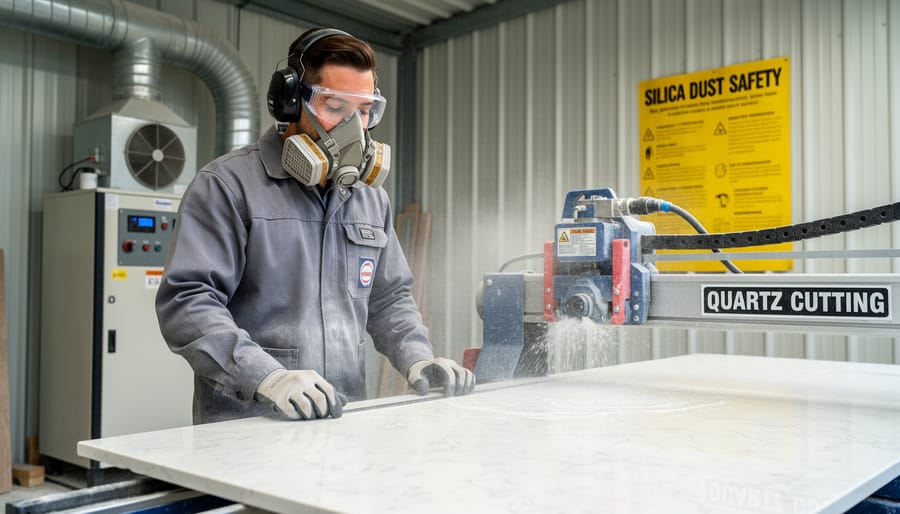
Working with quartz slabs during staircase installation presents serious health and safety risks that require proper precautions and equipment. Understanding these hazards before beginning your project can prevent injuries and long-term health consequences.
Beyond respiratory protection, ensure adequate ventilation throughout the cutting and installation process. Use wet-cutting techniques whenever possible to minimize airborne dust, and never dry-cut quartz indoors. Install industrial exhaust fans or work outdoors with continuous water flow on cutting tools.
Quartz’s exceptional density makes it significantly heavier than many natural stones. A single 3cm-thick tread measuring 36 inches can weigh 80-100 pounds. Never attempt to lift or maneuver large pieces alone. Use at least two people for any slab over 40 pounds, proper lifting techniques with bent knees, and mechanical aids like suction cup lifters or A-frame carts for larger pieces. Back injuries from improper handling are the most common accidents in stone installation.
Structural load calculations aren’t optional. A complete quartz staircase can add 1,500-3,000 pounds to your home’s structure depending on size. Consult a structural engineer before installation if your staircase spans more than six feet, you’re retrofitting an existing staircase not originally designed for stone, or you have any doubts about load-bearing capacity. Code compliance isn’t just bureaucracy; it prevents catastrophic failures.
Recognize your skill limits. Complex installations involving curved stairs, floating treads, or structural modifications require professional expertise. Mistakes with quartz aren’t easily reversible given the material cost and permanence once installed.
Step-by-Step Quartz Staircase Installation Process
Step 1: Measure and Plan Your Staircase Layout
Start by measuring each step’s rise and run at three points, left side, center, and right, because existing structures rarely run perfectly level or square. Record the smallest tread depth you find, typically between 10 and 11 inches for residential stairs, and the tallest riser height, usually 7 to 8 inches. These measurements determine your quartz slab dimensions and help you identify where shimming or grinding will be needed during installation.
Check local building codes early, as most jurisdictions enforce strict stair tread and riser limits with maximum riser height variations of 3/8 inch between steps and minimum tread depths that exclude nosing projection. Calculate total rise by measuring floor to floor, then divide by your planned riser height to determine the exact number of steps. Adjust riser height slightly if needed to keep all steps uniform, since quartz’s rigidity won’t forgive uneven substrate gaps the way wood or carpet might.
Create full-scale templates from cardboard or thin plywood for complex details like curved nosings, winder treads, or landings with unusual angles. These templates transfer directly to your quartz fabricator and eliminate costly cutting errors. Digital tools like SketchUp or specialized stair calculators speed layout planning and generate cut lists, but physical templates remain essential for confirming fit against actual site conditions before fabrication begins.
Step 2: Prepare the Substrate and Support Structure
A solid substrate is non-negotiable for quartz staircases, the stone’s weight and rigidity demand a foundation that won’t shift or settle. Start by inspecting your existing structure for cracks, weak spots, or moisture damage. Concrete substrates should be cured at least 28 days and free of oils or debris that interfere with adhesion. Wood frames require reinforcement with ¾-inch exterior-grade plywood, screwed at 6-inch intervals to eliminate flex.
Level everything within 1/8 inch across the entire staircase run. Use a laser level and shims to correct variations, since quartz won’t conform to uneven surfaces the way some materials do. Install additional blocking or steel angle supports beneath where treads will sit, especially at unsupported front edges where the nosing cantilevers.
Apply a moisture barrier next, polyethylene sheeting or liquid membrane, to prevent vapor transmission that can weaken adhesives. Overlap seams by 6 inches and seal penetrations. For outdoor installations or areas with high moisture exposure, prime the substrate with a bonding agent compatible with your adhesive system. This preparation prevents future failures and ensures your quartz stays securely anchored for decades.
Step 3: Cut Quartz Slabs to Specification
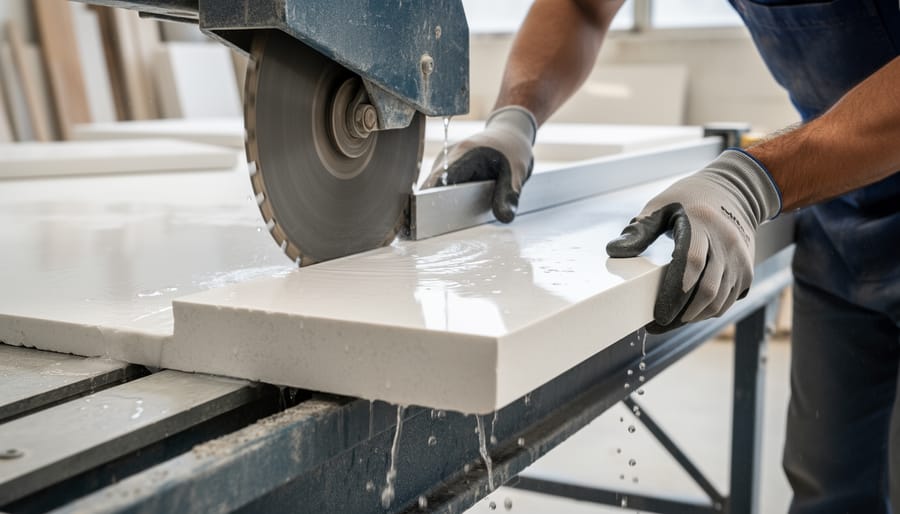
Cutting quartz slabs for staircase components demands precision and the right equipment. A high-quality wet saw with a diamond blade rated for engineered stone is non-negotiable. Water flow during cutting suppresses dust, cools the blade, and prevents thermal cracking in the quartz.
Mark cut lines clearly on the slab’s protective film using a straightedge and permanent marker. For treads, account for the nosing overhang, typically 1 to 1.5 inches beyond the riser face. Double-check all measurements against your template before making any cuts, because quartz cannot be repaired once cut incorrectly.
Feed the slab through the wet saw at a steady, moderate pace. Rushing creates chipping along the cut edge, while moving too slowly overheats the blade. For edge profiling, use router bits designed specifically for quartz, working in multiple shallow passes rather than one deep cut. Standard profiles include bullnose, beveled, or squared edges.
Cut risers slightly shorter than final height to allow for adhesive thickness during installation. Always cut on the reverse side when possible to minimize visible chipping on the finished face.
Step 4: Dry-Fit All Components
Lay out all cut quartz pieces in their exact installation positions without adhesive. Start with the bottom riser and tread, working your way up. Check each tread for level using a 4-foot spirit level, acceptable tolerance is 1/16 inch over the length. Verify riser heights match your measurements within 1/8 inch; inconsistencies here create tripping hazards and code violations.
Test nosing overhangs with a measuring tape, confirming they’re uniform (typically 1-1.25 inches). Place adjacent treads to check reveals between steps remain consistent. Look for gaps at wall junctions or between pieces that exceed 1/16 inch. Mark any pieces needing adjustment with painter’s tape, noting whether trimming or shimming will correct the issue. This step prevents costly mistakes once adhesive is applied.
Step 5: Apply Adhesive and Set Risers
Choose a high-quality, polymer-modified thinset mortar specifically rated for heavy stone applications. Standard tile adhesives won’t provide adequate support for quartz risers, which bear significant weight and stress. Your adhesive should have a shear strength of at least 250 psi and be suitable for vertical installations.
Apply adhesive to the prepared substrate using a 1/4-inch square-notch trowel, working in sections small enough to complete before the mortar begins to skin over (typically 15-20 minutes). Hold the trowel at a 45-degree angle to create consistent ridges that maximize contact area. Back-butter each riser piece with a thin skim coat of adhesive before setting it against the notched substrate.
Press each riser firmly into place, using a slight twisting motion to collapse the adhesive ridges and eliminate air pockets. Check for proper alignment with a level, making minor adjustments within the first few minutes. Temporary support braces or masking tape can hold risers in position until the adhesive cures. Avoid walking on adjacent areas or placing stress on newly set risers for at least 24 hours to prevent shifting during the critical bonding period.
Step 6: Install Quartz Treads and Nosings
With the risers securely in place and adhesive fully cured, you’re ready to install the horizontal tread pieces, the most visible and functionally critical components of your quartz staircase.
Begin by applying a thick, even layer of construction adhesive to the substrate where each tread will sit. Use a notched trowel to ensure consistent coverage across the entire contact area. Position the tread carefully, aligning the back edge flush against the riser face while allowing the nosing to extend forward by your planned overhang, typically 1 to 1.25 inches for residential stairs.
Press the tread firmly into the adhesive bed, then use a level to verify it’s perfectly horizontal in both directions. Any slope creates water pooling and uneven wear patterns. Shim beneath the tread if needed before the adhesive sets.
For nosing details, ensure the bullnose or beveled edge projects consistently on each step. This uniformity matters visually and for safety. Check that the reveal, the vertical gap between the nosing’s underside and the riser below, remains consistent throughout the staircase, usually around 0.25 inches.
Secure heavy treads with additional mechanical fasteners from below if your substrate allows. Let the adhesive cure completely per manufacturer specifications before removing any temporary supports or allowing foot traffic.
Step 7: Grout Joints and Seal Seams
Once all treads and risers are securely set, address the joints between pieces to create a unified, professional appearance. Unlike natural stone, quartz typically requires minimal grouting, but seams between slabs and junctions at risers demand careful attention.
For narrow seams between quartz pieces, use a two-part epoxy resin matched to your slab color rather than traditional grout. Most quartz fabricators provide color-matched epoxy or can recommend exact shade matches from manufacturers. Mix the epoxy according to package directions, working in small batches as it begins hardening within 15-20 minutes.
Apply epoxy using a narrow putty knife or specialized seam filler, pressing firmly into joints to eliminate air pockets. Overfill slightly, then scrape excess flush with the surface using a razor blade held at a low angle. Work methodically along each seam, wiping tools clean between passes.
At riser-to-tread junctions, apply a thin bead of clear or color-matched silicone caulk if the joint exceeds 1/16 inch. This flexible sealant accommodates minor movement while maintaining a clean visual line. Smooth with a dampened finger or caulk tool immediately after application.
Allow epoxy to cure fully, typically 24 hours, before permitting foot traffic. Proper seam treatment renders joints nearly invisible, contributing to the monolithic appearance that makes quartz staircases so visually striking.
Step 8: Final Finishing and Protective Treatments
After the grout cures, tackle the final finishing touches that elevate your quartz staircase from functional to flawless. Begin with edge polishing if your fabricator didn’t pre-finish all edges during cutting. Use progressive-grit diamond hand pads (200, 400, 800, then 1500 grit) with water to smooth any rough spots along nosings or exposed edges, working in consistent strokes until you achieve a uniform sheen matching the slab surface.
Clean all surfaces thoroughly with a pH-neutral stone cleaner and microfiber cloths, removing adhesive residue, grout haze, and installation dust. Avoid acidic or abrasive cleaners that can etch quartz or leave scratches.
Most engineered quartz doesn’t require sealing due to its non-porous nature, but confirm with your manufacturer’s recommendations. Natural quartzite staircases benefit from a penetrating sealer applied according to product instructions.
For polished treads, consider anti-slip treatments to prevent accidents. Clear adhesive tread strips offer invisible protection without altering appearance. Alternatively, apply a non-slip coating designed for stone that maintains the polished look while adding microscopic texture. Test any treatment on a sample piece first to ensure compatibility and aesthetic acceptance.
Design Integration Strategies for Quartz Staircases
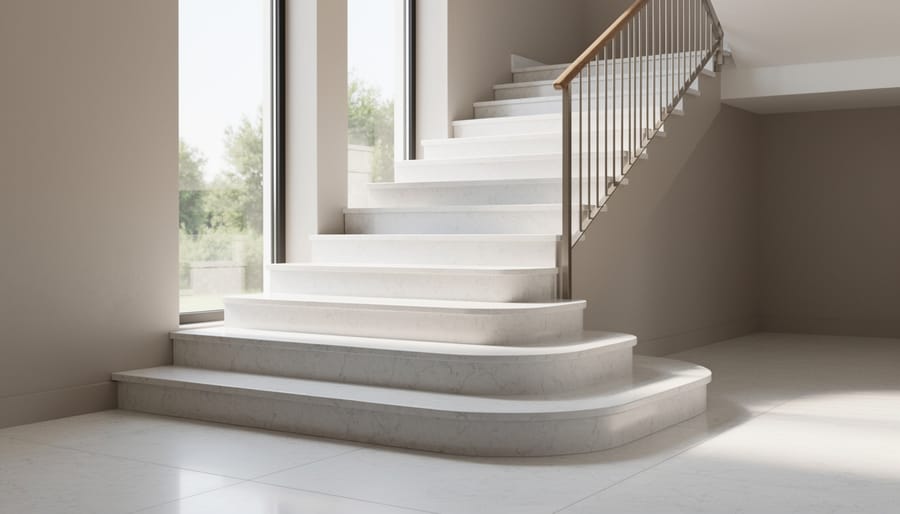
A well-designed quartz staircase functions as both architectural necessity and visual centerpiece, requiring thoughtful integration with your home’s existing materials, proportions, and aesthetic language. The key lies in treating the staircase as a cohesive design element rather than an isolated feature.
For modern architectural styles, pair quartz treads with minimalist glass balustrades and stainless steel handrails to emphasize clean lines and transparency. Choose quartz in crisp whites, cool grays, or dramatic blacks with consistent veining patterns that complement the restrained color palette typical of modernist interiors. Floating stair designs particularly benefit from thick quartz treads (3cm minimum) that appear to cantilever from the wall, creating striking negative space beneath each step.
Transitional designs demand more nuanced material relationships. Combine quartz staircases with wood balustrades in medium tones, incorporating metal accents through newel posts or balusters that bridge traditional and contemporary elements. Select quartz colors with subtle movement rather than bold veining, warm grays or taupe tones work exceptionally well here. The quartz nosing profile should reference traditional millwork details without slavish reproduction, creating visual dialogue between old and new.
Contemporary installations allow greater color and texture experimentation. Layer quartz treads with contrasting materials like walnut risers or leather-wrapped handrails for tactile richness. Consider waterfall edge details where quartz wraps continuously from tread to riser, emphasizing the material’s engineered consistency and eliminating visual breaks.
Lighting integration dramatically impacts how quartz performs visually. Install recessed LED strips beneath each nosing to create floating illumination that highlights the quartz edge profile while providing safe navigation. Avoid direct overhead fixtures on polished quartz, which create hot spots and reduce slip resistance through glare. Side-mounted wall sconces at consistent intervals provide ambient lighting that brings out quartz’s depth without compromising safety.
Material coordination extends beyond adjacent surfaces. If your kitchen features quartz countertops, repeat that exact slab selection in stair treads to create intentional visual connections across spaces. Alternatively, choose quartz one shade lighter or darker than existing installations to establish subtle hierarchy while maintaining material consistency throughout the home.
Verifying Quality and Final Inspection Checklist
Before final sign-off, conduct a thorough quality inspection to verify your quartz staircase meets both aesthetic and structural standards. This systematic review ensures the installation will perform safely and beautifully for decades, catching any issues while corrections are still practical.
Begin your inspection at the top step and work downward, checking each tread for level using a 24-inch spirit level placed at multiple angles. No tread should deviate more than 1/16 inch from level across its depth or width. Run your hand along each nosing edge to verify consistent overhang (typically 1 to 1.25 inches) and smooth, uniform edge profiles without chips or rough spots.
Test bonding security by applying firm downward pressure at each tread’s center and edges, listening for any hollow sounds or feeling movement that indicates incomplete adhesive coverage. Well-bonded quartz should feel absolutely solid with zero flex or give. Inspect all joints with a flashlight held at an acute angle to highlight inconsistencies; grout lines should maintain uniform width (typically 1/16 inch) with no gaps, voids, or excess material obscuring the seam.
- Verify all riser heights match within 3/16 inch per building code requirements
- Check nosing alignment creates a clean visual line when viewed from the side
- Confirm no lippage exists where tread meets riser (edges should sit flush)
- Test slip resistance on polished surfaces, especially if anti-slip treatment was specified
- Inspect seams for color-matched filler with no visible gaps or air pockets
- Verify support structure shows no signs of stress, cracking, or deflection
Document the installation with photographs showing overall appearance, detail shots of joints and nosings, and any areas requiring follow-up. This creates a baseline record for future maintenance and warranty purposes. Pay attention to how lighting interacts with the surface, as quartz light effects can reveal imperfections invisible under different conditions, similar to considerations for natural stone sconces placement.
The final inspection confirms not just technical compliance but also the stone design harmony that makes your staircase both functional and visually striking. Address any deficiencies immediately while installation crews and materials remain accessible.
Maintenance Requirements and Long-Term Care
Quartz staircases demand minimal maintenance compared to natural stone alternatives, but consistent care preserves their appearance and structural integrity for decades. Establish a routine cleaning schedule using pH-neutral stone cleaners diluted according to manufacturer specifications, never acidic products like vinegar or citrus-based solutions that can etch the surface. For daily upkeep, dry-mop treads to remove grit that accelerates wear, then damp-mop weekly with clean water and microfiber cloths.
Address spills immediately, especially acidic substances like wine or coffee. Blot rather than wipe to prevent spreading, then clean with your stone-safe solution. While quartz resists staining better than marble or granite, prolonged exposure to pigmented liquids can still cause discoloration at seams or micro-scratches.
Most engineered quartz requires no periodic sealing, unlike porous natural stones. However, verify your specific product’s requirements with the manufacturer, some honed or leathered finishes benefit from annual sealer applications using impregnating sealers designed for dense stone. Apply sealers evenly with foam applicators, allow penetration for 10-15 minutes, then buff away residue.
For minor scratches on polished surfaces, professional re-polishing restores the original finish. Deep chips or cracks require epoxy repair matched to your quartz color, best handled by certified stone restoration technicians. Inspect grout lines and seams annually, regrouting as needed to prevent moisture infiltration that compromises adhesive bonds.
Avoid placing rubber-backed mats directly on treads, they can cause discoloration over time. Use felt pads under heavy objects and enforce a no-shoes policy for high-heeled footwear that concentrates impact forces.
Common Questions About Quartz Staircases
How does quartz compare in cost to granite or marble for staircases?
Quartz staircases typically fall in the mid-to-high price range, often comparable to premium granite and slightly less than exotic marble varieties. Expect to pay $150-$300 per square foot installed, though engineered quartz’s consistency can reduce waste and installation time, offsetting some material costs.
Is quartz durable enough for high-traffic staircases?
Quartz ranks 7 on the Mohs hardness scale and resists chipping better than marble, making it excellent for residential and commercial staircases. Its non-porous engineered composition also means it won’t stain or harbor bacteria like some natural stones, maintaining appearance even in heavily used areas.
Are polished quartz stairs too slippery for safe use?
Polished quartz can be slippery when wet, so honed or leathered finishes are recommended for stair treads. You can also apply anti-slip strips to nosings or choose textured quartz varieties specifically designed for flooring applications where traction matters.
Can I install quartz staircases outdoors?
Outdoor installation isn’t recommended for most engineered quartz products because UV exposure can cause discoloration and resin degradation over time. For exterior applications, consider natural granite or limestone instead, which handle weather exposure better than quartz composites.
Installation timeframes vary by project complexity, but most residential quartz staircases take two to four weeks from template to completion. Custom designs like stone spiral staircases require additional fabrication time and precise engineering. Professional installers typically need three to five days on-site for a standard straight staircase once all materials arrive, though structural modifications or complex geometries extend that window. The fabrication process itself consumes most of the timeline, as quartz slabs must be cut, profiled, and finished to exact specifications before installation begins.
Quartz staircases represent a compelling fusion of engineered durability and natural beauty, offering homeowners and designers a sophisticated solution for high-traffic vertical spaces. Throughout this guide, we’ve explored the complete installation process, from precise measurement and structural preparation through final finishing and quality verification. When properly designed and installed, quartz stairs deliver exceptional performance that can span decades with minimal maintenance, making them a worthwhile investment in any residential or commercial property.
The aesthetic versatility of quartz allows seamless integration into virtually any architectural style, while its non-porous surface resists staining and simplifies cleaning. For complex installations involving multiple turns, structural modifications, or heavy slabs, consulting experienced professionals ensures both safety and optimal results. The principles outlined here apply equally to ongoing natural stone care across your home’s surfaces.
With careful planning, quality materials, and attention to detail during installation, your quartz staircase will serve as both a functional pathway and a striking architectural feature that enhances your space for years to come.