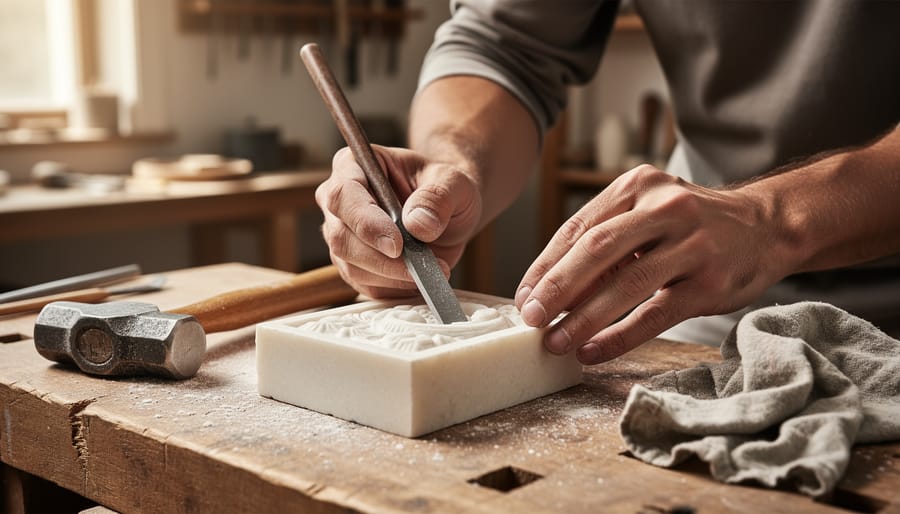
Stone carving begins with three essentials: a carbide chisel, a 2-pound hammer, and a block of soapstone or alabaster soft enough to shape without power tools. Most beginners complete their first simple relief carving in 4 to 6 hours across two sessions, learning to read the grain, control depth, and finish the surface to a smooth polish. The craft demands patience and respect for the material, but the barrier to entry is lower than most assume.
Unlike wood or clay, stone doesn’t forgive wandering cuts or excessive force. Each strike removes material permanently, which makes planning and deliberate movement central to success. That constraint teaches control quickly. Soapstone and alabaster sit at the softer end of the Mohs hardness scale, rating between 1 and 3, so they yield to hand pressure and respond well to rasps and rifflers during refinement. Harder stones like limestone, marble, and granite require pneumatic tools, dust extraction systems, and months of practice to carve safely and effectively, placing them outside the scope of a first project.
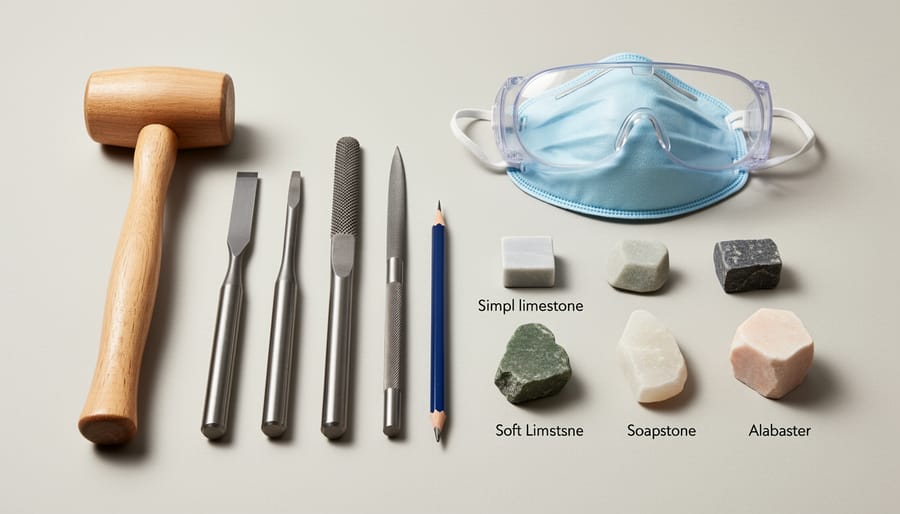
Safety preparation matters as much as tool selection. Stone dust is a respiratory hazard, and flying chips can damage eyes in seconds. A NIOSH-rated N95 respirator, impact-rated safety glasses, and leather work gloves form the minimum protective kit. Carving outdoors or in a well-ventilated garage with a wet cloth draped over the work reduces airborne particulates significantly.
The process itself is methodical: transfer a simple design onto the stone surface, establish depth with controlled chisel strikes, refine contours with rasps, and finish with progressively finer abrasives. Starting with a low-relief design like a leaf or geometric pattern keeps the scope manageable while building the muscle memory and visual judgment that underpin every advanced technique. Stone carving rewards focus and deliberate practice, and your first finished piece proves the material will yield to persistence.
Essential Tools and Materials for Your First Stone Carving Project
Choosing Your First Stone
Selecting your first carving stone requires balancing three practical factors: hardness, workability, and your budget. Start with stones rated between 1 and 3 on the Mohs hardness scale. This scale runs from 1 (softest) to 10 (diamond), and lower numbers mean easier carving with hand tools.
Soapstone ranks around 1-2 on the scale, making it the most forgiving choice for absolute beginners. You can carve it with minimal force, and mistakes are easier to correct. Its waxy feel provides good tactile feedback as you learn tool control. Expect to pay $3-8 per pound from sculpture suppliers.
Alabaster sits at 2 on the scale and offers slightly more resistance than soapstone while still remaining beginner-friendly. It carves cleanly, accepts fine details well, and polishes to a beautiful translucent finish. Price ranges from $5-12 per pound depending on color and quality.
Limestone varies between 3-4 on the scale. It requires more effort to carve but teaches you proper technique since it punishes aggressive tool work. Indiana limestone and similar soft varieties work well for first projects. Cost runs $2-6 per pound, often less if sourced locally from quarries or stone yards.
Avoid marble, granite, or any stone above 4 on the Mohs scale until you have developed proper hand strength and technique. These harder stones demand power tools and advanced skills to work safely and effectively.
Critical Safety Precautions and Workspace Setup
Setting Up Your Carving Workspace
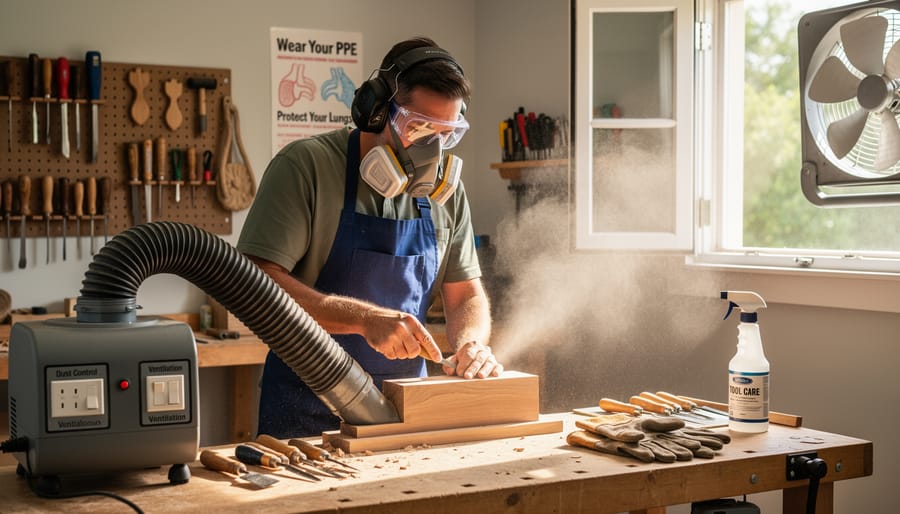
Your workspace directly impacts both safety and carving quality. Choose a location where stone dust won’t damage furnishings or electronics, a garage, basement, or outdoor shed works well. If you’re working indoors, seal off the space with plastic sheeting and position a box fan in a window to draw dust outward, never toward your face or living areas.
Natural light from multiple angles helps you see contours and shadows accurately. Supplement daylight with an adjustable task lamp positioned to eliminate harsh shadows that obscure detail. Set your workbench height so your arms rest comfortably at about a 90-degree angle when holding tools, typically 34 to 36 inches for most adults. A sturdy wooden bench withstands hammer strikes better than metal, which rings and vibrates.
Contain dust aggressively. Cover your workbench with a drop cloth that you can shake outside daily. Keep a push broom and shop vacuum dedicated to your carving area. Wear NIOSH-approved N95 respirators during all carving sessions, and always use safety glasses that provide eye protection from flying particles rated for impact resistance.
Store tools within arm’s reach on a wall-mounted pegboard or in a rolling cart. Keep your first-aid kit visible and accessible. Before you begin refining surfaces through stone polishing verify your workspace ventilation moves air effectively, stone dust settles slowly and accumulates in unexpected corners. A well-organized setup lets you focus on technique rather than hunting for tools or fighting poor conditions.
Step-by-Step Process: Carving Your First Stone Piece
Step 1: Selecting and Preparing Your Design
Start with a simple design that has clear, bold shapes and minimal fine detail. Geometric patterns, basic leaf shapes, or stylized symbols work well for first projects because they’re forgiving if you remove slightly too much material and they don’t require intricate tool control.
Sketch your design on paper first, keeping it roughly 3 to 4 inches across and no deeper than half an inch. Avoid thin, delicate elements like narrow stems or pointed tips, these break easily when you’re still developing your striking accuracy.
Transfer the design to your stone using a soft pencil or soapstone marker. For curved designs, cut out your paper pattern and trace around it directly on the stone surface. Mark the outline clearly with bold, continuous lines you can see through dust.
Use a permanent marker to draw depth guidelines on the stone’s edge, showing how deep to carve at various points. This prevents the common mistake of carving unevenly deep across your design.
Finally, cross-hatch the background areas you’ll remove with your marker. This visual distinction between what stays and what goes keeps you from accidentally chiseling into your design itself.
Step 2: Roughing Out the Form
Start with a point chisel and a 1-2 pound carving hammer to remove the bulk material outside your design lines. Hold the chisel at a 45-degree angle to the stone surface, too steep and you’ll dig in; too shallow and you’ll skip across the surface without cutting.
Work from the outer edges of your marked design inward, never from the center outward. This protects your design area from accidental chips and gives you room to maneuver your tools. Remove material in small increments, taking off roughly 1/4 inch with each pass. Beginners often try to remove too much at once, which leads to loss of control and unwanted fractures.
Strike the chisel with firm, controlled blows rather than aggressive pounding. Let the weight of the hammer do the work, you’re guiding direction, not forcing it. Rotate your stone frequently to access different angles and maintain even progress around your design.
Keep your non-dominant hand behind the chisel head, never in front of the cutting edge. As you get within a half-inch of your design lines, switch to lighter taps and smaller bites. You can always remove more material, but you can’t put it back.
Step 3: Refining the Shape
With the bulk material removed, switch to tooth chisels and lighter hammer taps to refine the contours. Work systematically across the surface, removing the rough marks left by point chisels and bringing your carving closer to its final form.
Hold the tooth chisel at a shallower angle, about 30 degrees, and use controlled, shorter strokes. The parallel grooves these chisels create remove stone more evenly than point tools, letting you shape curves and develop depth without creating gouges. Move across the grain rather than with it to prevent unexpected fractures.
Check your progress frequently by running your hand over the surface. Your fingers detect high spots and inconsistencies your eyes might miss. Compare the carving against your reference drawing from multiple angles, turning the piece on your workbench to ensure proportions remain accurate.
As details emerge, reduce hammer force further. Light taps give you precise control when carving near edges or working on delicate elements. If you’re creating relief depth, establish the lowest background areas first, then work toward raised features, this approach prevents accidentally removing too much from prominent elements.
For tight curves or recessed areas, switch to smaller chisels. The narrower cutting edge allows access to confined spaces without damaging adjacent surfaces.
Step 4: Smoothing and Finishing
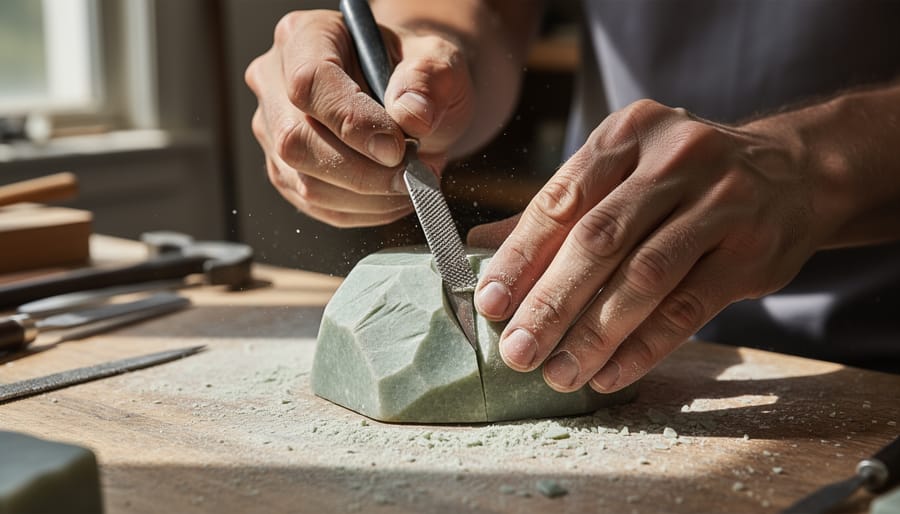
Once you’ve refined the overall shape, shift focus to surface quality. Start with coarse rasps to smooth rough tool marks, working systematically across the entire piece. Move to finer rasps and rifflers, small curved files perfect for tight contours and detailed areas. Keep checking your work from multiple angles; shadows reveal surface imperfections invisible from one viewpoint.
Switch to wet-dry sandpaper next, beginning with 80- or 120-grit and progressing through 220-, 400-, and 600-grit stages. Work wet to control dust and prevent scratching. Each grit removes marks from the previous one, so don’t skip steps. If you want a polished finish rather than a matte surface, continue through finer grits (800, 1200, 2000) and consider polishing pad selection for achieving professional results on harder stones.
For soapstone or alabaster, hand-sanding to 600-grit typically produces a pleasing satin sheen. You can seal the finished piece with paste wax or stone sealer to protect it and enhance color depth. Some carvers prefer a natural, unpolished finish that shows tool marks, both approaches are valid. If you’re interested in adding color, research professional stone coloring techniques after you’ve mastered basic carving skills.
Common Mistakes and How to Correct Them
Removing too much material is the most common beginner mistake and unfortunately cannot be undone. Work slowly and check your depth frequently against your pattern lines. If you’ve carved too deep in one area, you can either adjust the entire design to match that depth or incorporate the mistake into a revised composition.
Uneven surfaces result from inconsistent tool angles or pressure. Hold your chisel at the same angle throughout each stroke and maintain steady, controlled strikes. If you’ve created an uneven area, work back to a consistent depth using light passes rather than trying to correct it with one aggressive cut.
Stone breakage usually happens when working too close to an edge or striking too hard. If a piece breaks off, you can sometimes reattach it with stone epoxy, blend the break line through strategic carving, or redesign around the missing section. Prevention beats repair: always leave extra margin around edges and increase striking force gradually.
Evaluating Your Work and Planning Next Projects
Building Your Stone Carving Skills
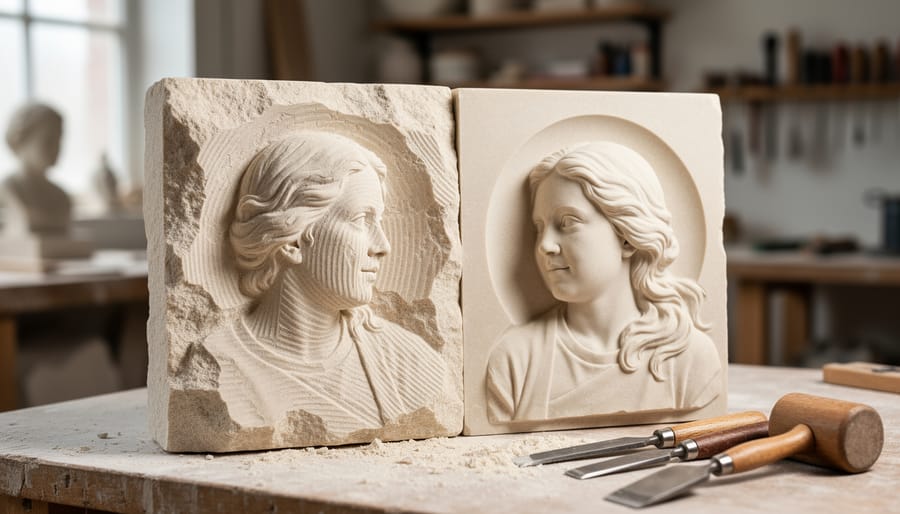
After completing your first relief carving, advance to small free-standing forms like simple geometric shapes or stylized animals. These projects teach you to think three-dimensionally and plan cuts from multiple angles. Progress next to low-relief portrait plaques or botanical designs that demand finer detail work and controlled depth variations.
As your confidence grows, experiment with harder stones. Granite and marble require different techniques than soapstone but reward your effort with permanence, understanding how stone patina develops over decades adds depth to your appreciation of durable materials. Observing how time and weather affect outdoor sculptures informs better material choices for specific projects.
Seek hands-on instruction through local stone carving guilds, community college workshops, or intensive weekend courses. Online platforms like YouTube offer technique demonstrations, but nothing replaces in-person feedback on your hammer control and chisel angles. Join forums such as Stone Carving Community or regional guilds to share work, troubleshoot problems, and discover stone suppliers. Most carvers gladly mentor beginners who show genuine commitment to the craft.
Frequently Asked Questions About Beginning Stone Carving
Starting stone carving raises practical questions that can make or break a beginner’s commitment to the craft. These answers address the most common concerns that emerge when you’re ready to move from curiosity to action.
How long does it take to complete your first carving?
A simple relief carving in soft stone like soapstone typically takes 4-8 hours spread across multiple sessions. Your first project will take longer than subsequent ones as you develop tool control and learn to read the stone, but most beginners complete an initial piece within two weekends of focused work.
What’s the realistic startup cost for stone carving?
You can start with a basic hand tool kit for $60-100, a piece of soapstone for $15-30, and essential safety gear (dust mask, safety glasses) for $20-30. The total investment ranges from $100-160, making stone carving more accessible than many assume.
Should I start with hand tools or power tools?
Begin with hand tools. They’re safer for learning, force you to understand how stone behaves, and develop the fundamental techniques you’ll need even if you later add power tools. Hand tools also produce less dust and require simpler safety precautions, which matters when you’re still establishing your workspace habits.
Where can I find stone to practice on without spending much?
Craft stores and online retailers sell small soapstone pieces for $15-30. Landscaping supply yards sometimes sell limestone chunks inexpensively, and some stone carving suppliers offer “practice grade” stones with minor flaws at reduced prices that work perfectly for learning.
How do I maintain my carving tools?
Clean tools after each session with a stiff brush to remove stone dust, then wipe metal surfaces with a lightly oiled cloth to prevent rust. Sharpen chisels and points as soon as they stop cutting cleanly rather than waiting until they’re completely dull.
Can I carve stone indoors safely?
Yes, with proper precautions. Work near an open window or in a well-ventilated space, always wear a dust mask rated for fine particles, and use a vacuum with a HEPA filter for cleanup. Soft stones like soapstone produce less dust than harder varieties, making them better choices for indoor work.
The learning curve feels steeper in your imagination than in practice. Most beginners surprise themselves with what they can accomplish in their first attempt once they commit to the process and work through initial uncertainties. Stone carving rewards patience more than natural talent, and the questions that seem critical before you start often resolve themselves once your chisel makes contact with the stone. The craft teaches through doing rather than through endless preparation, so the best response to most concerns is to gather your basic tools and materials and begin with a manageable first project.