Baking pastry directly on a heated natural stone surface produces superior texture and crust development by drawing moisture from the dough while distributing heat evenly across the base. This centuries-old technique, now accessible to home bakers and professional kitchens alike, relies on dense stones like granite, marble, or soapstone that have been properly prepared, heated to precise temperatures between 450°F and 500°F, and maintained as dedicated baking surfaces.
The science is straightforward: stone’s thermal mass absorbs and radiates consistent heat, eliminating hot spots that plague metal baking sheets. When chilled dough meets a preheated stone, the temperature differential creates steam pockets that lift laminated pastries while simultaneously crisping the bottom layer. Professional bakeries have long understood this principle, but recent interest from home bakers and designers exploring multifunctional kitchen surfaces has brought renewed attention to stone selection, surface preparation, and maintenance protocols.
Success depends on three factors: choosing the right stone thickness (minimum three-quarters of an inch for adequate heat retention), conditioning the surface to prevent flavor transfer and cracking, and mastering temperature management throughout the baking process. A properly maintained pastry stone will develop a natural patina over time, improving performance with each use.
This guide covers everything from initial stone selection and seasoning through advanced lamination techniques, with specific temperature guidelines, timing benchmarks, and troubleshooting methods. Whether you’re outfitting a commercial kitchen or exploring artisanal baking methods at home, understanding how natural stone interacts with pastry dough transforms results from acceptable to exceptional.
What Are Pastry Stones and How Do They Work?
Pastry stones are thick slabs of natural stone, typically granite, marble, or soapstone, used as baking surfaces to replicate the thermal conditions of professional brick ovens in a home kitchen. Unlike metal baking sheets that heat and cool rapidly, these dense stone surfaces absorb heat slowly and release it steadily, creating an environment where laminated doughs, puff pastries, and croissants develop their characteristic flaky layers and golden crusts. Professional pastry chefs have long relied on marble counters for rolling dough and stone-lined ovens for baking; pastry stones bring both advantages into the home baker’s workflow.
The science behind their effectiveness lies in thermal mass and even heat distribution. The thermal mass of granite and similar stones means they store significant amounts of heat energy, then radiate it consistently across the entire surface. When you place pastry dough on a properly preheated stone, heat transfers uniformly from below, eliminating the hot spots and temperature fluctuations common with metal pans. This steady heat flow crisps the bottom of croissants and tarts without burning edges, while the radiant heat from above completes the baking process.
Different stones offer distinct advantages. Marble stays naturally cool, making it ideal for rolling butter-rich doughs and tempering chocolate, but its porous nature demands regular sealing and careful cleaning to prevent acid damage from citrus or vinegar. Granite and soapstone excel at high-temperature baking, holding heat through multiple batches. Soapstone, in particular, heats more slowly but maintains its temperature longer than granite, providing exceptional consistency for delicate pastries that require precise thermal control.
This combination of thermal stability and surface versatility explains why artisan bakeries invest in stone baking surfaces and why serious home bakers see immediate improvements in pastry quality when switching from metal to stone.
Required Tools and Materials
Before you start working with pastry stones, gather the right materials and understand your options. The stone itself is your primary investment, but several supporting tools will ensure safe handling, accurate temperature control, and long-term maintenance of your baking surface.
Natural Stone Options
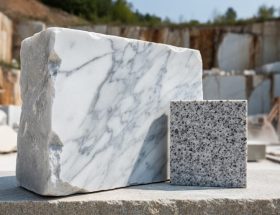
Three stone types dominate professional pastry work, each with distinct properties. Granite offers exceptional durability and heat retention, making it ideal for high-temperature baking and repeated thermal cycling. It resists scratching and staining better than other options, though it requires food-safe sealing before first use. Marble provides a naturally cool surface perfect for rolling laminated doughs and tempering chocolate, but its porous nature demands regular sealing and careful cleaning to prevent acid damage from citrus or vinegar. Soapstone delivers the most even heat distribution due to its dense composition, though it’s softer and more prone to surface scratches.
For any stone type, minimum thickness matters. Choose slabs at least three-quarters of an inch thick to ensure adequate thermal mass and prevent cracking under thermal stress. A half-inch slab won’t retain enough heat for professional results. Standard sizing runs 16 by 20 inches for home ovens, providing ample workspace without overwhelming your oven rack’s weight capacity.
Essential Tools and Materials
- Natural stone slab: granite, marble, or soapstone, minimum 3/4-inch thickness, 16×20 inches recommended
- Food-safe stone sealer: water-based, non-toxic formula approved for direct food contact
- Infrared thermometer: laser model with 400°F+ range for surface temperature verification
- Oven thermometer: hanging or standing model to confirm actual oven temperature
- Heavy-duty oven mitts: extended length with heat resistance to 500°F minimum
- Parchment paper: unbleached, commercial-grade for transferring delicate pastries
- Bench scraper: metal or plastic for dough handling and stone cleaning
- Rolling pin: French-style or tapered wooden pin for laminated doughs
- Soft-bristle brush: natural fiber for applying sealer and gentle cleaning
- pH-neutral stone cleaner: formulated specifically for natural stone surfaces
Sourcing Your Stone
Local stone fabricators and countertop suppliers often sell remnant pieces at significant discounts compared to retail baking stones. Ask for offcuts from kitchen installations, specifying food-grade material without resin fillers. Architectural salvage yards occasionally stock unused marble or granite slabs. When ordering online, verify the seller provides thickness guarantees and ships with protective packaging, as stone corners crack easily during transport. Expect to pay between forty and one hundred twenty dollars depending on stone type, size, and finish quality.
Safety Precautions and Important Warnings
Working with natural stone requires awareness of several critical safety factors. These surfaces are heavy, thermally sensitive, and demand proper handling from purchase through daily use.
Weight and Handling Risks
A standard 18×24-inch stone slab at the recommended 3/4-inch thickness weighs 25-40 pounds depending on the material. Always use both hands when moving stone, keep it close to your body, and bend at the knees rather than the waist. Transport new slabs on a cart or dolly, never carry them unsupported for more than a few steps. Before placing stone in your oven, verify that your oven racks can support the weight without bending or collapsing; commercial-grade racks or additional support brackets may be necessary for larger slabs.
Thermal Shock Prevention
Stone must always heat and cool gradually with your oven. Start with a cold oven when preheating, and allow the stone to cool completely inside the turned-off oven before removal. The granite heat retention properties that make these surfaces excellent for baking also mean they hold temperature for extended periods. Plan at least 2-3 hours for a fully heated stone to cool safely.
Food-Safe Materials and Cleaning
Only use sealers explicitly labeled food-safe and designed for high-temperature applications. Many general stone sealers contain chemicals that off-gas when heated. For marble surfaces, avoid all acidic cleaners including vinegar, lemon juice, and commercial products containing citric or phosphoric acid; these will etch the surface and compromise food safety. Use only pH-neutral dish soap and warm water for routine cleaning.
Ventilation During Initial Curing
The first time you heat a new stone slab, open kitchen windows and run your exhaust fan. Even food-safe sealers may release odors during the initial high-temperature curing cycle. This is normal and will dissipate after the first 1-2 uses.
Step-by-Step Process: Preparing and Using Your Pastry Stone
Selecting and Preparing Your Stone Surface
Choosing the right stone transforms your pastry work from guesswork into precision. Granite stands as the workhorse for high-heat baking, it handles temperature extremes without flinching and delivers the even heat distribution that croissants and puff pastry demand. Marble excels for cold work, keeping butter blocks firm during lamination, but it needs careful handling in the oven due to its sensitivity to thermal shock. Soapstone offers middle ground, heating slowly but retaining warmth longer than either granite or marble.
Your stone must meet minimum structural requirements. Aim for three-quarter inch thickness at least, thinner slabs crack under thermal stress and lack the thermal mass needed for consistent results. A honed finish provides better grip for dough, while polished surfaces work best when you’re using parchment paper as a barrier.
Start with a thorough cleaning using warm water and a soft cloth. Skip the soap entirely for your first wash, residues can bake into the stone’s surface. Dry the slab completely, then inspect for cracks or chips that could worsen under heat.
Most granite requires no sealer for baking applications, but some porous stones benefit from a food-safe penetrating sealer. Apply it sparingly following the manufacturer’s instructions, then let the stone cure for 48 hours before use.
The first oven session conditions your stone for a lifetime of baking. Place the cold slab on the center rack of a cold oven, then heat gradually to 250°F. Hold for 30 minutes, then increase to your target baking temperature over another 15 minutes. This slow ramp prevents thermal shock and drives out any residual moisture locked in the stone’s structure.
Preheating and Temperature Management
Placing a cold stone in a preheated oven invites thermal shock and potential cracking. Instead, position your pastry stone on the middle rack of a cold oven, then set your target temperature and heat them together. This gradual warming ensures the stone’s entire mass reaches uniform temperature without stress fractures.
For laminated pastries like croissants and puff pastry, preheat to 400°F. Danish and similar enriched doughs perform best at 375°F, while artisan breads benefit from higher heat at 450-475°F. These are oven temperatures, your stone surface will stabilize slightly lower, which is why verification matters.
An infrared thermometer gives you the right stone temperature reading in seconds. Aim the laser at the stone’s center and check multiple spots to confirm even heating. A 1-inch thick granite slab typically needs 60 minutes to reach full thermal saturation at 400°F; thinner stones (3/4 inch) may stabilize in 45 minutes. Marble heats slightly faster than granite due to different thermal properties.
Don’t rush this step. A half-heated stone creates uneven bottom crusts and disappointing rise. Set a timer when you turn on your oven, and verify the surface temperature before loading your pastries. The stone should read within 25°F of your target oven setting when fully saturated.
Working with Dough on Stone Surfaces
Working with dough on stone surfaces requires attention to temperature contrasts and moisture management. For laminated doughs like croissant and puff pastry, chilled marble (45-50°F) provides the ideal surface for final rolling. The cold stone keeps butter layers firm during shaping, preventing them from melting into the dough and ruining your lamination. Work quickly in 5-minute intervals, returning dough to refrigeration between handling stages.
When transferring shaped pastries to your preheated baking stone, use a well-floured pizza peel or the back of a rimless baking sheet for a smooth slide. For delicate items prone to sticking or distortion (pain au chocolat, turnovers, Danish), assemble them on parchment paper cut to fit your stone, then transfer the entire sheet. The parchment creates a moisture barrier without significantly impacting bottom crust development.
Moisture control separates mediocre results from professional quality. Laminated pastries release steam as butter melts and dough expands. Your preheated stone absorbs this moisture while radiating consistent heat, creating the crisp, flaky bottom crust home ovens typically struggle to achieve. For rustic breads with high hydration dough, lightly dust the stone with semolina or cornmeal to prevent sticking and enhance底部 texture.
Croissants benefit from a 425°F stone, while puff pastry needs 400°F to prevent burning before the layers fully develop. Artisan breads require 475-500°F for proper oven spring and crust formation.
Post-Baking Care and Maintenance
Let your stone cool completely in the oven with the door cracked open. Never move a hot stone directly to cold surfaces or run water over it, thermal shock can cause immediate cracking. This gradual cooling mirrors the preheating process and typically takes 90 minutes to two hours.
For routine cleaning, wait until the stone reaches room temperature, then wipe with a damp cloth. Granite tolerates mild dish soap; marble and soapstone require pH-neutral cleaners only. Scrape stuck-on dough with a plastic bench scraper, working gently to avoid scratching the surface.
Stubborn stains respond to a paste of baking soda and water applied for 15 minutes before wiping. On marble, test in an inconspicuous spot first. Avoid lemon juice, vinegar, or commercial oven cleaners, these acids etch marble permanently and can compromise food-safe sealers on all stone types.
Re-seal granite and soapstone every six months if you notice water soaking in rather than beading on the surface. Marble used primarily for cold work needs sealing less frequently, roughly once yearly.
Store stones flat, never propped on edge where stress points develop. If removing from the oven between uses, cushion with towels and keep in a climate-controlled space to prevent moisture-related expansion and contraction damage.
Verifying Results and Troubleshooting
Successful pastry stone baking reveals itself through three primary indicators. First, examine the bottom crust: it should display deep golden-brown coloration with no pale spots or soggy patches. Second, check the rise: laminated pastries like croissants should show distinct, even layers throughout, with no collapsed or compressed sections. Third, tap the bottom of your finished pastry, it should sound hollow and feel firm, not soft or doughy.
Temperature verification begins before you even place dough on the stone. Use your infrared thermometer to scan multiple points across the stone surface. For most pastries, you need consistent readings between 425°F and 475°F, with no more than 15-degree variance between spots. If you detect cool zones, extend your preheat time by 15-minute increments. Check again until the entire surface reaches target temperature.
Uneven browning typically signals two issues. When one side browns faster than the other, your oven has hot spots, rotate your stone 180 degrees during the preheat to compensate, or move it to a different rack position. If the top browns before the bottom crisps, your stone needs more thermal saturation. Increase preheat time to 75-90 minutes, allowing the stone’s full thermal mass to activate.
Sticking problems often stem from insufficient parchment paper or a too-hot stone surface for delicate doughs. For high-butter pastries, drop your target temperature by 25 degrees and use double-layered parchment. Alternatively, dust the stone lightly with semolina flour, which creates tiny insulating pockets without burning.
How do I know if my stone is hot enough?
Point an infrared thermometer at five different spots across the stone surface. All readings should fall within 15 degrees of your target temperature, with no cool zones remaining.
Why is my pastry browning unevenly?
Uneven browning indicates either oven hot spots or insufficient stone preheating. Rotate the stone during preheat and extend heating time to 75-90 minutes for full thermal saturation.
Can I fix a cracked stone?
Once a stone develops cracks from thermal shock, it cannot be safely repaired for food use. Replace it and prevent future damage by always heating and cooling stones gradually with the oven.
Thermal cracking happens when stones experience rapid temperature changes. Never place a cold stone into a hot oven, and never run cold water over a hot stone. If you notice hairline cracks, retire that stone immediately, cracks worsen with each heating cycle and can cause catastrophic breakage during use.
As you master basic stone techniques, advance your skills by experimenting with different stone types for specific pastries. Marble excels for butter-heavy croissants due to its cool working surface, while granite’s superior heat retention works perfectly for rustic breads. Track your results in a baking journal, noting stone temperature, preheat duration, and pastry outcomes. This data helps you develop intuition for natural stone cookware applications beyond pastry, from pizza to flatbreads. When your pastries consistently achieve professional-quality results, crisp bottoms, even rise, golden color, you have calibrated your stone technique successfully.
Advanced Stone-Infused Pastry Techniques
Once you’ve mastered basic pastry stone techniques, professional-level methods unlock new possibilities for precision baking and confectionery work.
Chilled marble excels for chocolate tempering and laminating butter blocks. Place a 1-inch thick marble slab in your refrigerator for at least two hours before working with tempered chocolate or preparing butter for croissant dough. The cold surface holds 45-50°F consistently, preventing premature melting while you spread and fold. Professional chocolatiers use this method to achieve the glossy snap of perfectly tempered chocolate, while pastry chefs rely on chilled marble to keep butter pliable without softening during the lamination process.
Dual-surface workflows combine hot and cold stones in a single production sequence. Set up a preheated granite slab in your oven for baking while keeping marble chilled on your counter for dough preparation. This approach mirrors techniques used at Tartine Bakery in San Francisco, where bakers roll croissant dough on refrigerated marble, then transfer shaped pastries directly to hot stone surfaces for baking. The temperature contrast creates superior texture: cold stone prevents butter from breaking through dough layers, while radiant heat from the baking stone ensures crisp, even browning.
Seasonal adjustments matter more than most home bakers realize. During summer months, reduce your stone preheat time by 10-15 minutes and lower oven temperature 25°F to compensate for ambient kitchen heat. Winter conditions may require extending preheat to 75 minutes for full thermal saturation.
Artisanal bakeries committed to sustainable stone sourcing report that locally quarried granite and marble slabs last decades under daily commercial use, making natural stone both an environmental and economic investment in long-term baking quality.
Mastering pastry stones transforms your home kitchen into a professional-grade baking environment. The thermal properties of natural stone, whether you choose granite’s durability, marble’s cooling efficiency, or soapstone’s exceptional heat retention, create the consistent temperatures that separate good pastries from extraordinary ones.
The process you’ve learned is straightforward: select appropriate stone, prepare and seal the surface properly, preheat thoroughly, work your dough with confidence, and maintain your investment through simple care routines. Each step builds toward reliably crisp crusts, even browning, and the satisfying rise that defines artisanal pastry work.
Start with one stone type and master its characteristics before expanding your collection. Try laminated doughs on preheated granite, then experiment with chilled marble for delicate butter work. The beauty of natural stone lies in its versatility and permanence. Unlike specialized baking equipment that wears out or becomes obsolete, a well-maintained stone slab serves generations of bakers. This sustainability pairs perfectly with artisanal techniques that value quality over speed.
Your pastry stone becomes more seasoned and responsive with each use, developing into an irreplaceable tool that elevates every baking session.