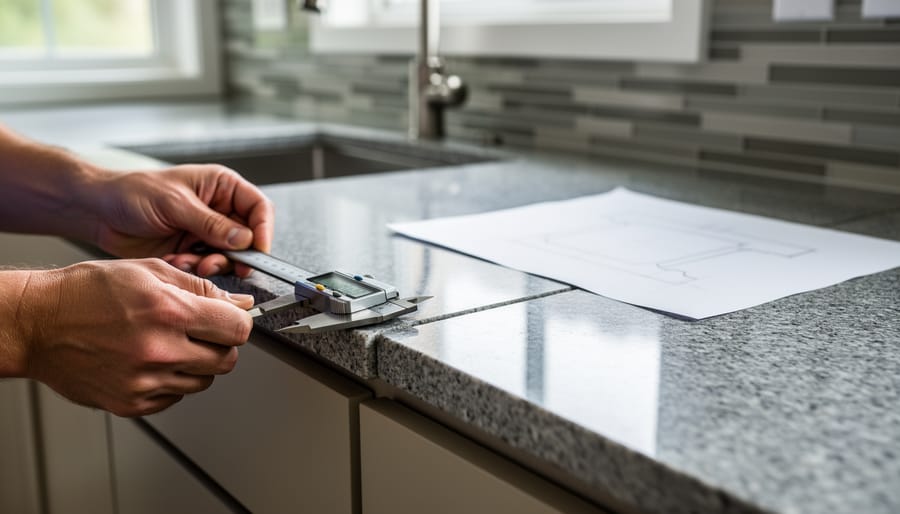
Measuring granite countertops accurately requires three essential dimensions: length, width, and depth of each cabinet run, measured in inches and converted to square footage. The process takes roughly 30 to 45 minutes for an average kitchen and demands precision to within one-eighth of an inch. Get it right, and you’ll avoid costly material waste, poor seam placement, and installation delays that can derail your renovation timeline.
Most homeowners underestimate how measurement errors cascade through the entire installation process. A miscalculation of just half an inch can mean the difference between a seamless corner joint and an unsightly gap that compromises both aesthetics and structural integrity. Professional fabricators build their quotes on your measurements, so inaccuracies directly affect granite countertop costs through material overages, additional fabrication time, and potential rework.
The measurement process extends beyond simple length and width calculations. You’ll need to account for backsplash height, overhang depth, sink cutouts, and any angled or curved sections that add complexity to the layout. Each element affects the total square footage calculation and influences how fabricators plan slab cuts to minimize waste and maximize the stone’s natural veining patterns.
This guide walks you through the complete measurement process with the same techniques professional templaters use. You’ll learn which tools deliver the accuracy you need, how to handle tricky angles and irregular spaces, and what verification steps catch errors before they become expensive problems. Whether you’re measuring to get initial quotes or confirming a contractor’s numbers, these methods ensure your granite installation starts on solid ground.
Tools and Materials You’ll Need
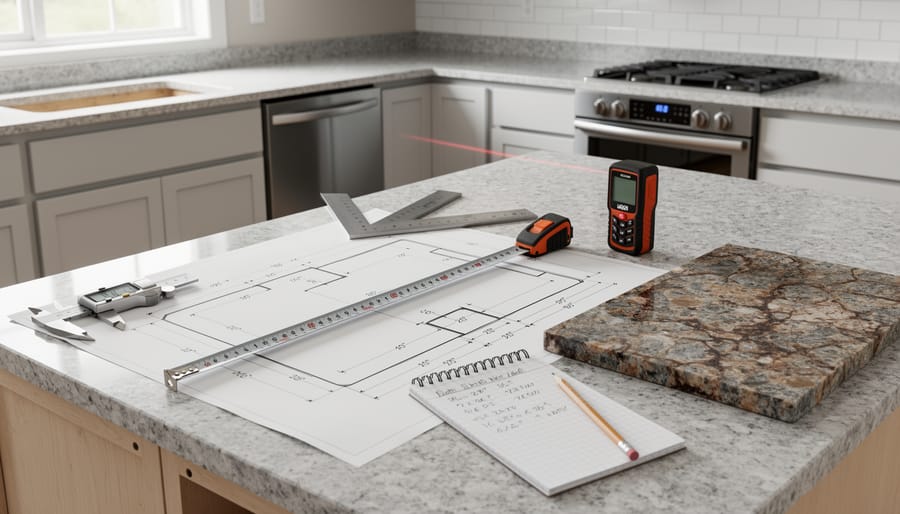
Accurate granite countertop measurement demands specific tools that account for the material’s weight, permanence, and cost. Unlike measuring for tile or laminate where small errors can be adjusted during installation, granite slabs are cut once based on your dimensions, making precision non-negotiable.
For most residential projects, you’ll need both basic and moderately specialized equipment:
- 25-foot tape measure with a rigid blade that won’t sag during long runs across cabinets
- Laser distance measure for quick verification of large spans and hard-to-reach areas where a tape measure won’t stay straight
- Carpenter’s square or framing square to check corner angles, since few kitchen corners are truly 90 degrees
- 4-foot level to assess cabinet tops and identify high or low spots that affect countertop installation
- Straightedge or long level (6 feet) for detecting wall bows and irregularities along backsplash areas
- Graph paper and pencil for creating scaled overhead diagrams with accurate proportions
- Masking tape and permanent marker for labeling measurements directly on cabinets
- Digital camera or smartphone to photograph the space with measurements visible for fabricator reference
A basic 16-foot tape measure might suffice for a small bathroom vanity, but kitchen projects require the 25-foot length to span entire wall runs without splicing measurements. Laser measures cost between forty and one hundred dollars and eliminate reading errors across distances, though you’ll still need a traditional tape for tight spots around plumbing and inside corners.
Professional-grade tools become worthwhile if you’re measuring multiple rooms or complex layouts. A digital angle finder removes guesswork from corner measurements, and a laser level identifies cabinet plane variations that a bubble level might miss. However, most homeowners achieve fabrication-ready accuracy with the standard toolkit above, provided they measure twice at every critical point.
Safety Precautions and Preparation
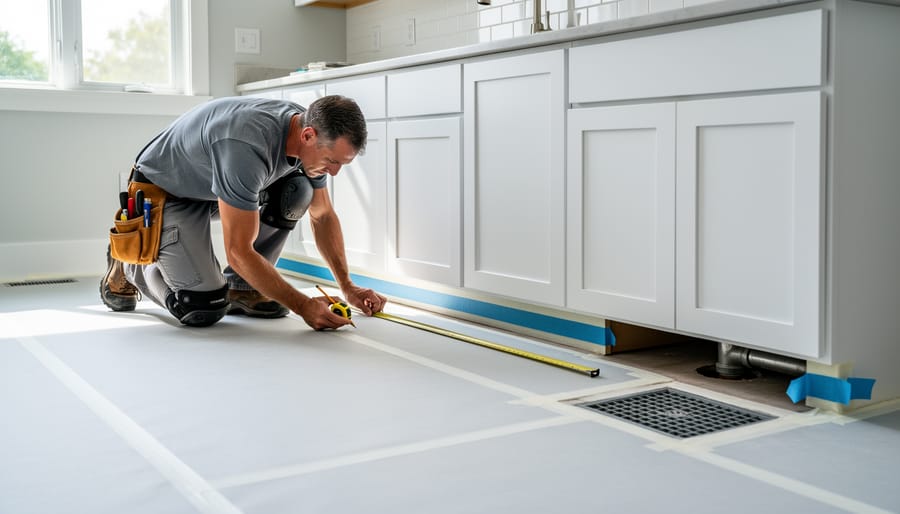
Before you start measuring, take stock of your workspace and potential hazards. Measuring granite countertops isn’t inherently dangerous, but you’ll be working around electrical outlets, plumbing connections, and sometimes gas lines that demand respect and caution.
If you’re measuring to replace existing countertops, identify where water supply lines connect to sinks and where electrical outlets sit near the counter surface. You don’t need to shut off utilities just to measure, but know their locations so you can work around them safely. If you’re removing old countertops before measuring, shut off water at the supply valves beneath the sink and disconnect the lines. For cooktops, gas lines must be shut off at the valve and the appliance disconnected before removal.
Protect your workspace as you measure. Lay drop cloths or cardboard over finished flooring to prevent scratches from ladders or dropped tools. Use painter’s tape to mark cabinet faces if you’re working with messy materials like template paper or cardboard. Keep the area well-lit so you can spot obstructions and read your tape measure accurately.
Check cabinet stability by pressing firmly on cabinet boxes and looking for movement or gaps between the cabinet and wall. Granite is extremely heavy (around 18 pounds per square foot), and weak or improperly secured cabinets won’t support it. If cabinets rock, have gaps larger than a quarter inch from the wall, or show signs of previous water damage with soft spots or delamination, you need a cabinet specialist to assess whether they can handle granite’s weight. Similarly, if you’re installing a large island or peninsula, verify that the floor structure beneath can support the combined weight of cabinets and stone. This typically requires a professional assessment, particularly in older homes or those with modified floor plans.
Preparing Your Kitchen or Bathroom for Measurement
Before you begin measuring, proper workspace preparation ensures accuracy and prevents damage to existing surfaces. Start by clearing all countertop items, small appliances, dish racks, and decorative objects, and store them away from the work area. Empty cabinet contents near where you’ll be working to prevent accidental spills or damage.
If you’re replacing existing countertops, you’ll need to remove granite safely before taking final measurements, as old material can obscure cabinet damage or irregularities. For new construction or bare cabinet installations, skip this step.
Check cabinet levelness using a 4-foot level placed across cabinet tops in multiple directions. Mark any low spots or tilting sections, these affect how granite sits and may require shims during installation. Inspect cabinet boxes for water damage, sagging, or structural weakness that could compromise heavy stone countertops.
Identify and mark all fixture locations with masking tape: sinks, cooktops, faucet holes, and electrical outlets. Measure the exact dimensions of appliances you’re keeping, as fabricators need these for precise cutouts. Note the distance from cabinet edges to plumbing lines and electrical boxes.
Walk along walls where countertops will sit, running your hand along the surface to feel for bows, bumps, or gaps. Use a straightedge to check wall flatness, variations beyond 1/8 inch over 10 feet require notation, as they’ll affect backsplash fit and may need scribing during installation.
Step-by-Step Measurement Process
Step 1: Sketch Your Layout
Start with a bird’s-eye view sketch of your countertop area on graph paper, using a consistent scale like one square equals six inches. Draw the outline of your cabinet runs as rectangles, marking each wall they touch. Note every corner, inside corners where walls meet in an L-shape and outside corners where countertops wrap around peninsula ends. Label cabinet sections by length and mark permanent fixtures like windows, outlets, or structural columns that affect the layout. Include appliance locations (range, dishwasher, refrigerator) even if they won’t require cutouts, since they determine where seams can fall. This visual reference prevents confusion when you record actual dimensions and helps your fabricator understand the space at a glance.
Step 2: Measure Length and Depth
Start at one end of your cabinet run and measure the total length along the front edge of the cabinets, not the wall. Walls rarely run perfectly straight, so measuring from the wall will give you inaccurate dimensions. Record this measurement, then take at least three depth measurements: one at each end and one in the middle of the run.
For depth, measure from the back wall (or backsplash location) to the front edge of the cabinets. Standard depth is typically 24 to 25 inches, but verify rather than assume. If your wall bows in or out, note these irregularities on your sketch with measurements showing where and by how much the wall deviates. A wall that bows out by half an inch will require the granite to be cut deeper in that spot to maintain a consistent overhang.
Write down every measurement immediately. Use fractions of an inch rather than rounding to whole numbers, granite fabrication works to tight tolerances. Mark on your diagram which measurements correspond to which locations. If you have multiple straight sections (like in an L-shaped kitchen), measure each run separately and note where they meet.
Step 3: Document Corners and Angles
Corners present unique challenges in granite measurement because few kitchens have perfectly square angles. Start by identifying whether each corner is inside (where two countertop sections meet inward) or outside (where countertop wraps around an exterior edge).
Use a framing square to check if corners are true 90-degree angles. Place the square flush against both walls and note any gaps, these reveal wall bows or angled corners. Measure the actual angle with a protractor or digital angle finder if it deviates from square. Record these measurements on your sketch, as fabricators need precise angles to create templates that fit properly.
For inside corners, measure from each wall to the corner point at the cabinet edge. Outside corners require measurements from fixed reference points along both legs of the turn. Document whether corners will be finished square, rounded, or beveled, since this affects how much granite the fabricator removes. Note that rounded corners typically have a 0.5-inch to 1-inch radius.
Step 4: Mark Cutout Locations
Cutouts demand the highest precision in your measurement process because even a quarter-inch error can ruin an expensive slab. Start by identifying every opening you’ll need: sinks, cooktops, faucets, soap dispensers, and any specialty fixtures.
Use fixed reference points that won’t change during installation. Measure from the front edge of the cabinet box to the center of each cutout, then measure from a sidewall or corner to establish the left-right position. Never measure from the wall itself, since walls often bow. For sinks, record the outside dimensions of the rim, then note whether you’re installing top-mount or undermount, the undermount sink fit requires different cutout specifications. Measure your actual appliance or get the manufacturer’s template, not just generic dimensions.
Document faucet hole locations relative to the sink center line, including the distance from the sink’s back edge. If you have a cooktop, measure from two perpendicular reference points to each corner of the opening. Take photos of your existing layout with a tape measure visible in the frame, this visual backup catches errors your notes might miss.
Step 5: Measure Backsplash Areas
Measure your backsplash area by recording the height from the countertop surface to where the backsplash will end, typically 4 inches for standard installations or 18-20 inches for full-height designs. Measure the length along each wall section where backsplash will be installed, noting any breaks for windows or open shelving.
Document the exact location and dimensions of all electrical outlets, light switches, and any wall-mounted fixtures. Measure from your established reference points (usually a corner or cabinet edge) to the center of each outlet, then record both the horizontal distance and the height above the countertop surface. This ensures your fabricator can create precise cutouts that align perfectly with existing electrical components. If outlets sit slightly off-level or at varying heights, measure each one individually rather than assuming uniform spacing.
Step 6: Account for Overhangs and Edge Details
Overhang dimensions significantly impact your final measurements and material calculations. Standard overhangs measure 1 to 1.5 inches beyond cabinet faces, but seating areas typically require 10 to 15 inches of clearance for comfortable leg room. Measure and document these extended sections separately, noting where support brackets or corbels will be needed for stability.
Your edge profile choices affect measurements differently depending on complexity. Simple edges like eased or beveled add minimal dimension, while ornate profiles such as ogee or dupont can extend the countertop edge by a half-inch or more. Record which profiles you’re considering for each section, since fabricators calculate material needs based on the finished edge treatment combined with countertop thickness. Measure overhang at multiple points along each run to catch any cabinet irregularities that might require adjustment.
Converting Measurements to Square Footage
Converting your linear measurements into square footage helps you estimate material costs and communicate clearly with fabricators. The basic formula is straightforward, but granite pricing involves nuances that go beyond simple area calculations.
For a standard rectangular countertop, multiply length by depth. A ten-foot counter that’s two feet deep equals twenty square feet. However, granite fabricators often calculate by the slab rather than the exact footprint. If your twenty-square-foot counter requires cutting from a larger slab that yields leftover material you can’t use elsewhere, you’ll pay for more than twenty square feet.
- Measure each countertop section separately and calculate its area using length times width. For a rectangular island measuring 4 feet by 3 feet, that’s 12 square feet.
- For L-shaped layouts, divide the design into two rectangles. Measure the first leg (say, 8 feet by 2 feet = 16 square feet) and the second leg (6 feet by 2 feet = 12 square feet), then add them together for 28 total square feet.
- Apply the same approach to U-shaped configurations by treating them as three connected rectangles, calculating each section individually before summing the results.
- Add ten percent to your total for waste factor, cutouts, and fitting adjustments. Your 28-square-foot L-shape becomes approximately 31 square feet for estimation purposes.
Industry pricing typically rounds up to the nearest full slab increment. Granite slabs commonly come in sizes around 50 to 60 square feet, so a project requiring 35 square feet might be priced based on a full slab. Fabricators also charge for complex cuts, seams, and edge work separately from base square footage. The cutout for your sink doesn’t reduce the price because that granite still had to be purchased and processed.
When you present measurements to a fabricator, they’ll create their own square footage calculation that accounts for slab yield, seam placement, and material efficiency. Don’t be surprised if their number differs from yours, they’re factoring in practical realities of working with natural stone slabs.
Common Measurement Mistakes to Avoid
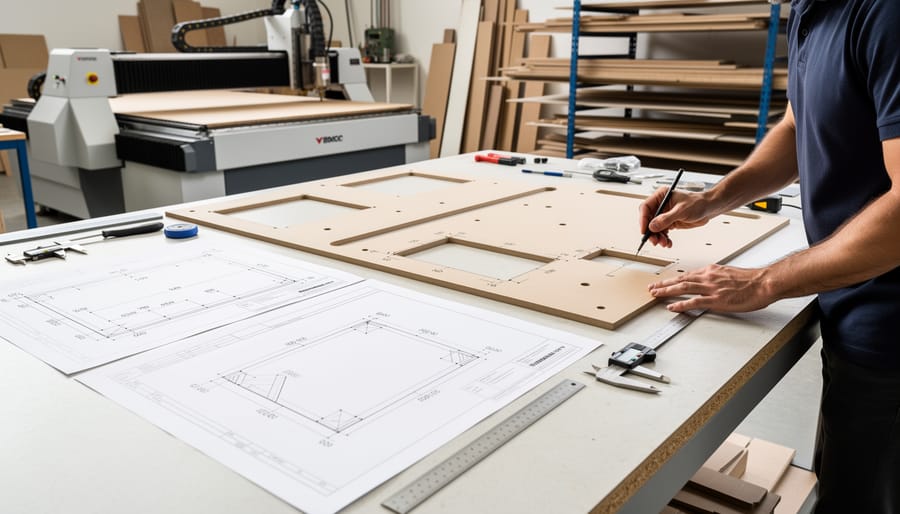
Even small measuring errors can lead to expensive granite countertops that don’t fit, require re-fabrication, or waste costly material. Here are the most common mistakes homeowners make and how to prevent each one.
Forgetting Dishwasher Gaps
Many people measure cabinet runs without accounting for the gap required for dishwasher installation and removal. Dishwashers need approximately 24 inches of width, but they also require clearance space, typically an extra quarter-inch on each side, for removal during repairs or replacement. If you measure the cabinet opening as exactly 24 inches and don’t communicate this to your fabricator, the countertop overhang may prevent future dishwasher service. Document the appliance location clearly and note that it needs service access.
Ignoring Wall Bows and Irregularities
Walls are rarely perfectly straight. Measuring only the cabinet edge and assuming the wall runs parallel can create gaps of half an inch or more at the backsplash. Take measurements at the front edge of the cabinets, at the back edge, and against the wall itself at multiple points along each run. Record the largest dimension. Your fabricator can scribe the granite to fit the wall’s actual contour rather than an idealized straight line.
Single-Point Measurements
Measuring the length of a countertop run at only one spot misses variations in depth. Cabinets may sit slightly crooked, or walls may angle in or out. Measure depth every two to three feet along the entire run and record each dimension on your sketch. The fabricator will use the deepest measurement to ensure full coverage.
Not Documenting Appliance Dimensions
Cooktops, ranges, and sinks have specific cutout requirements that vary by model. Simply writing “sink here” without noting whether it’s an undermount, drop-in, or farmhouse style, and without the manufacturer’s template or exact dimensions, creates guesswork for your fabricator. This often results in incorrect cutouts that can’t be fixed. Keep appliance spec sheets with your measurements and note the installation type clearly.
Verifying Your Measurements and Next Steps
After completing your measurements, verification is where many DIY measurers discover discrepancies that could have cost hundreds of dollars in fabrication errors. Start by re-measuring every dimension, particularly critical areas like sink cutouts and corner angles. Check that your measurements are consistent across multiple reference points, if your countertop depth measures 25 inches at one end and 25.5 inches at the other, you’ve identified a wall irregularity that needs documentation.
For granite fabrication, acceptable tolerances typically range from 1/16 to 1/8 inch on length measurements and even tighter (1/16 inch or less) for cutout positioning. Professional fabricators work within these margins, but your initial measurements should be as precise as possible. Compare diagonal measurements on rectangular sections; if they don’t match, your corners aren’t square, which affects how slabs will be cut and joined.
Physical templating becomes necessary for complex layouts with multiple angles, curved edges, or areas where walls are noticeably out of square. A template (created with thin hardboard, cardboard, or specialized templating materials) captures the exact profile of your space, including irregularities that numbers alone can’t convey. For straightforward rectangular countertops with standard cutouts, precise measurements may suffice, but when in doubt, discuss templating with your fabricator before they order material.
Prepare your measurement documentation by transferring your sketches to clean, labeled diagrams. Include all dimensions with clear reference points (measure from the same wall or cabinet edge consistently), mark appliance locations with their exact make and model when possible, and note any special requirements like electrical outlets in backsplashes or non-standard overhang depths. Most fabricators will schedule a professional templating visit after reviewing your measurements, this is standard practice and serves as a final verification before cutting expensive stone. Your preliminary measurements inform their work, help them estimate material needs and costs accurately, and identify potential challenges before fabrication begins. Treat this handoff as collaborative; fabricators appreciate homeowners who’ve done careful prep work, and your measurements provide the foundation for their precision templating process.
Frequently Asked Questions
Should I measure my countertops myself or hire a professional?
Homeowners can take preliminary measurements to estimate costs and plan their project, but professional templating is essential before fabrication begins. Fabricators use specialized tools and create physical templates to account for wall irregularities and ensure precise fit, which protects both you and the fabricator from costly errors.
How precise do my measurements need to be?
For initial planning, measurements within 1/4 inch are acceptable, but fabricators work to 1/16 inch tolerances during templating. Your preliminary measurements help with budgeting and design decisions, while the fabricator’s template ensures the actual slab fits perfectly.
What should I do if my walls aren’t straight?
Measure the depth at multiple points along each wall section and record the deepest measurement. Note any significant bows or irregularities on your sketch, as fabricators will scribe the granite to match wall contours during templating, ensuring tight backsplash fit despite wall imperfections.
When is professional templating absolutely required?
Professional templating is required before any granite is cut, typically after cabinets are installed and plumbing rough-ins are complete. Most fabricators won’t proceed without creating their own template, as this step verifies all dimensions and protects against measurement errors that could ruin an expensive slab.
Can I use my measurements to get accurate quotes?
Yes, your measurements provide a solid basis for initial quotes and help you compare pricing between fabricators. However, final pricing may adjust slightly after professional templating reveals the actual square footage needed, especially if wall irregularities require additional material.
Do I need to measure the backsplash separately?
Absolutely. Backsplash is typically priced and fabricated separately from the countertop surface, so you’ll need to measure the linear footage and height of all backsplash areas. Don’t forget to account for outlets, switches, and windows that interrupt the backsplash run.
These questions reflect the concerns most homeowners face when starting a granite countertop project. Your preliminary measurements serve an important purpose in planning and budgeting, even though professional templating remains the final word before fabrication. The key is understanding where DIY measurement adds value and where professional expertise becomes necessary. Fabricators appreciate customers who arrive with thoughtful preliminary measurements because it demonstrates project readiness and helps the conversation start from an informed place rather than complete uncertainty.
Accurate measurement isn’t just a preliminary task, it’s the foundation that determines whether your granite countertops will fit perfectly or become a costly headache. The hours you invest in careful measuring, double-checking dimensions, and documenting every detail directly translate to installation success. Poor measurements cascade into misaligned seams, incorrect cutouts, wasted material, and added expense.
Remember that professional fabricators rely on your initial measurements to estimate costs and plan their approach. While they’ll create precise templates before cutting, your detailed documentation gives them a roadmap and helps catch potential issues early. Don’t rush this process. Verify each dimension twice, account for wall irregularities, and clearly mark every cutout location.
Quality granite installation starts with measurement precision. Take your time, use proper tools, and communicate thoroughly with your fabricator. This collaboration ensures your investment delivers the beautiful, functional countertops you envision.